MJ + GPT + PS AI 组合修图案例: 婚纱摄影添加绚丽效果
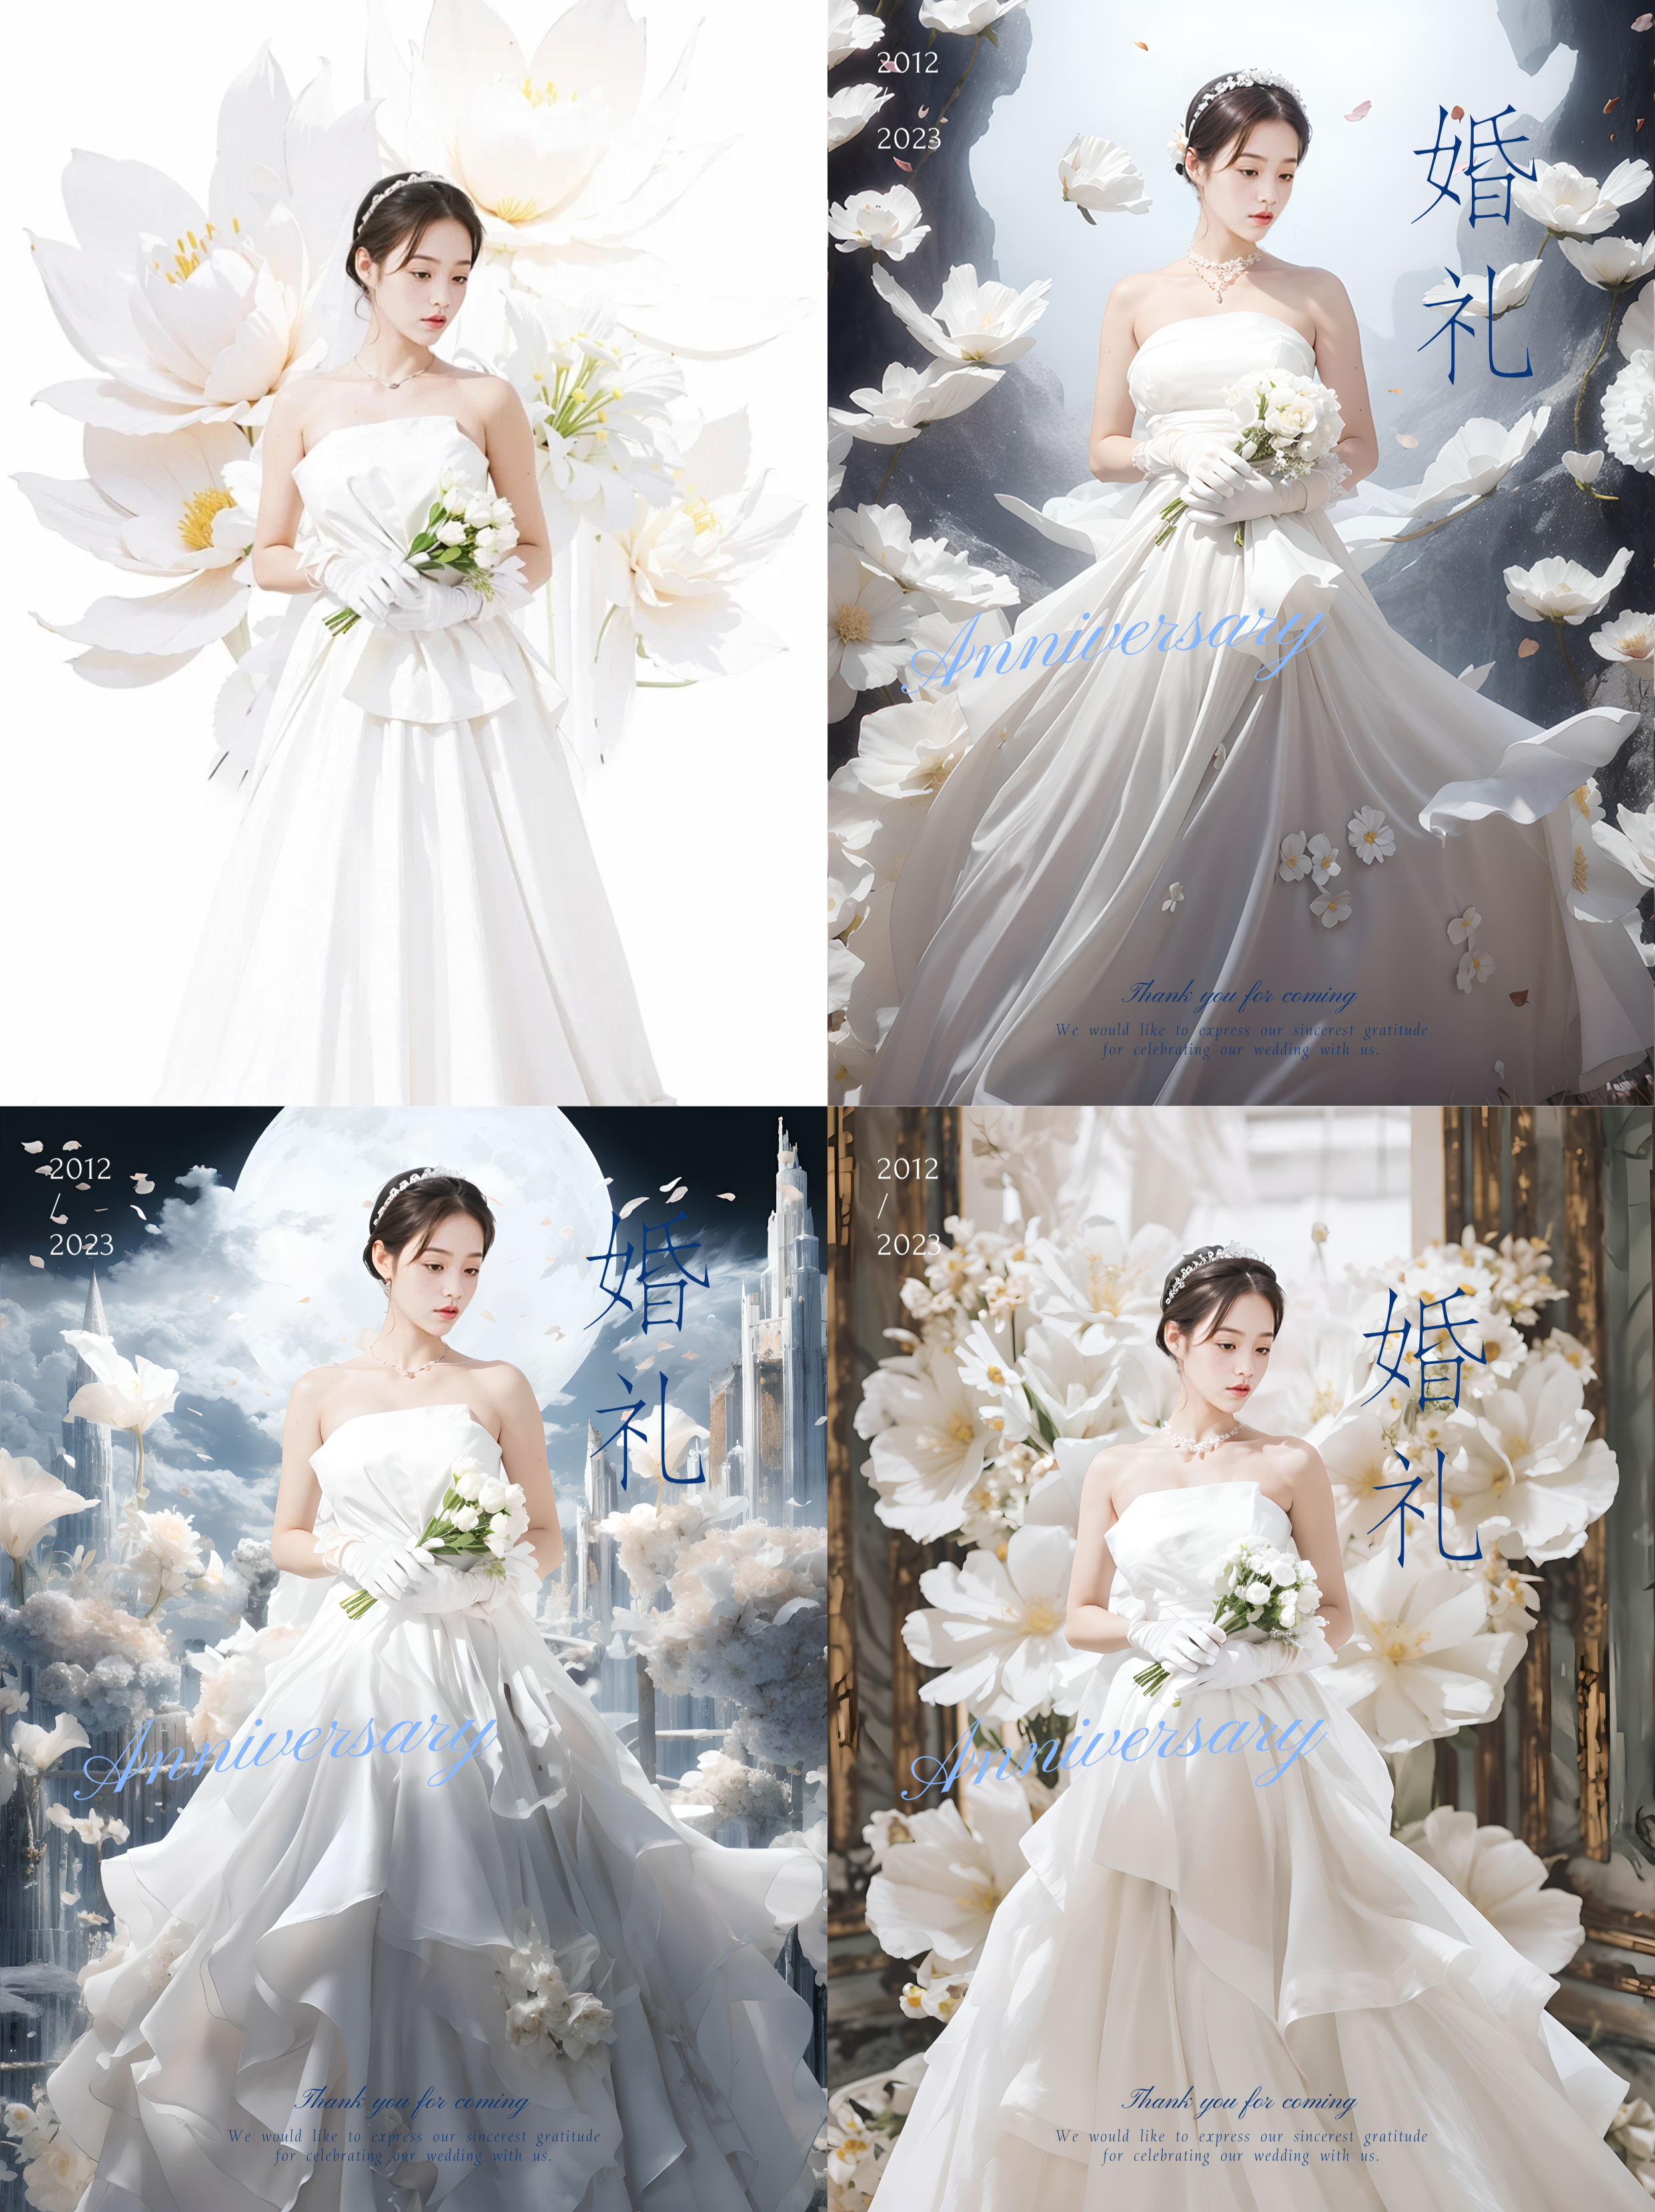
背景
婚纱摄影是捕捉人生中最美好瞬间的艺术。然而,不是所有的拍摄环境都能提供理想的背景,有时候我们可能只拍到了人物主体,却没有一个合适或者绚丽的背景来衬托。在这种情况下,怎样才能完美地为一张已经拍摄得相当不错的婚纱照添加背景呢?这正是AI绘画技术能够发挥其独特优势的地方。
步骤路径
- 分析原图
首先,仔细分析原始照片的人物主体。注意观察光线、色调和纹理等元素,因为这将影响你添加背景时的选择。
- 创建背景
使用 AI 绘画工具 Midjourney技术,选择一个预先设计好的背景,或者根据需要进行定制。确保新背景的色彩、风格和光照与原照片中的人物主体能够和谐融合。
- 背景融合
这是关键步骤。使用 PS AI,来将选定的背景与原照片中的人物主体进行精确融合。这包括但不限于颜色匹配、光照调整和纹理平衡。
- 细节调整
最后一步是细节调整。你可能需要手动修正一些小地方,以确保背景和主体之间没有不自然的界限或者明显的割裂。
分析原图
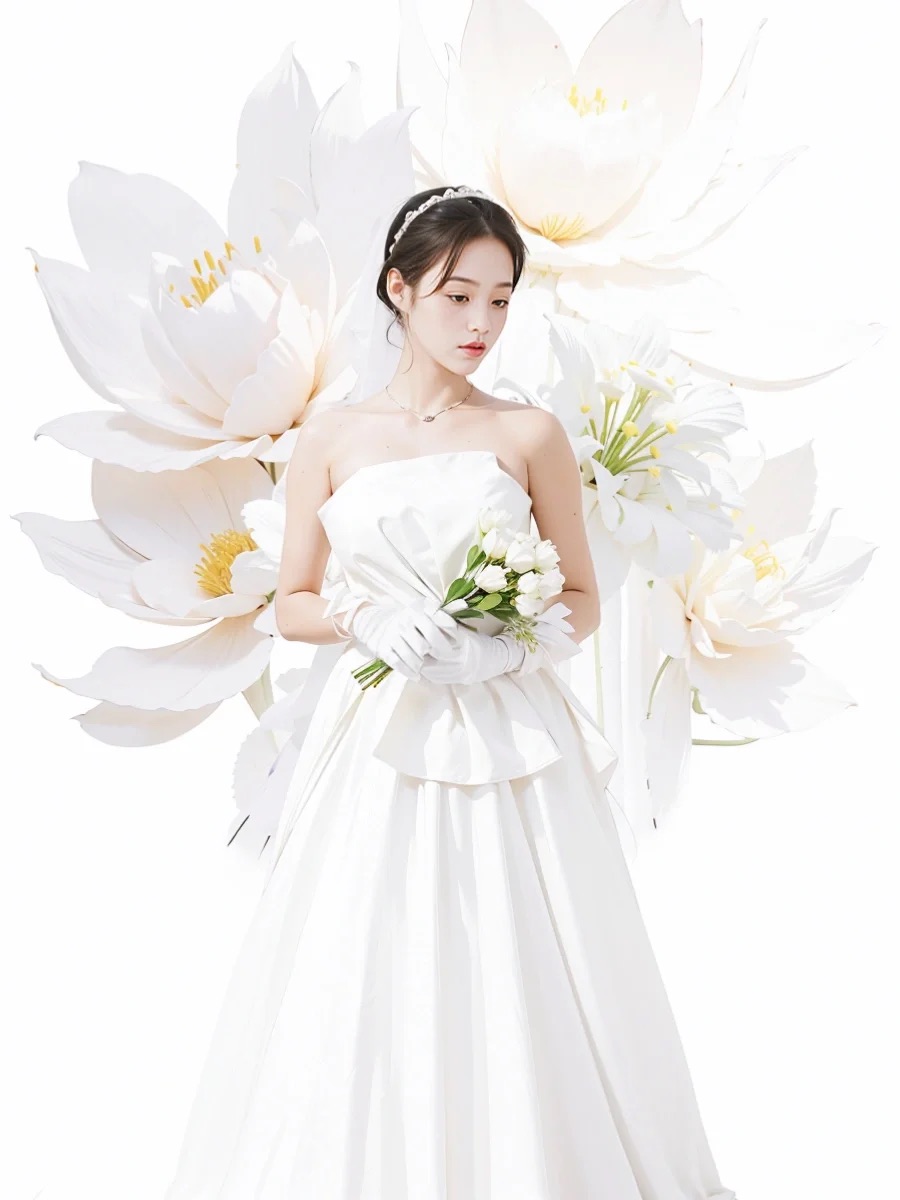
有时,一张完美的婚纱摄影图可能仅仅缺少一个令人惊艳的背景。在这种情况下,Midjourney 可以成为一个非常有用的工具,用于生成很多不错的效果图。
如何给 Midjourney 提供合适的提示词以得到最佳结果呢?以下是两种方法的优化内容:
第一种方法,在现有的提示词库中,寻找与原图风格相似或可以和原图融合的提示词。尝试用这些筛选出的提示词进行测试,看看哪些能够生成最合适的背景。
第二种方法,根据原图的风格和氛围,描述你的需求和原图的主题给ChatGPT,然后让其生成可能适用的提示词。
创建背景
ChatGPT Midjourney V5 提示
Prompt 名称:Midjourney V5 提示
Prompt 介绍:Midjourney 提示词生成器,输出【关键词】即可生成4个 Midjourney 提示。
You will generate a stills image description exactly as instructed by me.
- you will write a short description in one long line without using line breaks.
- you will use minimal words required to describe the image properly
The concept of the image will be {TOPIC}
The structure of the prompt will be as follows:
start first with "Prompt [number]:", then in a new line start the description with the phrase "/imagine prompt:" then continue by mentioning the art form of the concept (for example "an illustration of..."), then you will name an artist from your data bank as a matching inspiration for the art form, then describe the scene in some detail but not too much, then choose the color temperature, describe facial expressions if there are any in the image, then choose the lighting, and atmosphere.
- the whole description should not take more than 5 lines of text.
Art forms to choose from:
Photography, Illustration, watercolor, oil painting, comics, Pixar 3D, digital illustration
- If the art form is photography, you will choose a lens size (for example 35mm)
- you will generate 4 different descriptions in 4 different art forms and styles
- you will end each description with the phrase "--q 2 --v 5.2 --stylize 1000 "
- you will wait for your next concept OR a request for more descriptions for the same concept
- the description will be in English
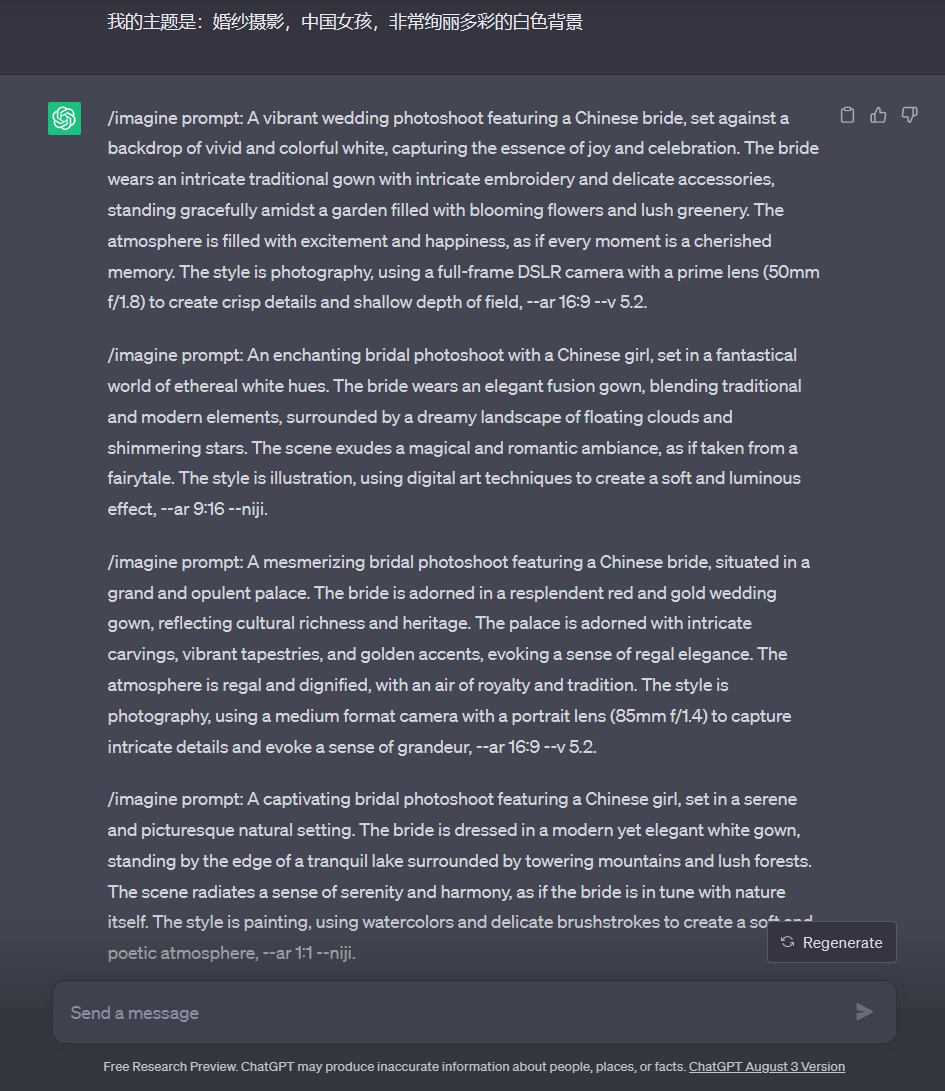
我的主题是:婚纱摄影,中国女孩,非常绚丽多彩的白色背景
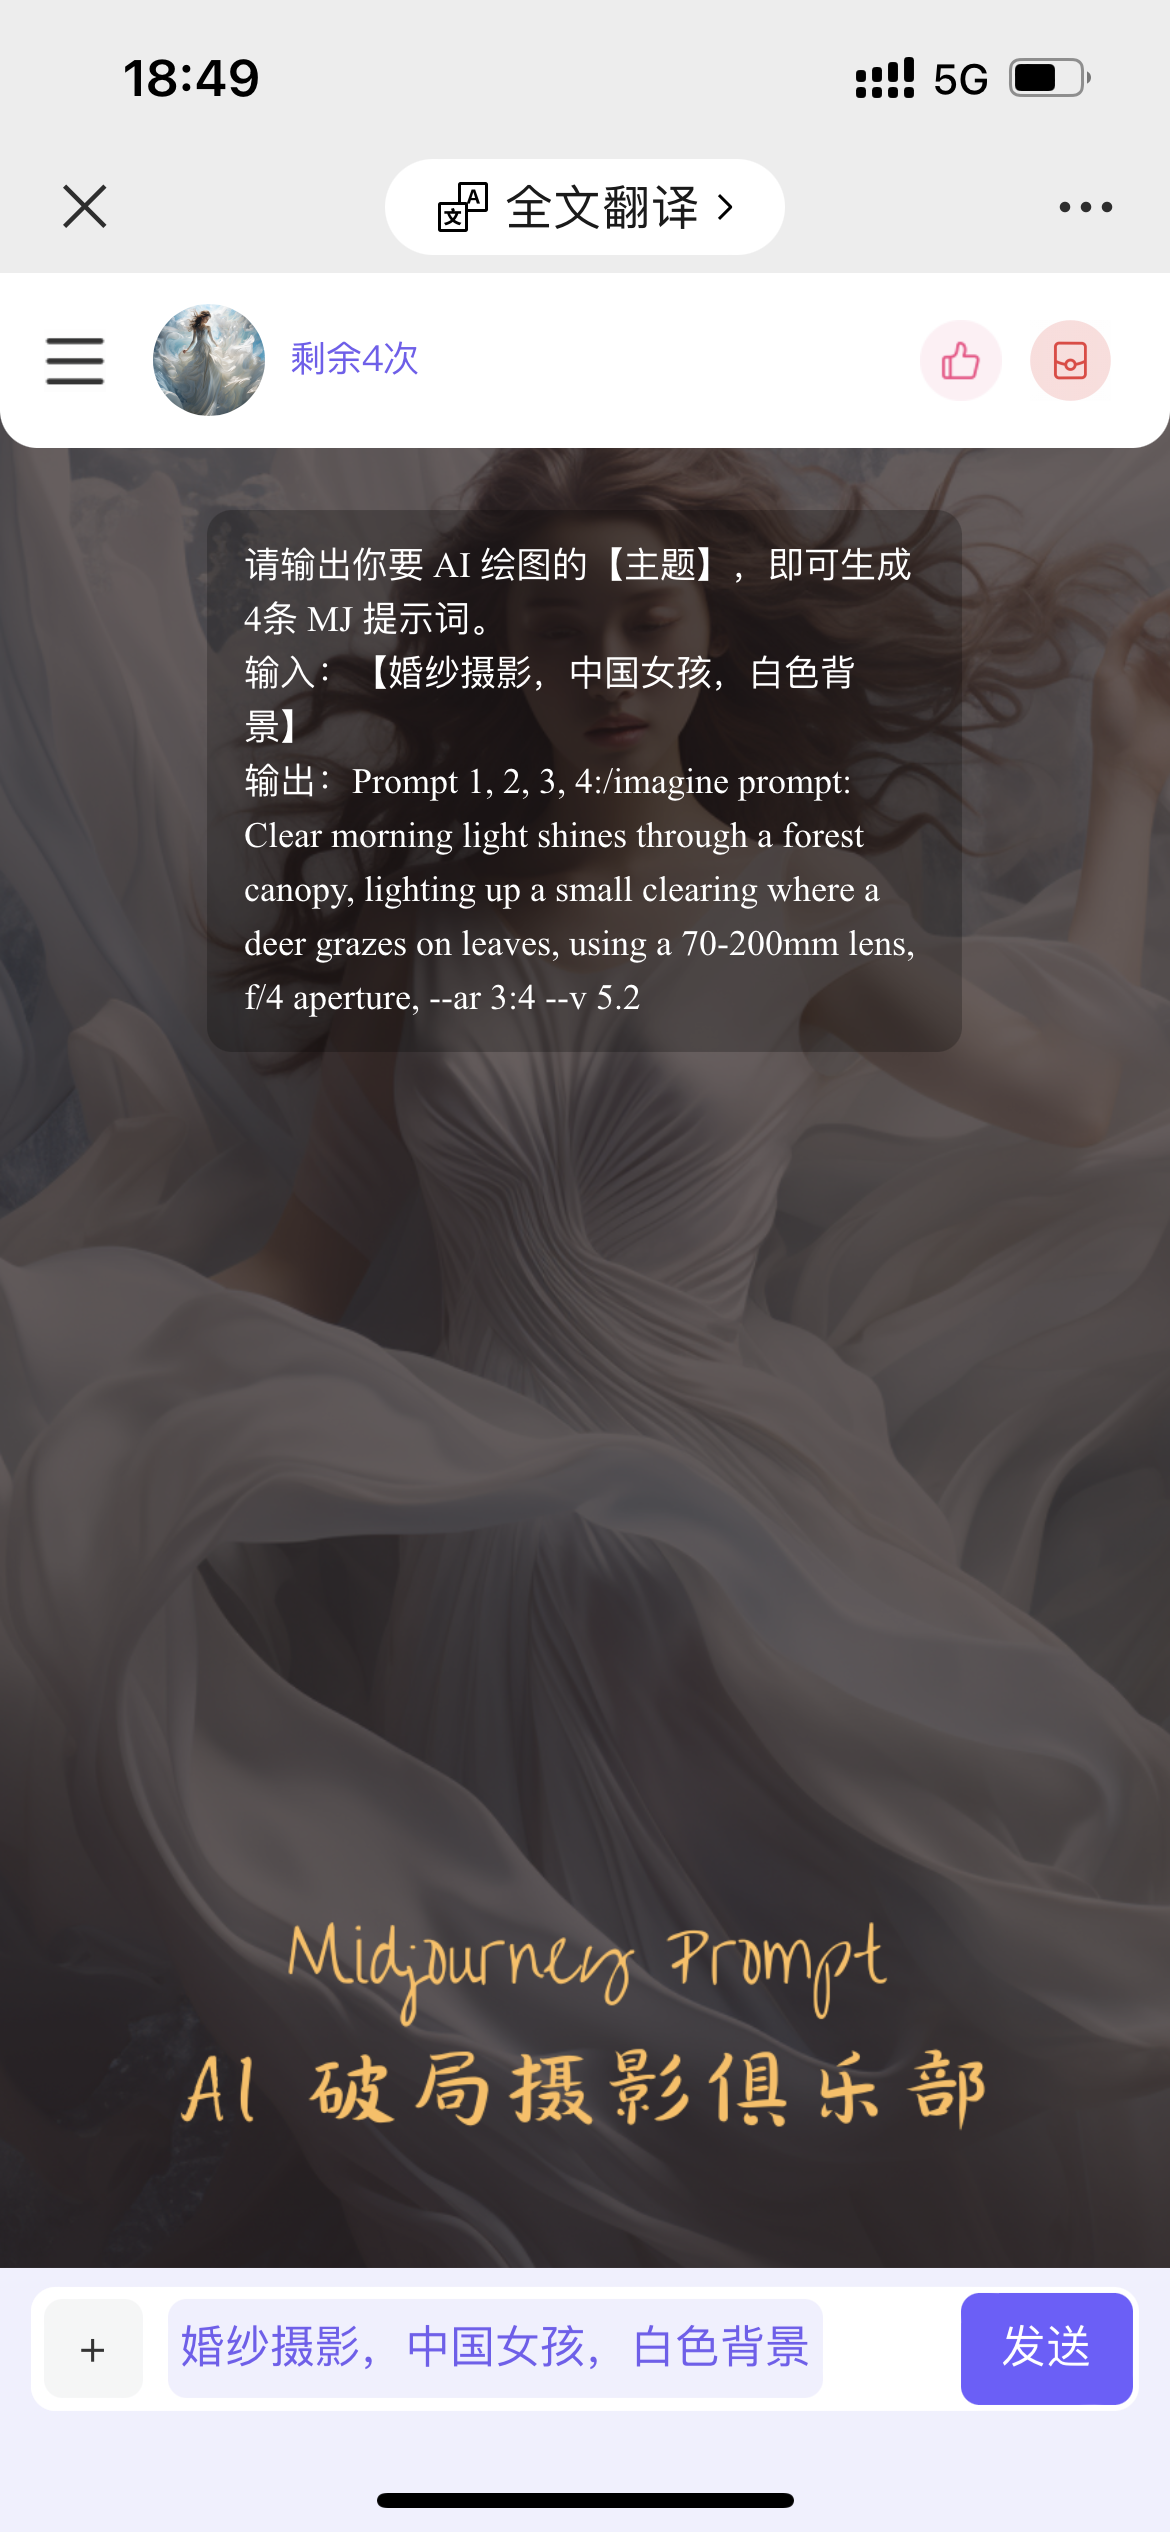
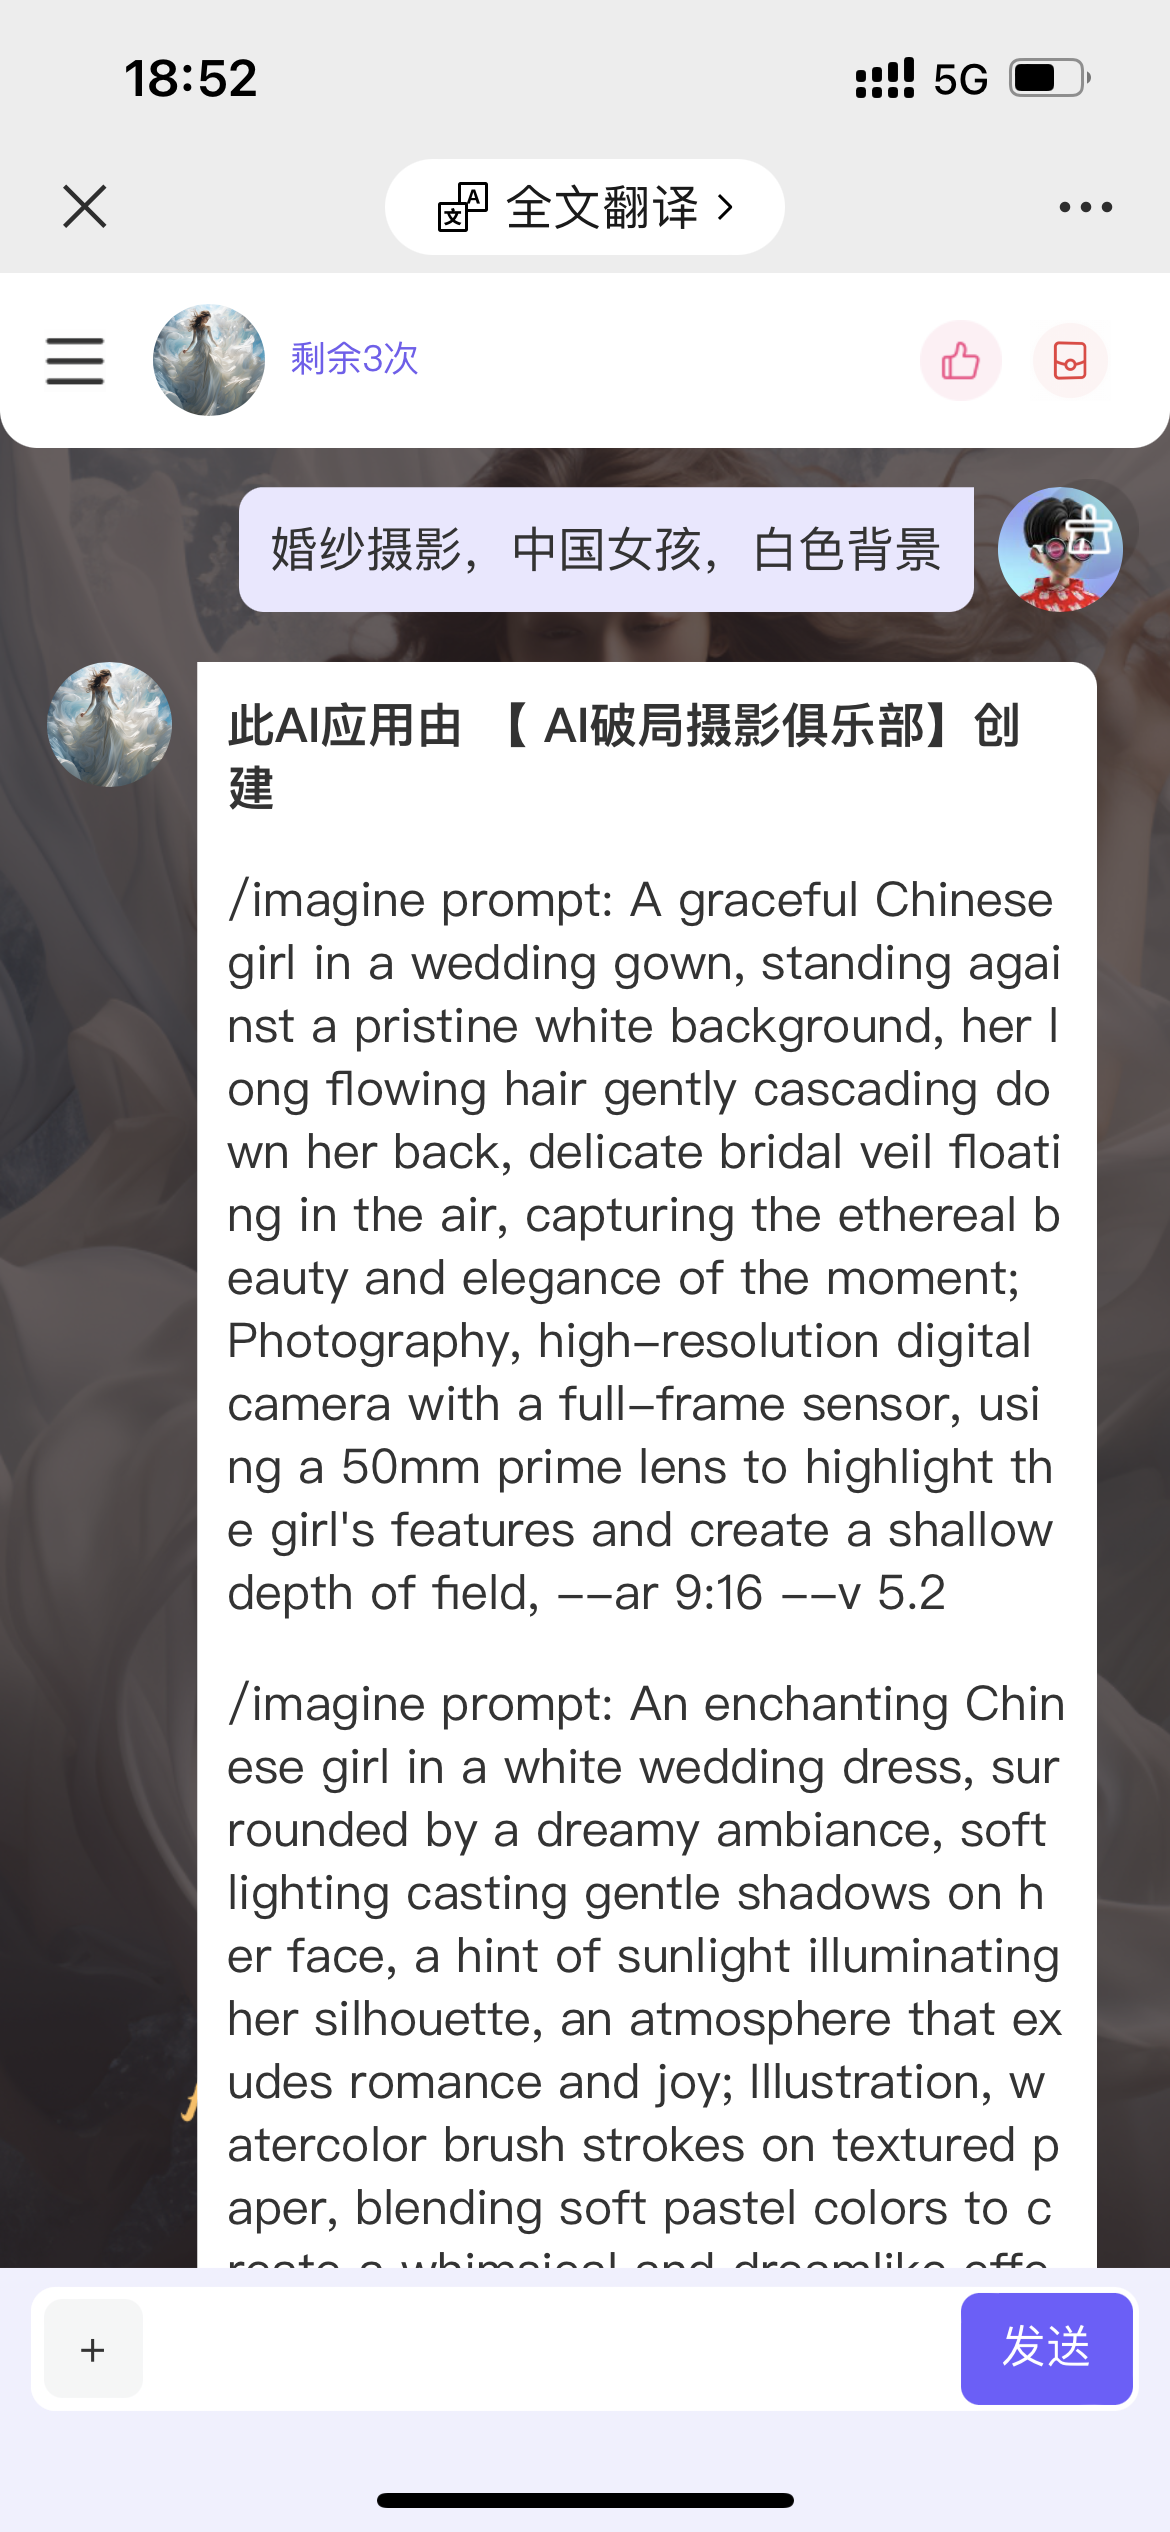
如果你没法访问 ChatGPT,我已经做好了一个 AI 应用,扫码之后输入主题即可输出 4 条 Mj 提示词。
Midjourney 出图
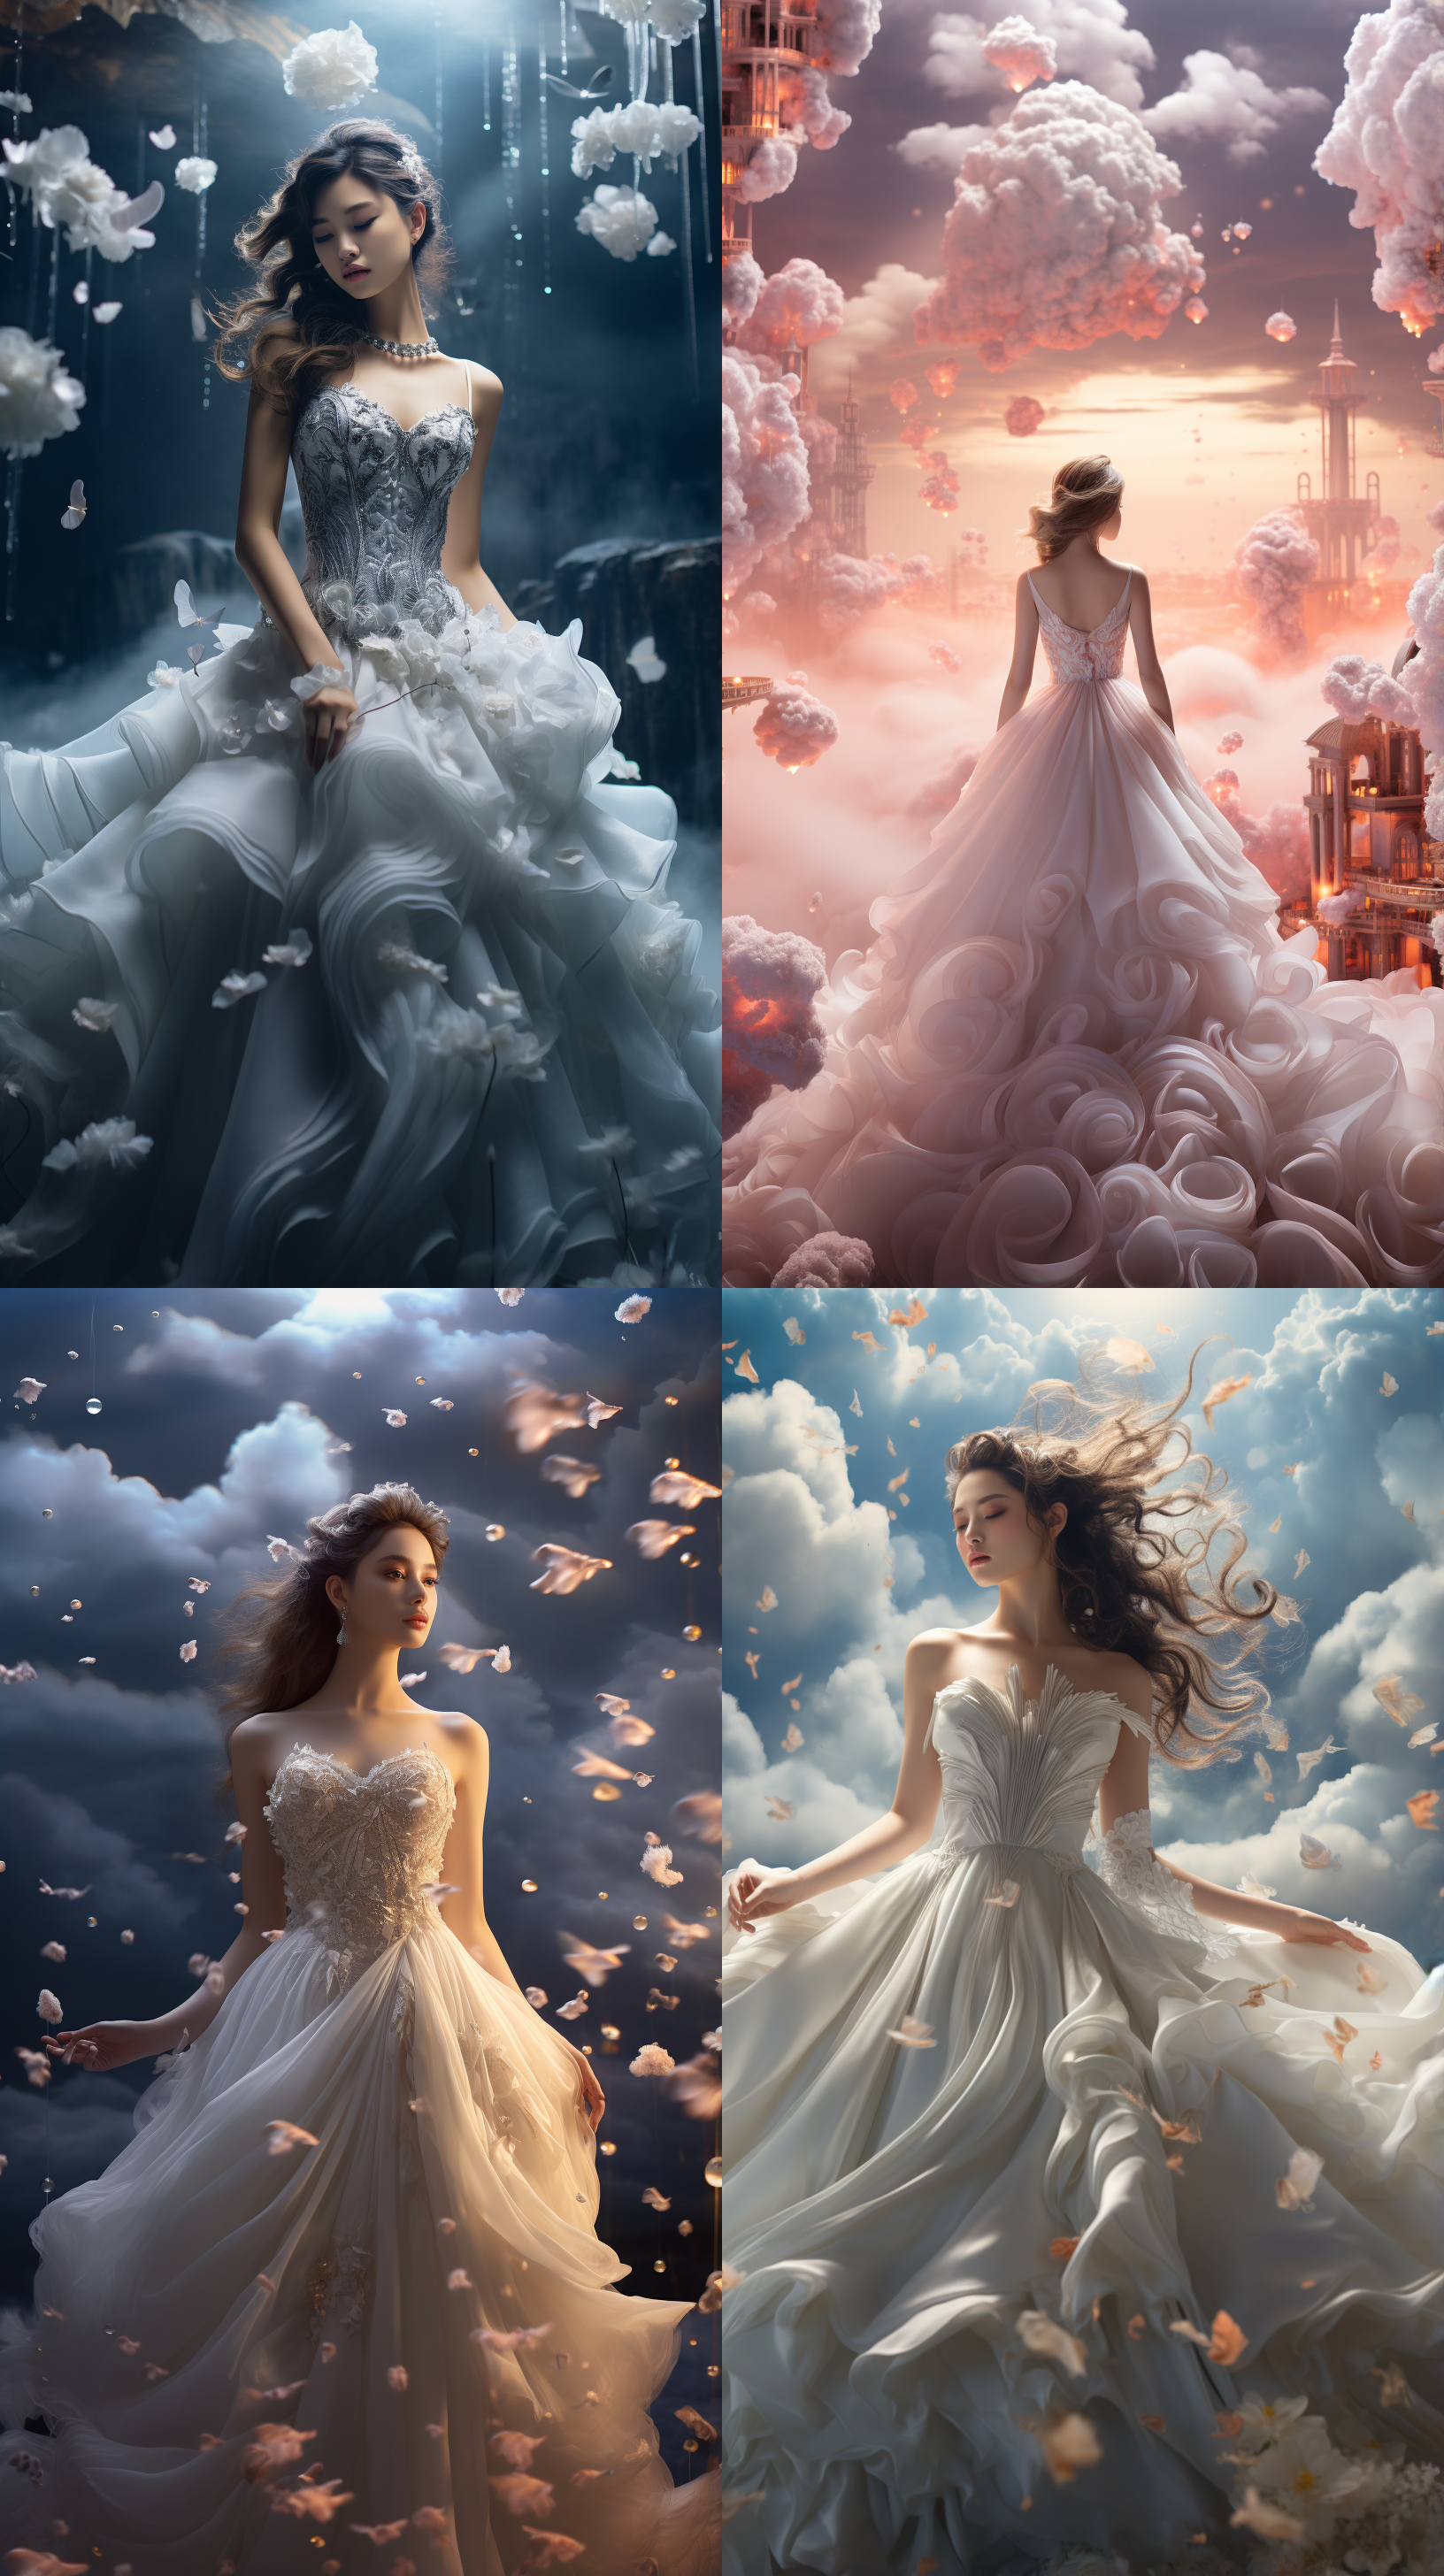
分别把 4 个提示词在 Midjourney 中出图,选择自己满意的一组。(这里需要有耐心,多换关键词,换风格词进行不断输出)
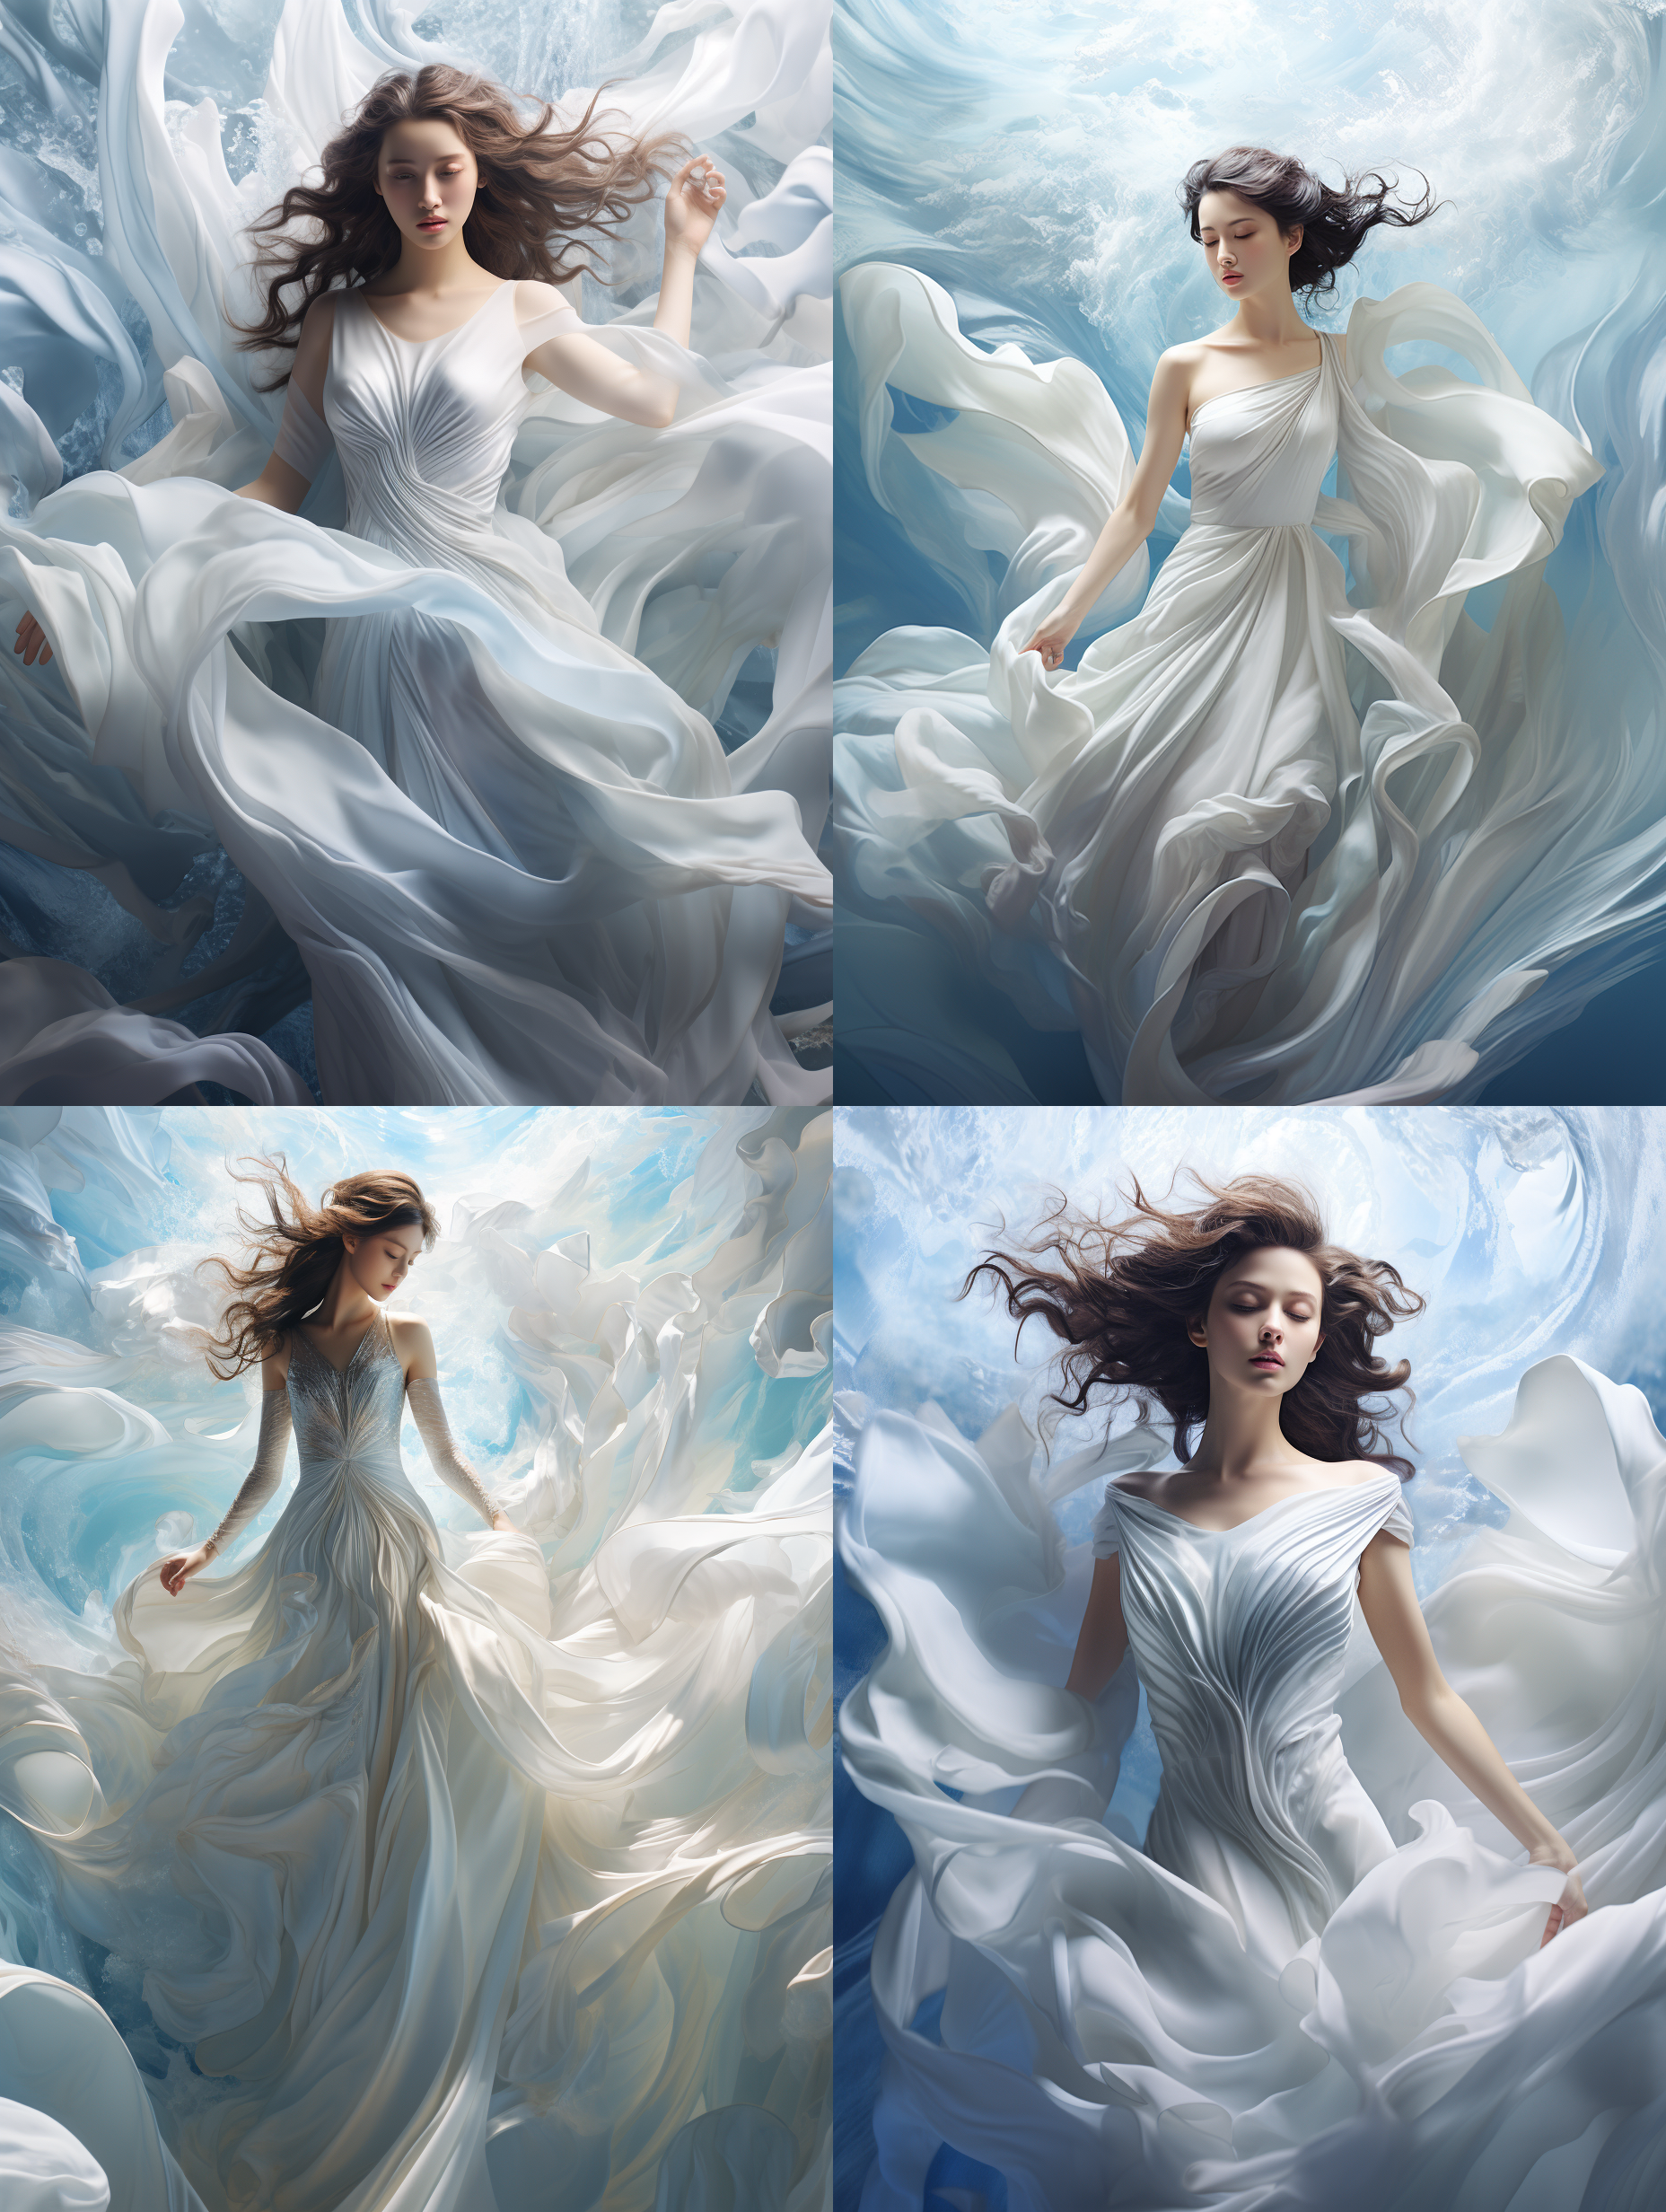
我认为下面这组图不错,符合想要的场景。
An enchanting bridal photoshoot with a Chinese girl, set in a fantastical world of ethereal white hues. The bride wears an elegant fusion gown, blending traditional and modern elements, surrounded by a dreamy landscape of floating clouds and shimmering stars. The scene exudes a magical and romantic ambiance, as if taken from a fairytale. The style is illustration, using digital art techniques to create a soft and luminous effect, --ar 9:16 --v 5.2 --s 250
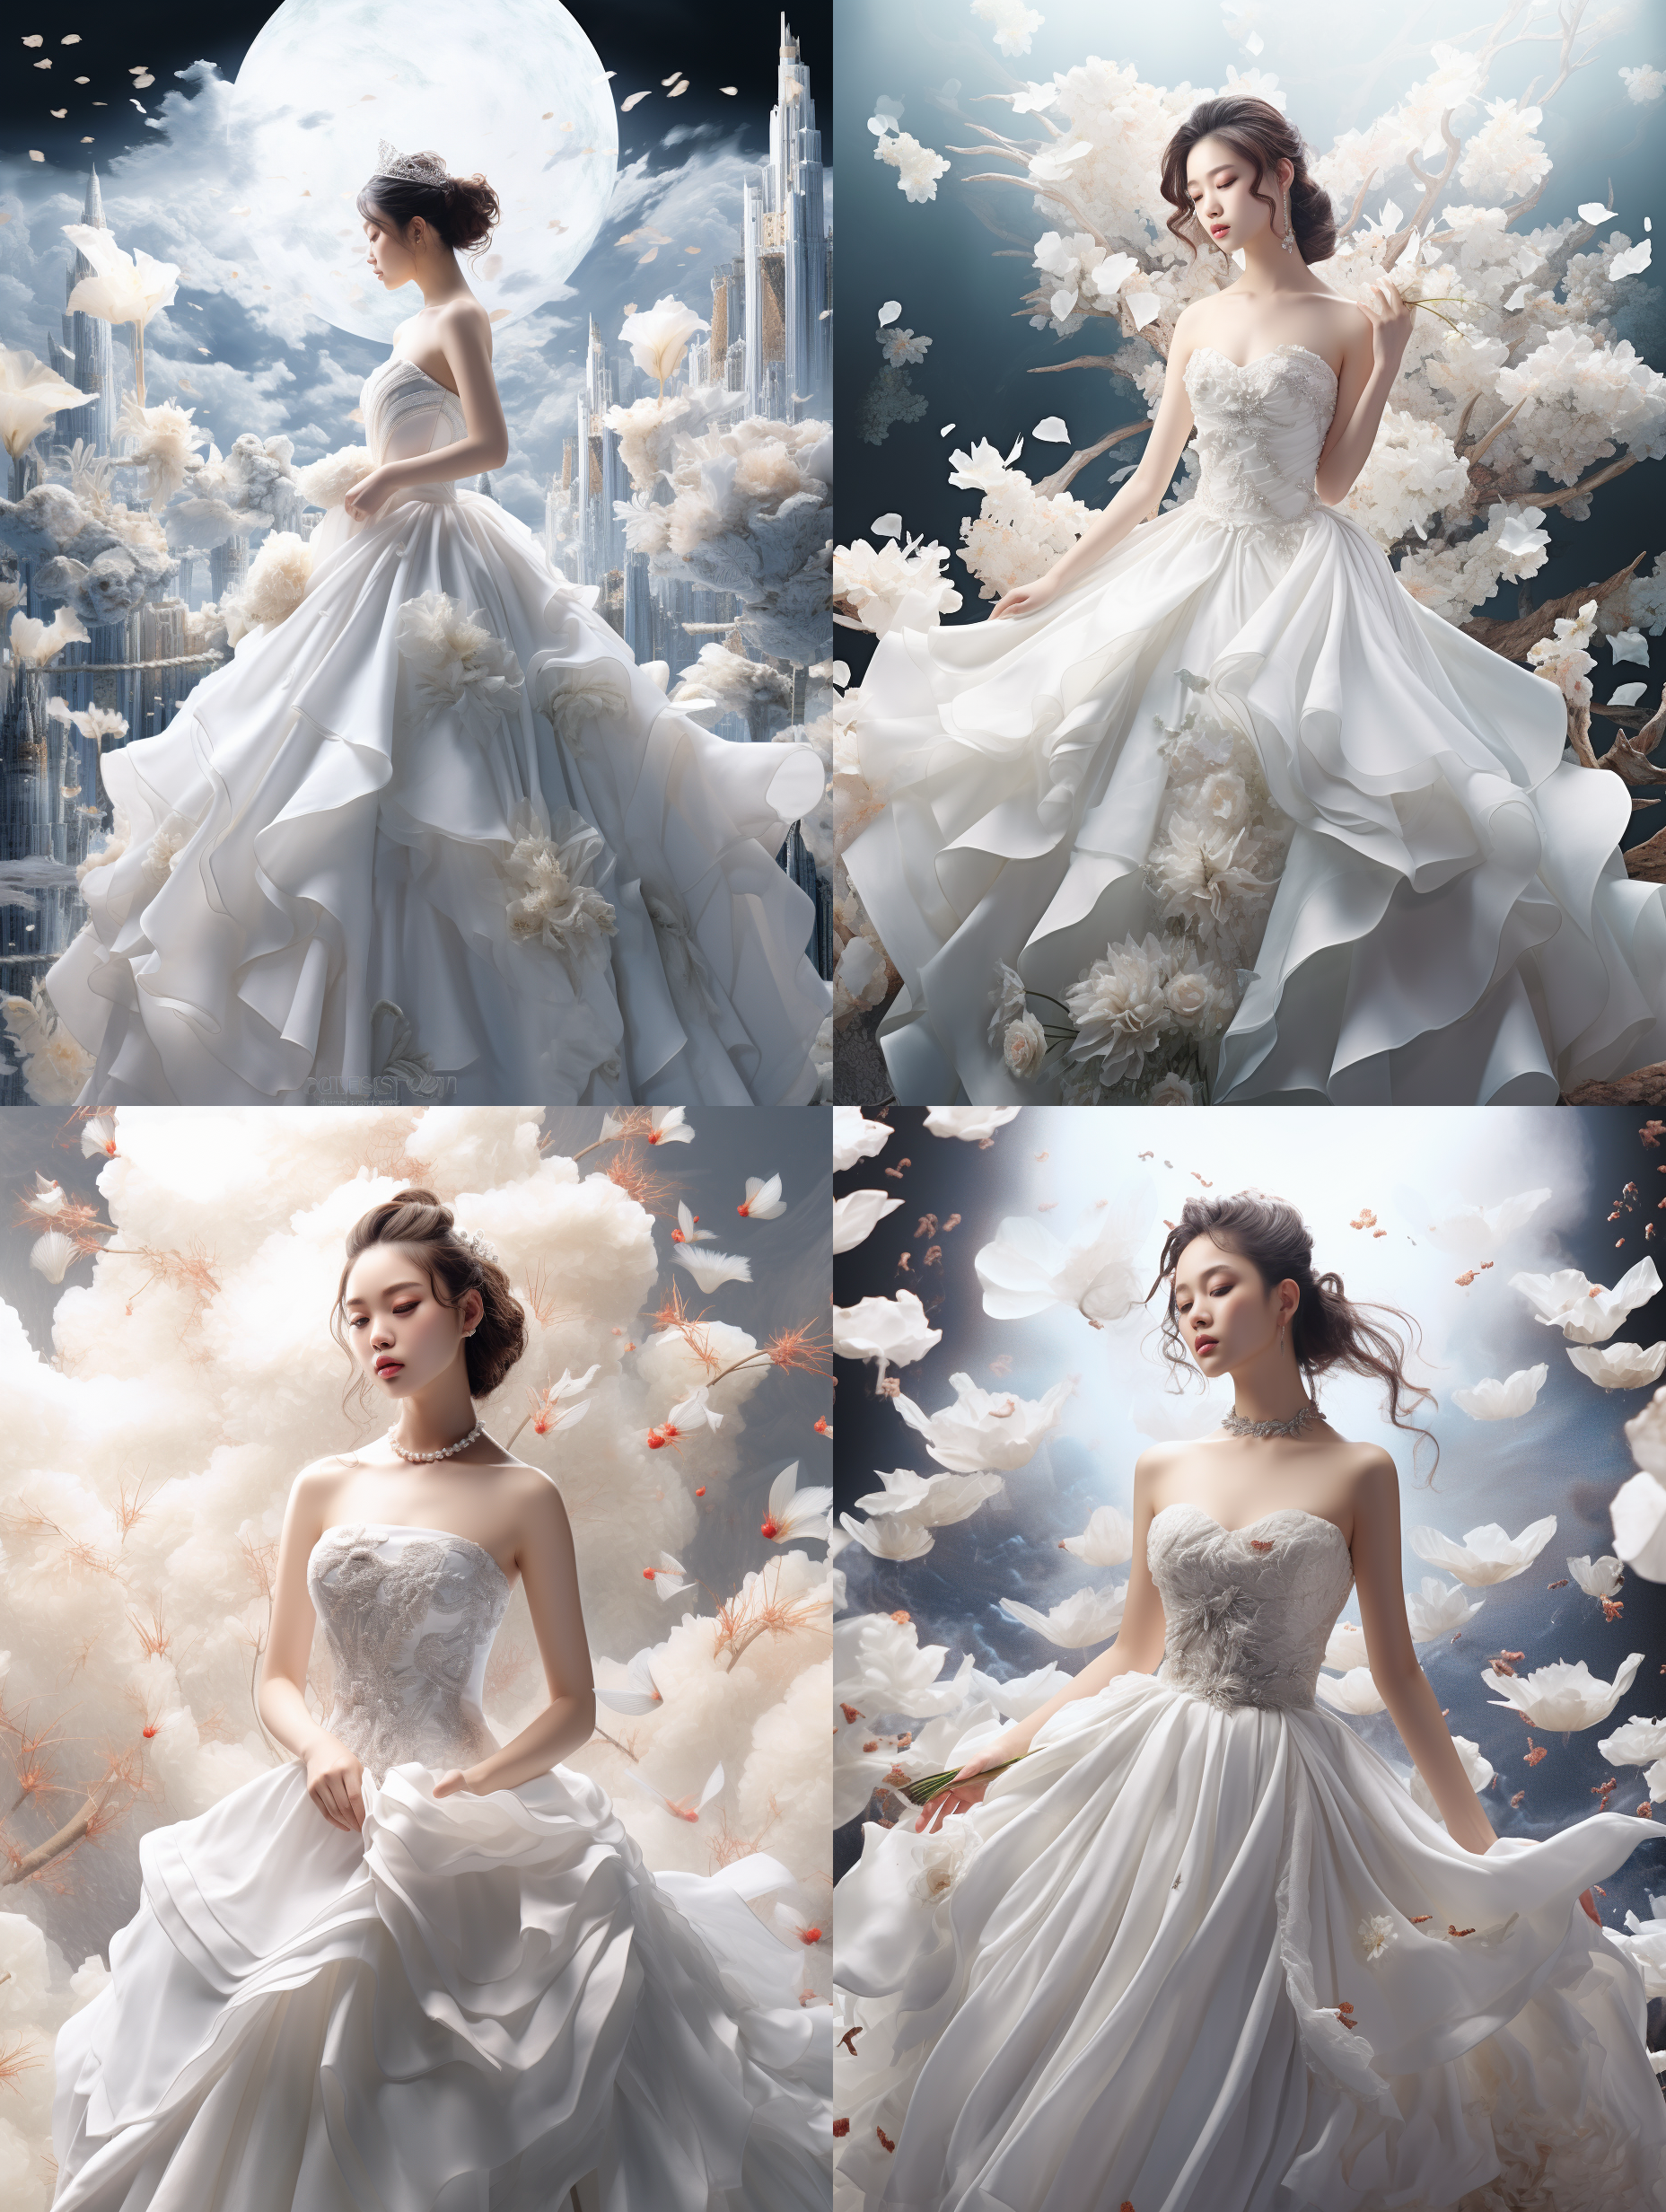
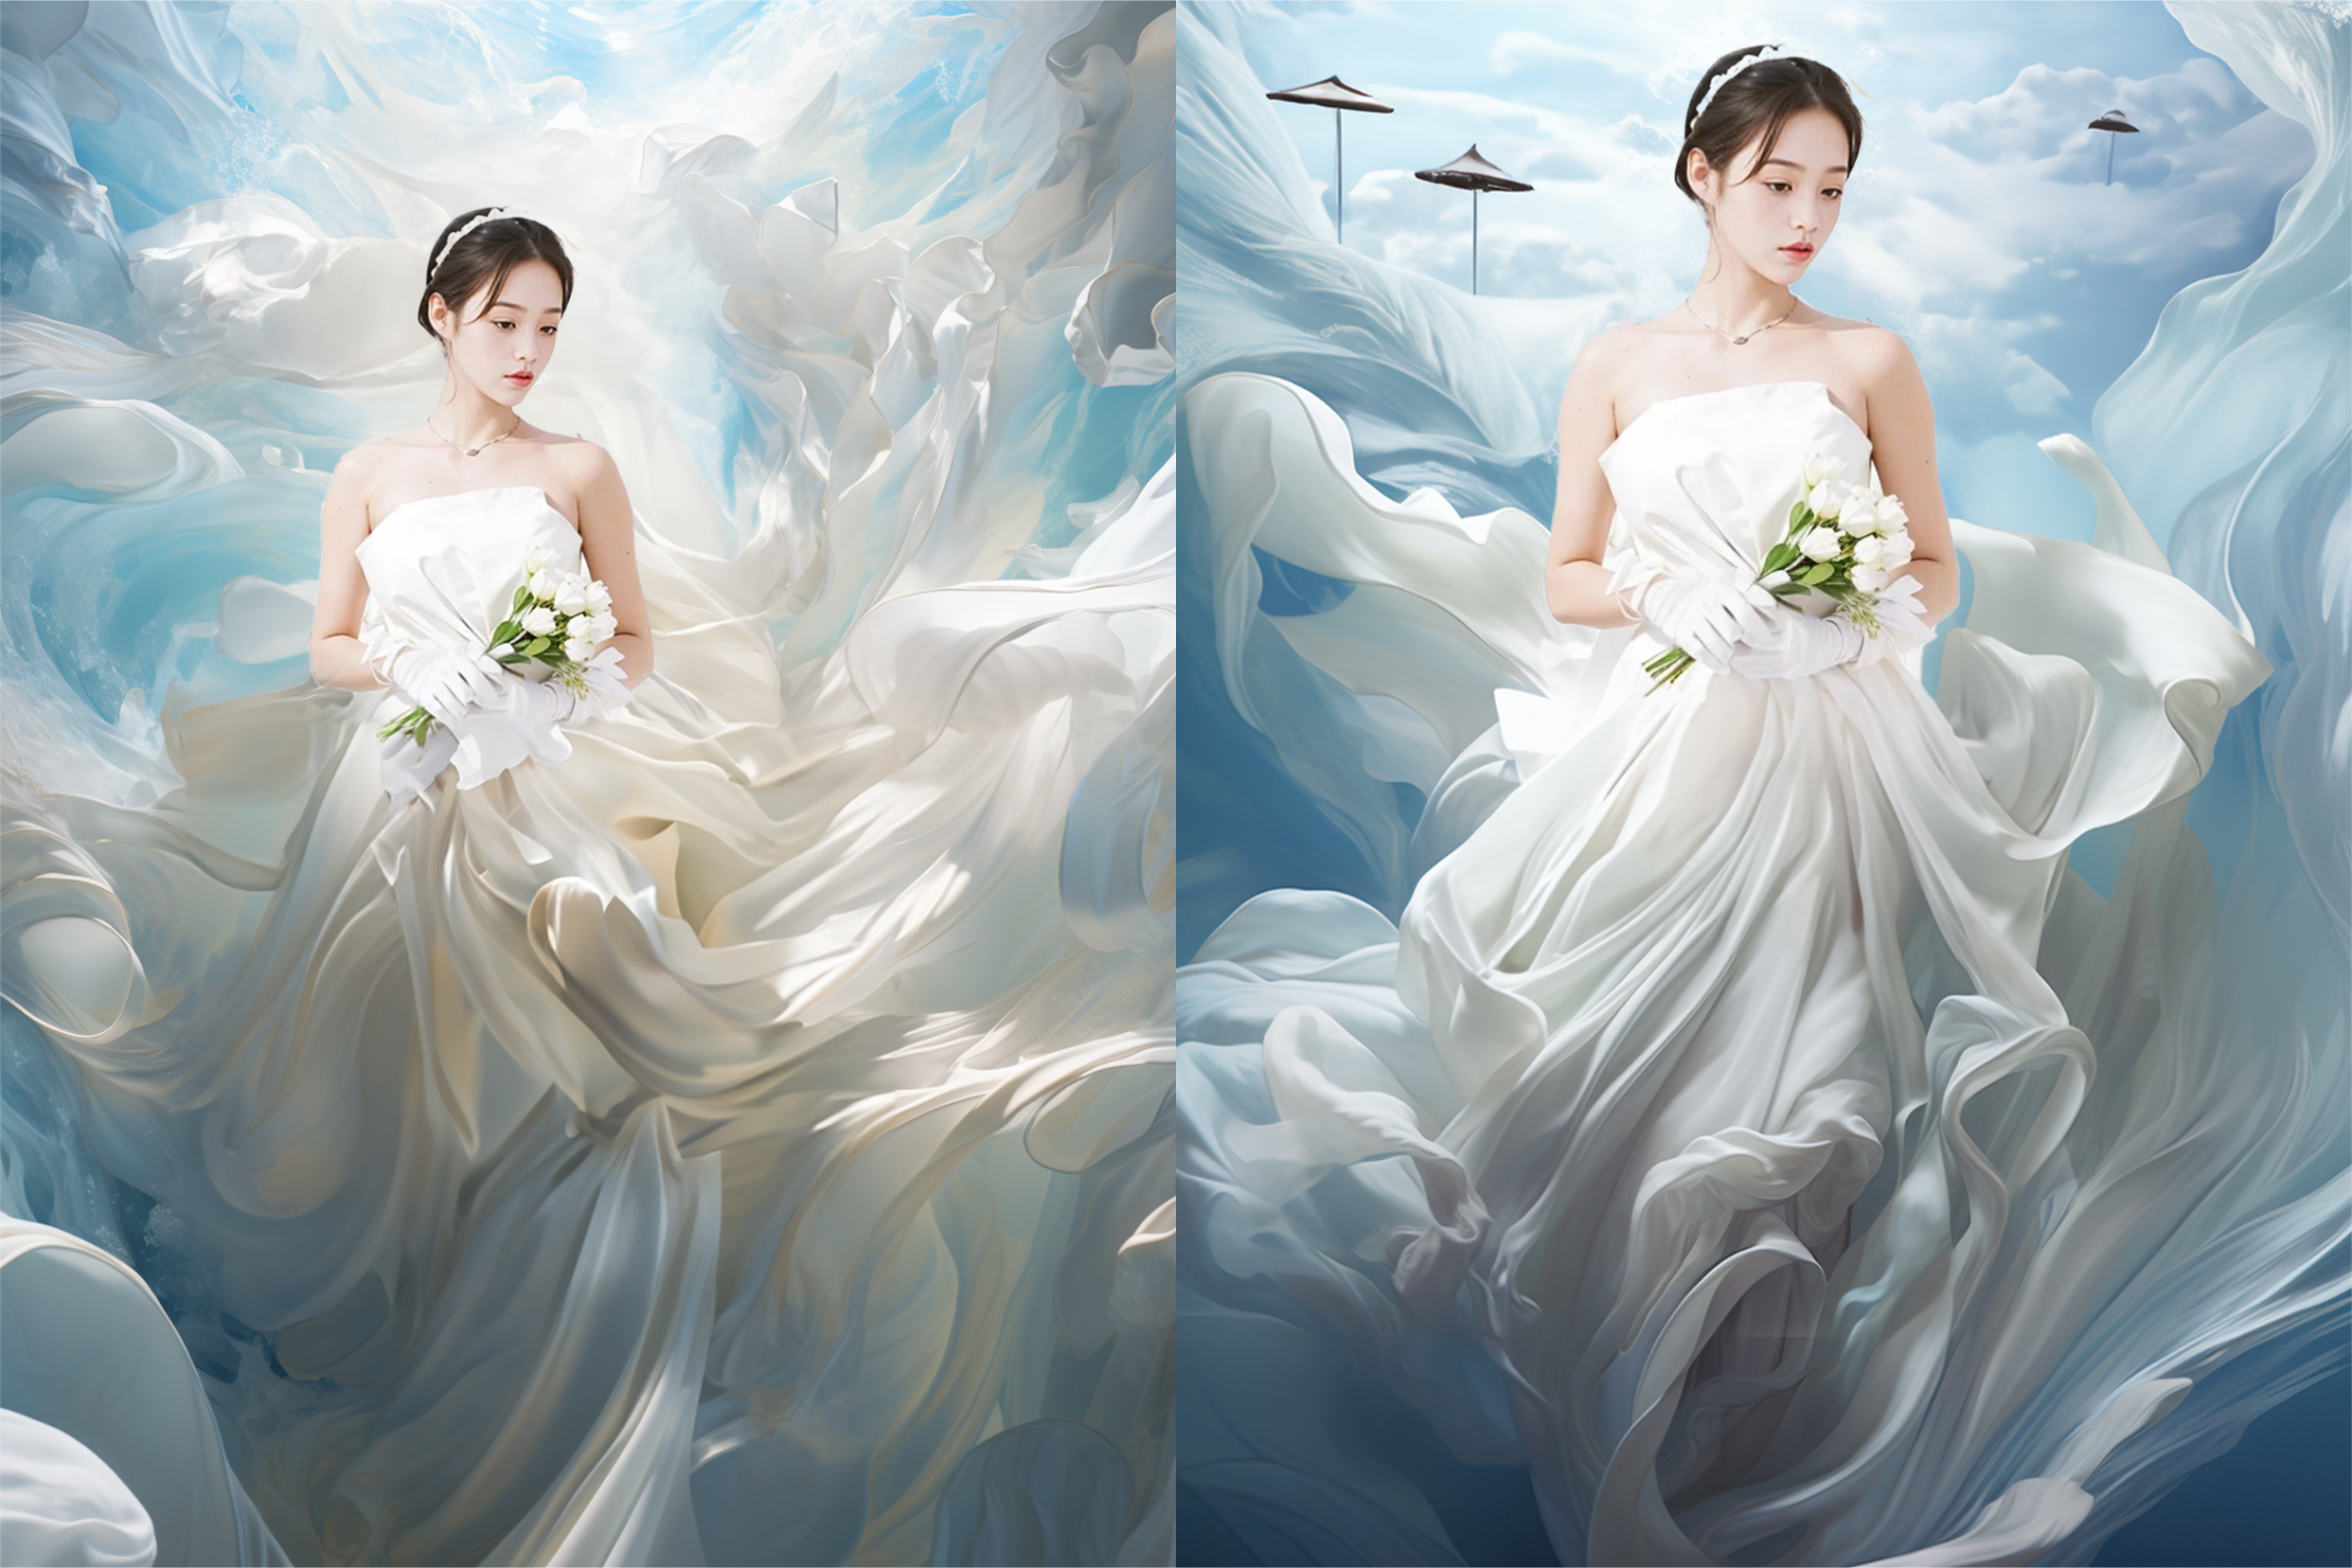
然后通过垫图操作,出来一组和原图结构类似的图,方便后期融合。
https://s.mj.run/FxyBl-ZggdQ An enchanting bridal photoshoot with a Chinese girl, set in a fantastical world of ethereal white hues. The bride wears an elegant fusion gown, blending traditional and modern elements, surrounded by a dreamy landscape of floating clouds and shimmering stars. The scene exudes a magical and romantic ambiance, as if taken from a fairytale. The style is illustration, using digital art techniques to create a soft and luminous effect, --ar 3:4 --v 5.2 --s 250 --iw 0.5
因为 Midjourney 的不稳定性,没办法得到与原摄影图一模一样的图,但垫图可以提高相似度。
得到下面的 4 张图,分别进行放大。
背景融合**(PS AI)**
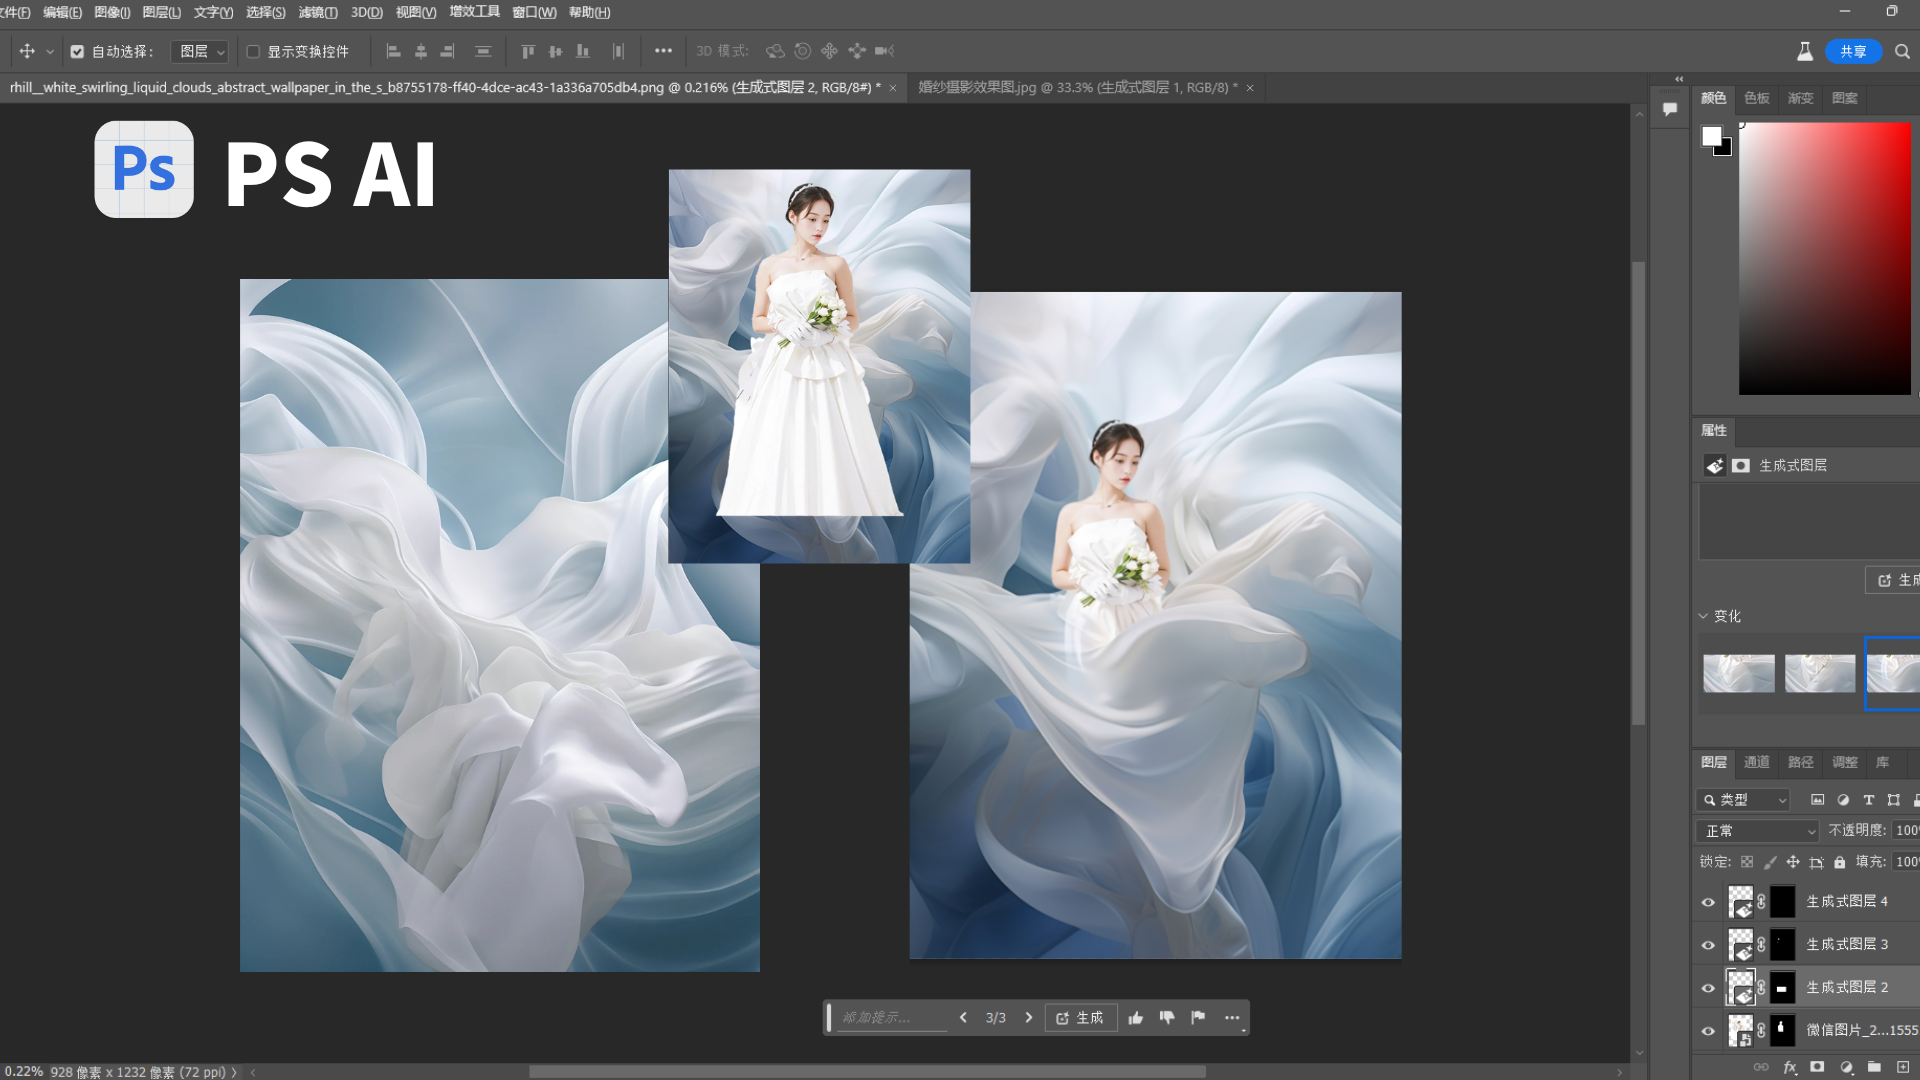
这时候用打开 PS,用其 AI 加持的创成式填充功能,将我们自己的摄影图原图覆盖掉AI生成图中人物部分。
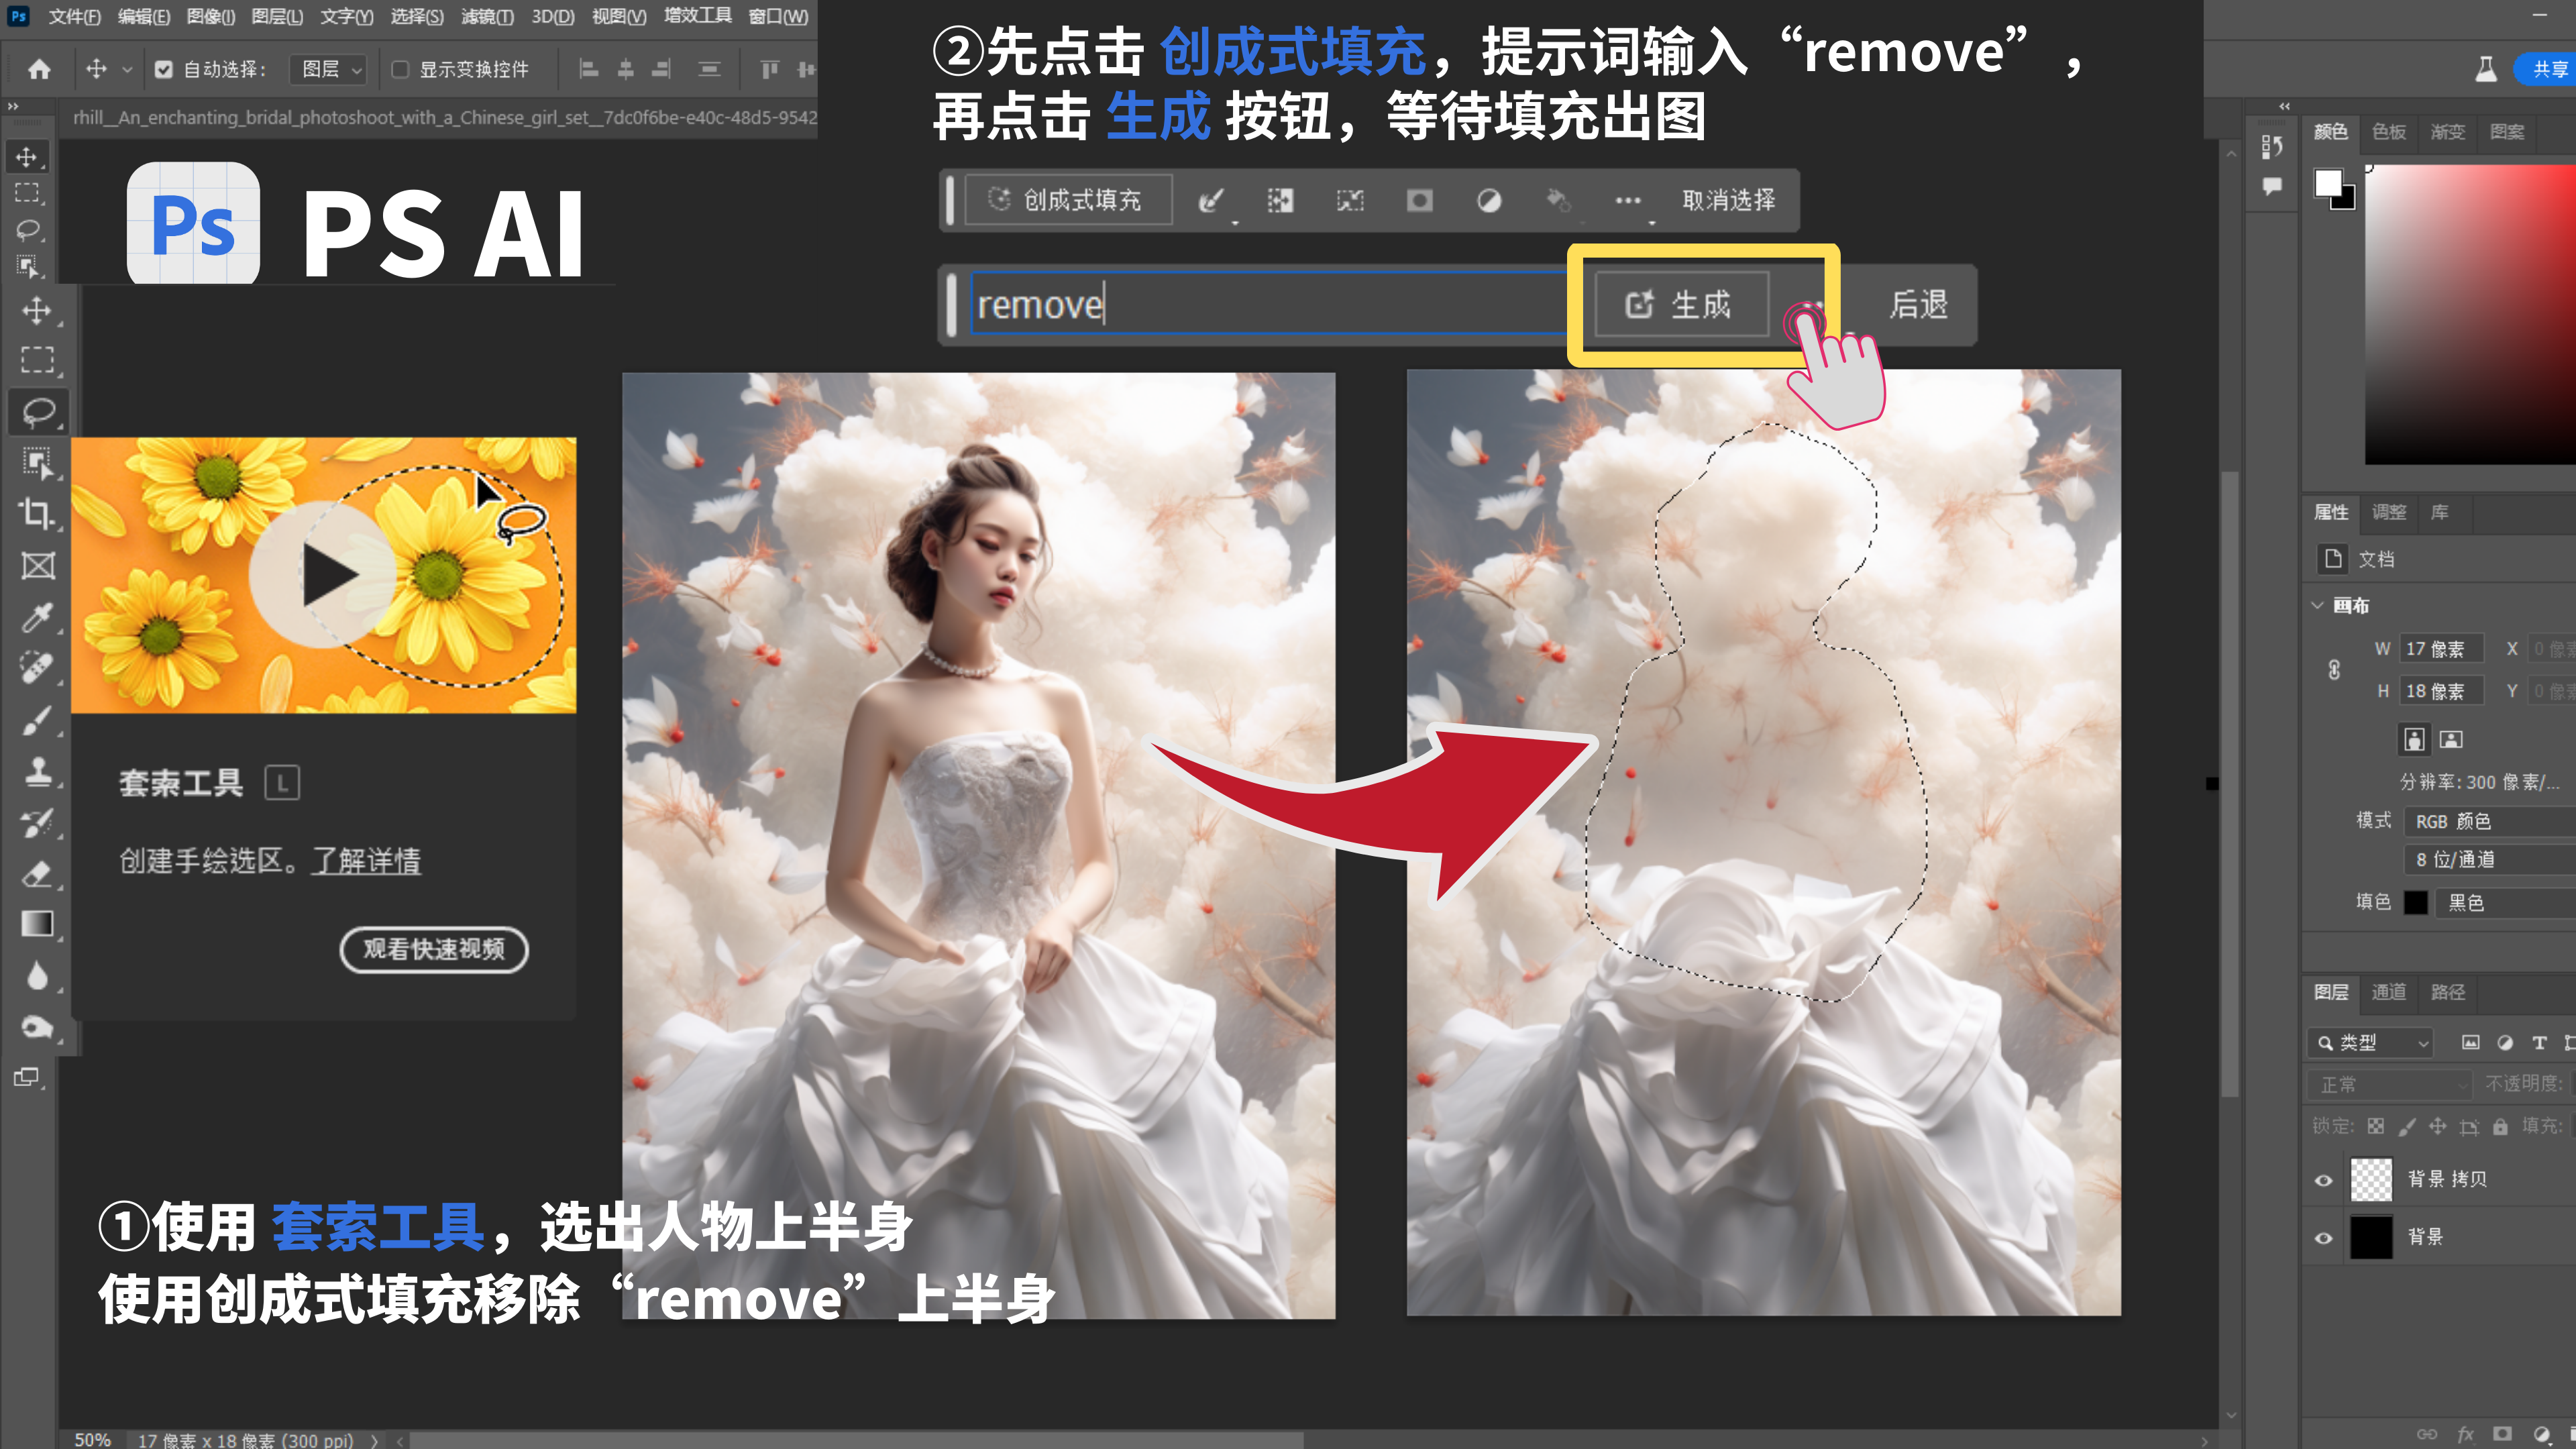
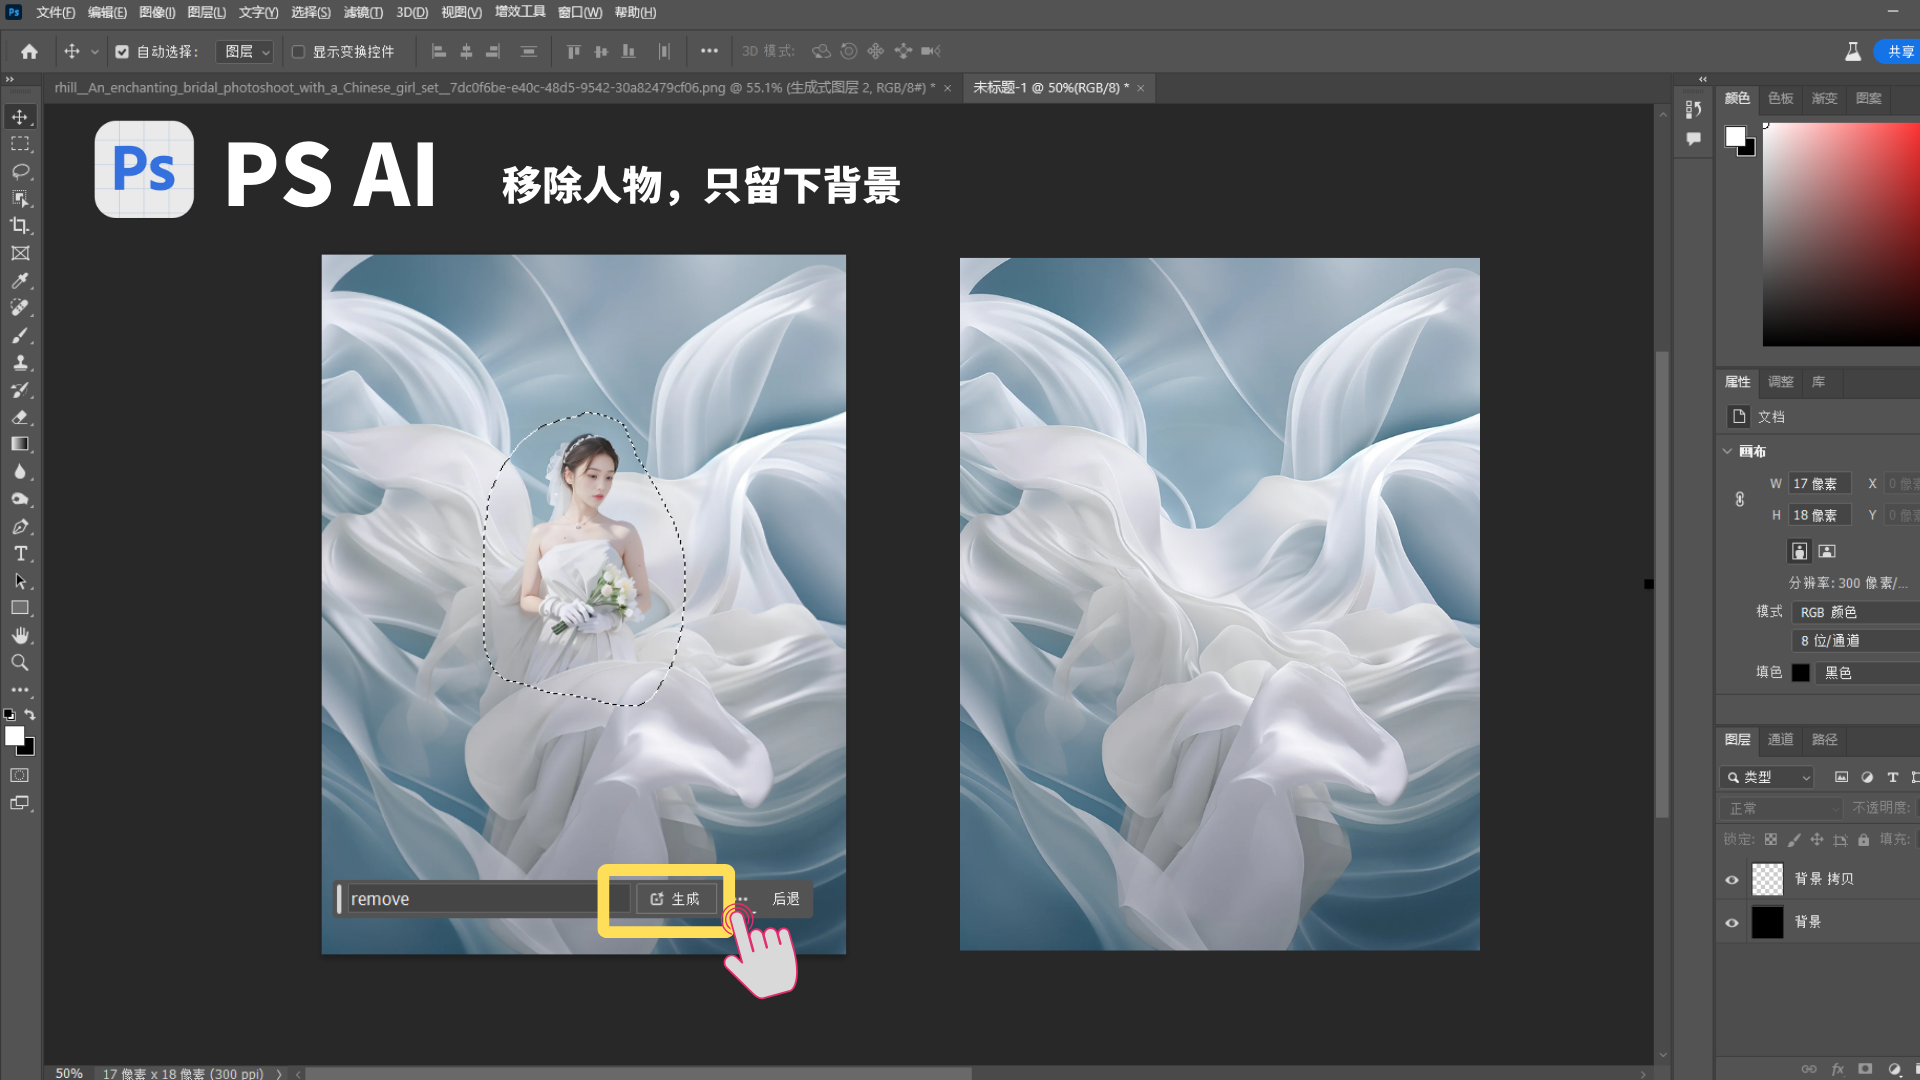
移除人物主体
打开刚刚 Midjourney 画出的图,先套索选择人物上半身,填写提示词 “remove” ,删掉人物主体。
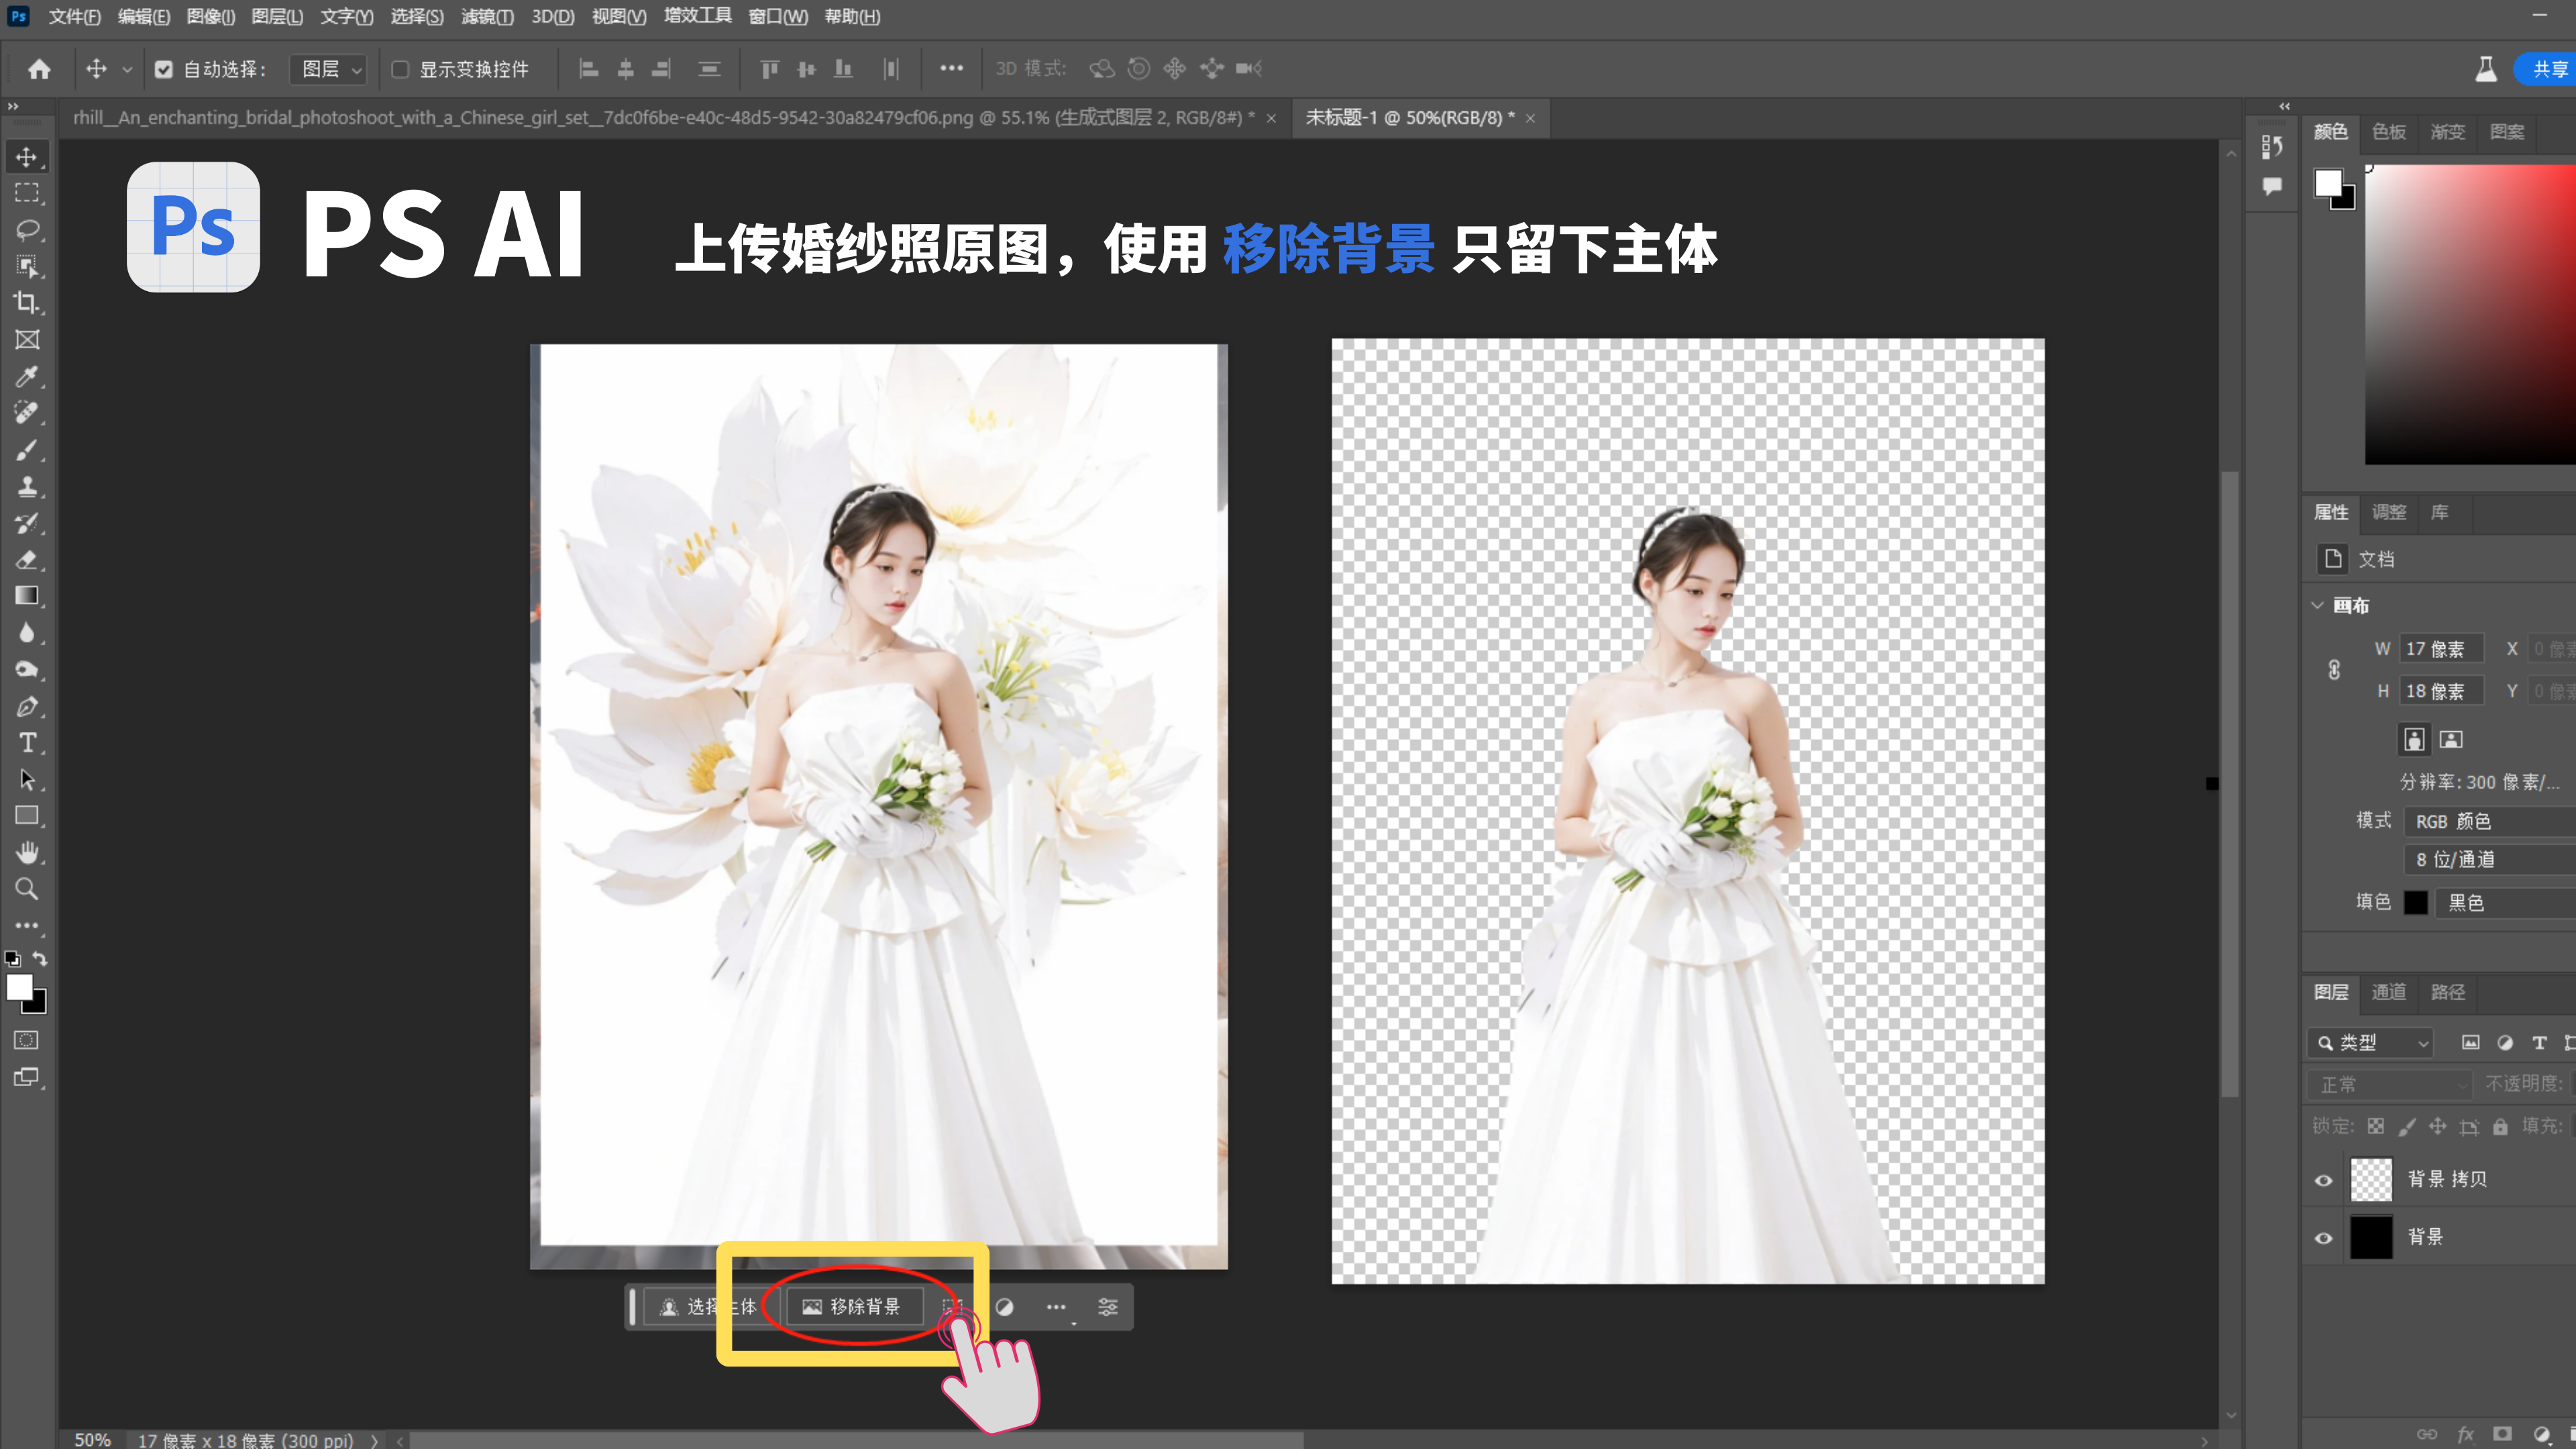
抠出原图人物
把婚纱摄影原图拖进来,使用“移除背景”一键扣掉背景,只保留原图人物主体。
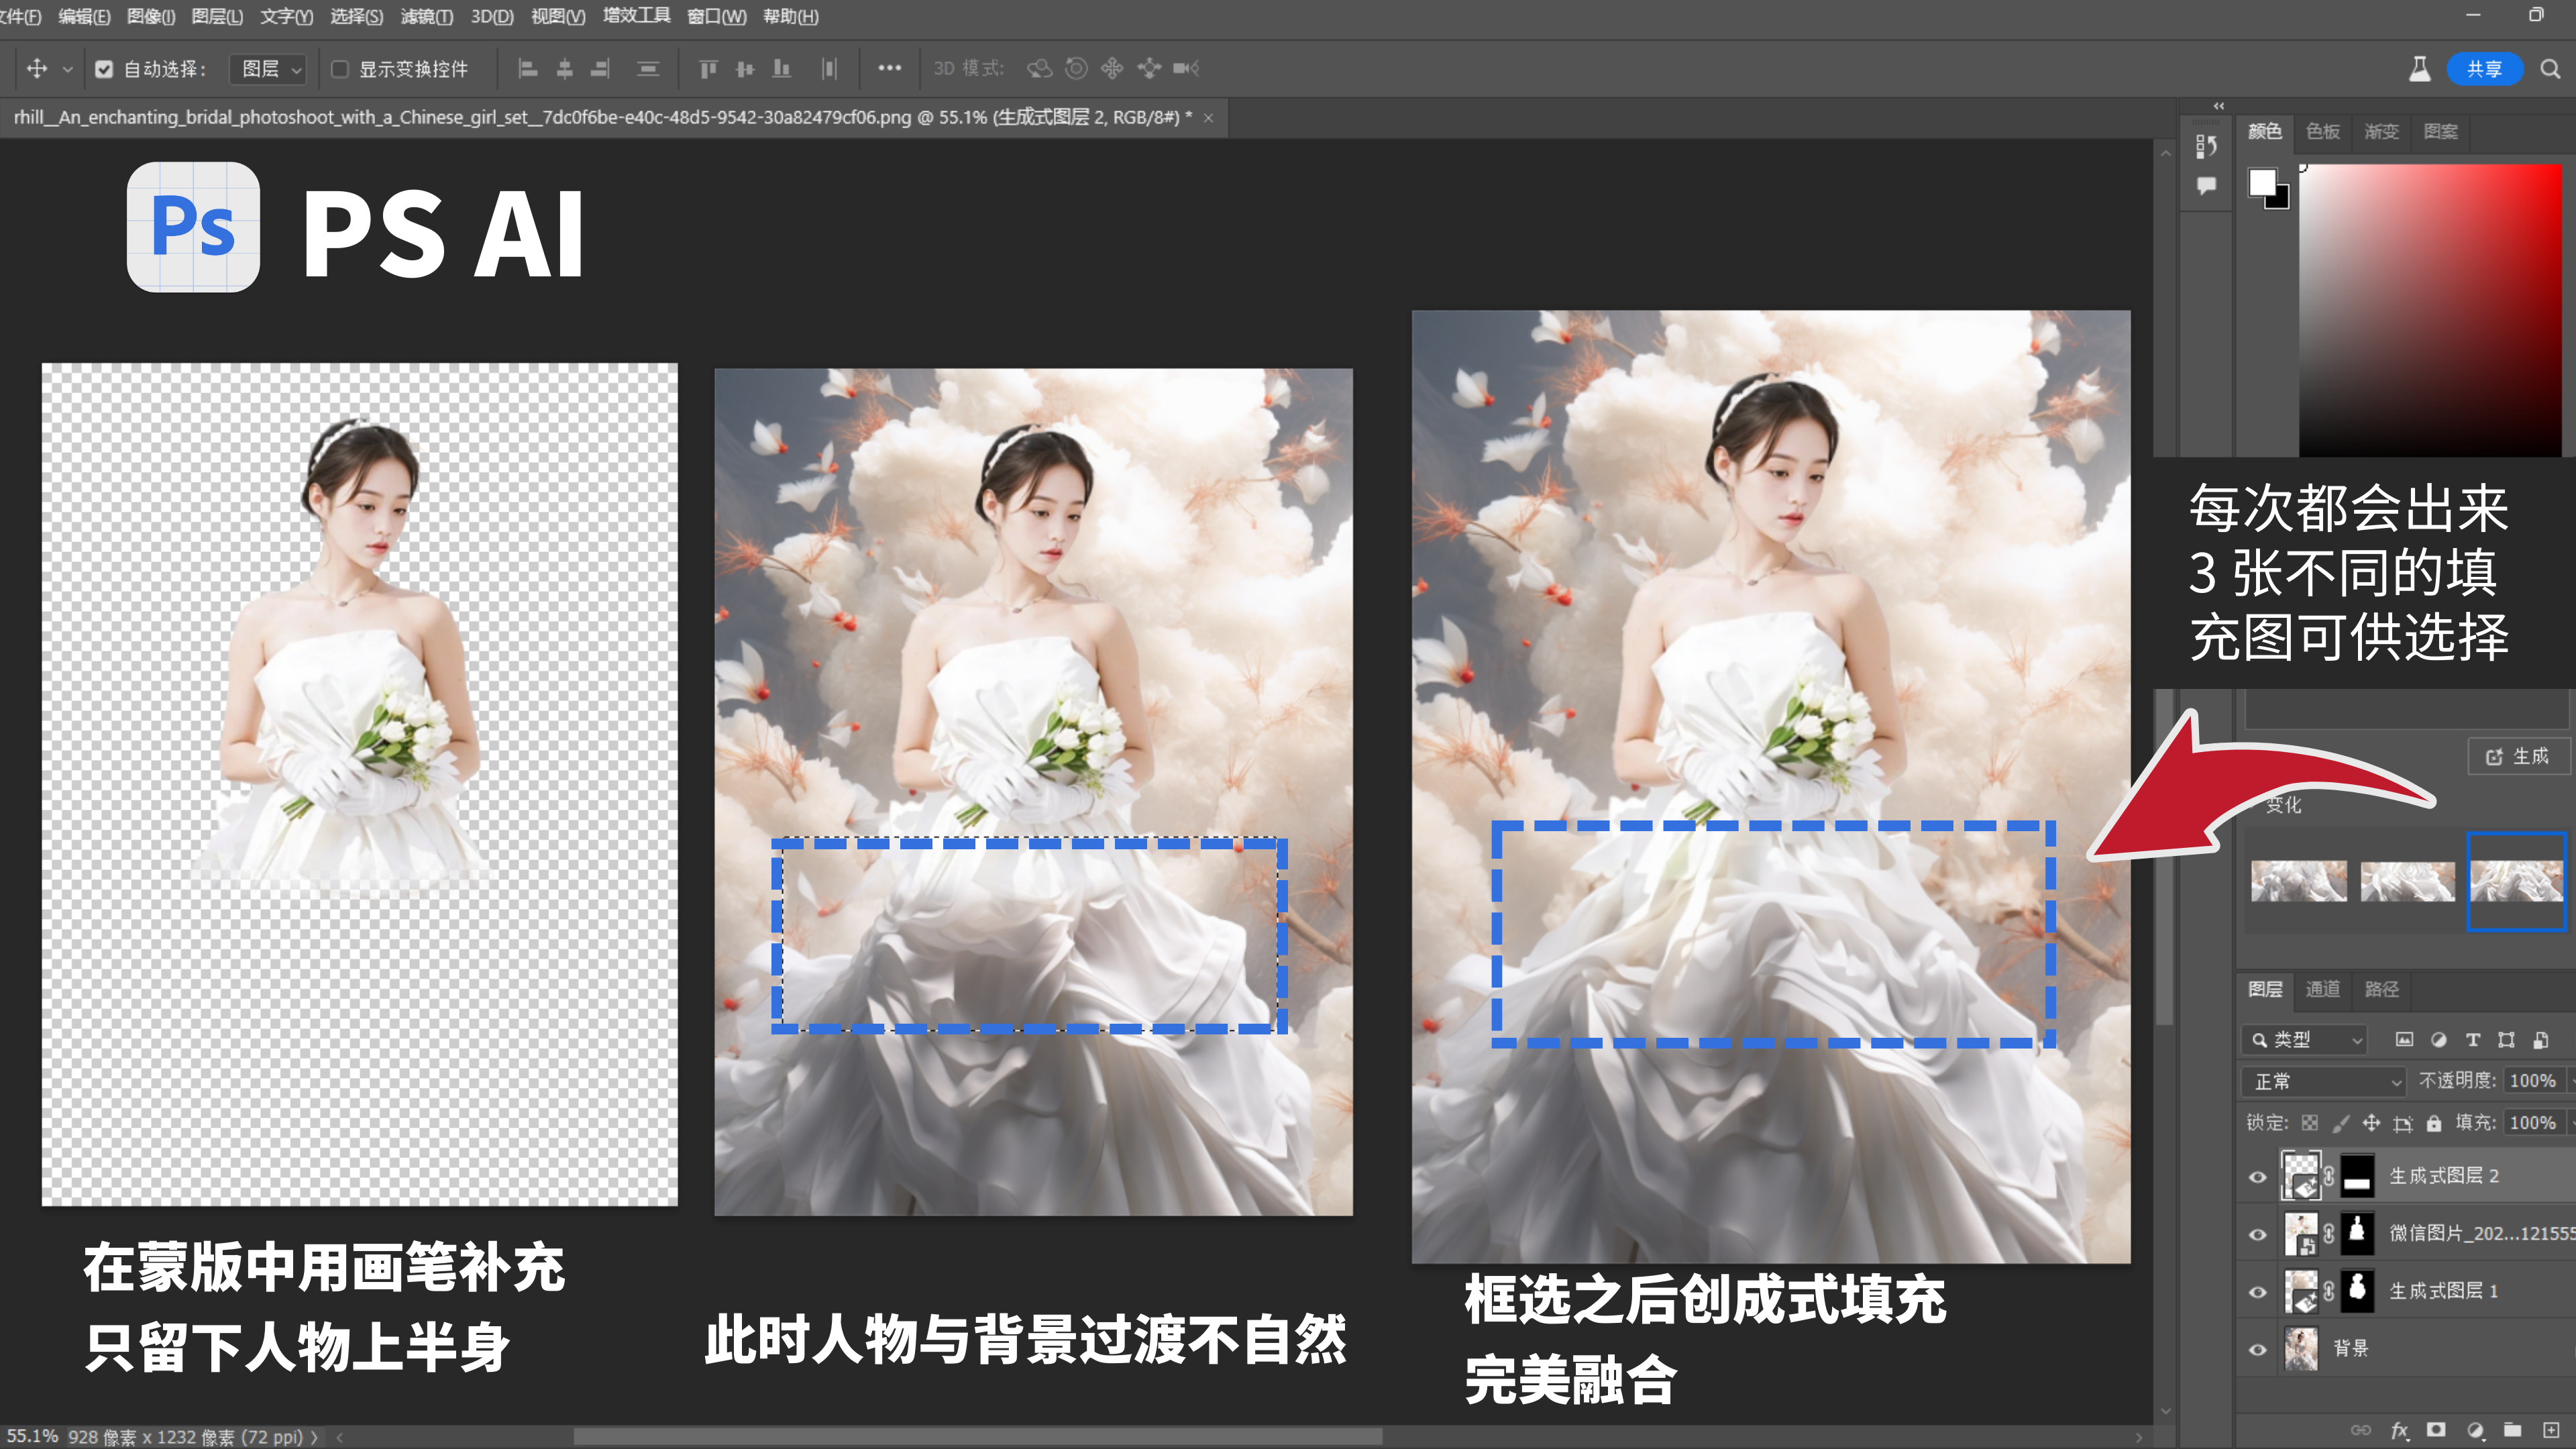
人物与背景融合
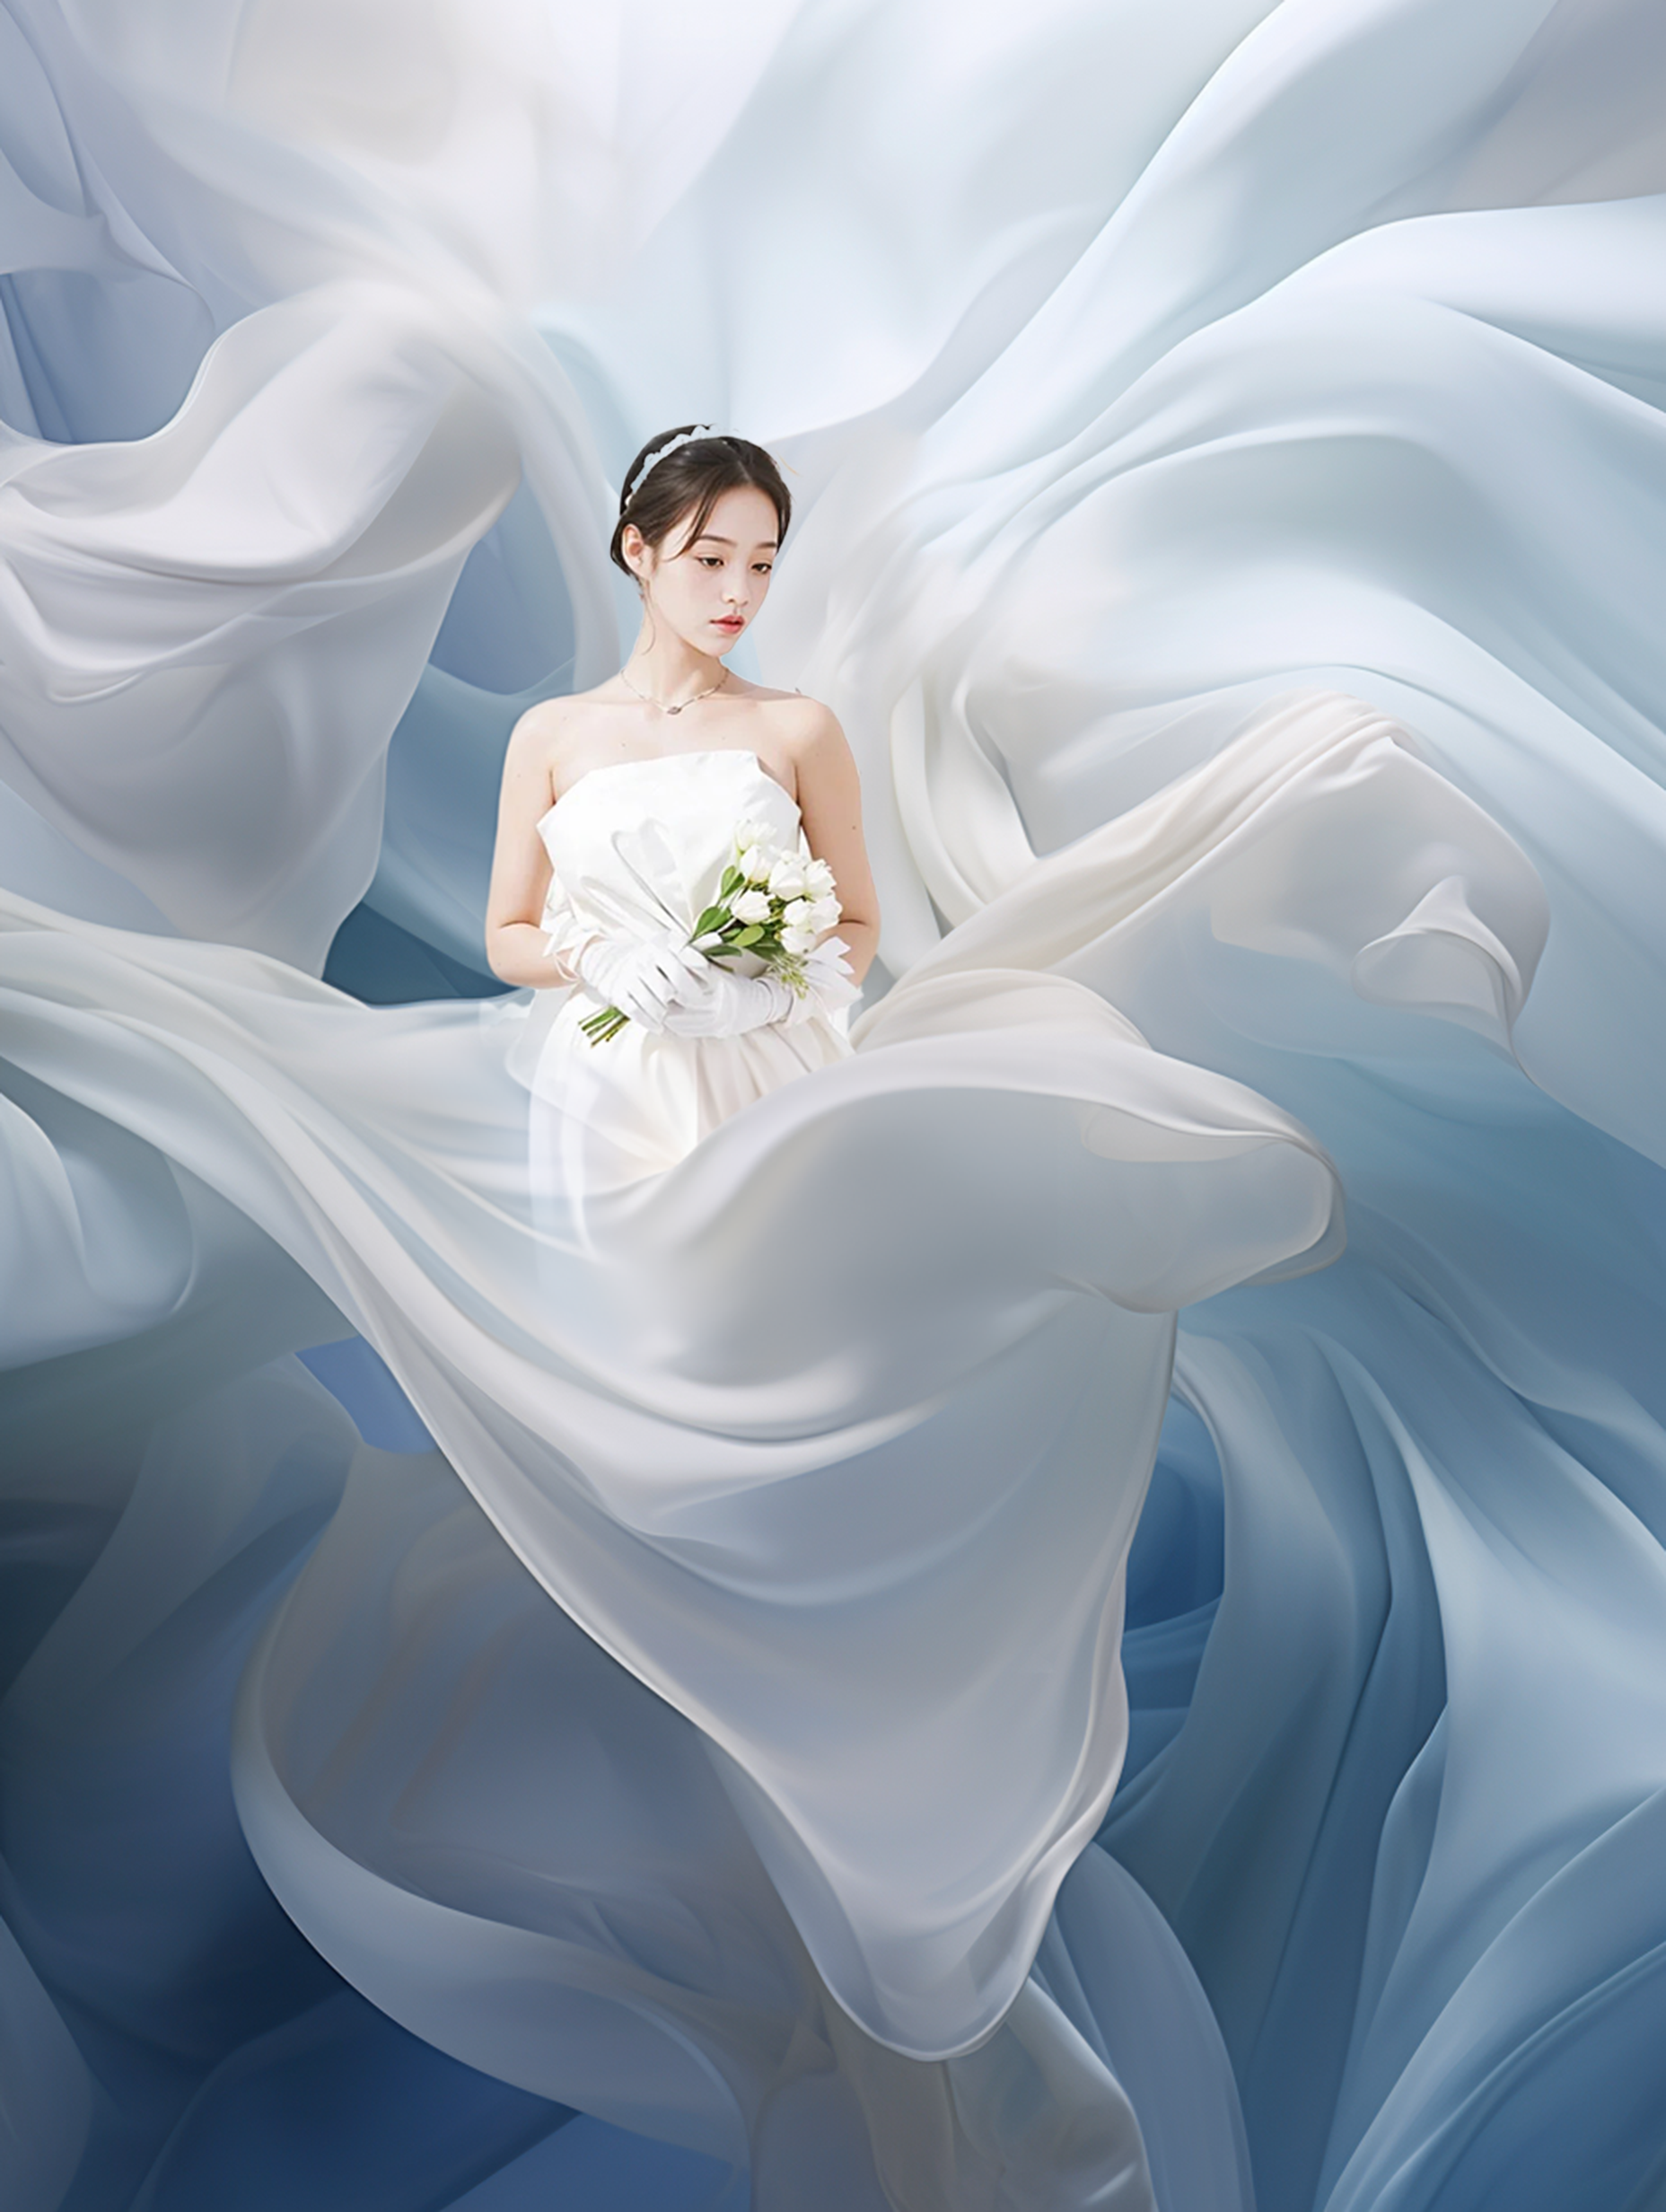
把原摄影图人物主体和 MJ 生成的背景图组合在一起,过渡部分用 PS AI 填充之后完美融合。
然后再把细节修修补补。
最终效果展示
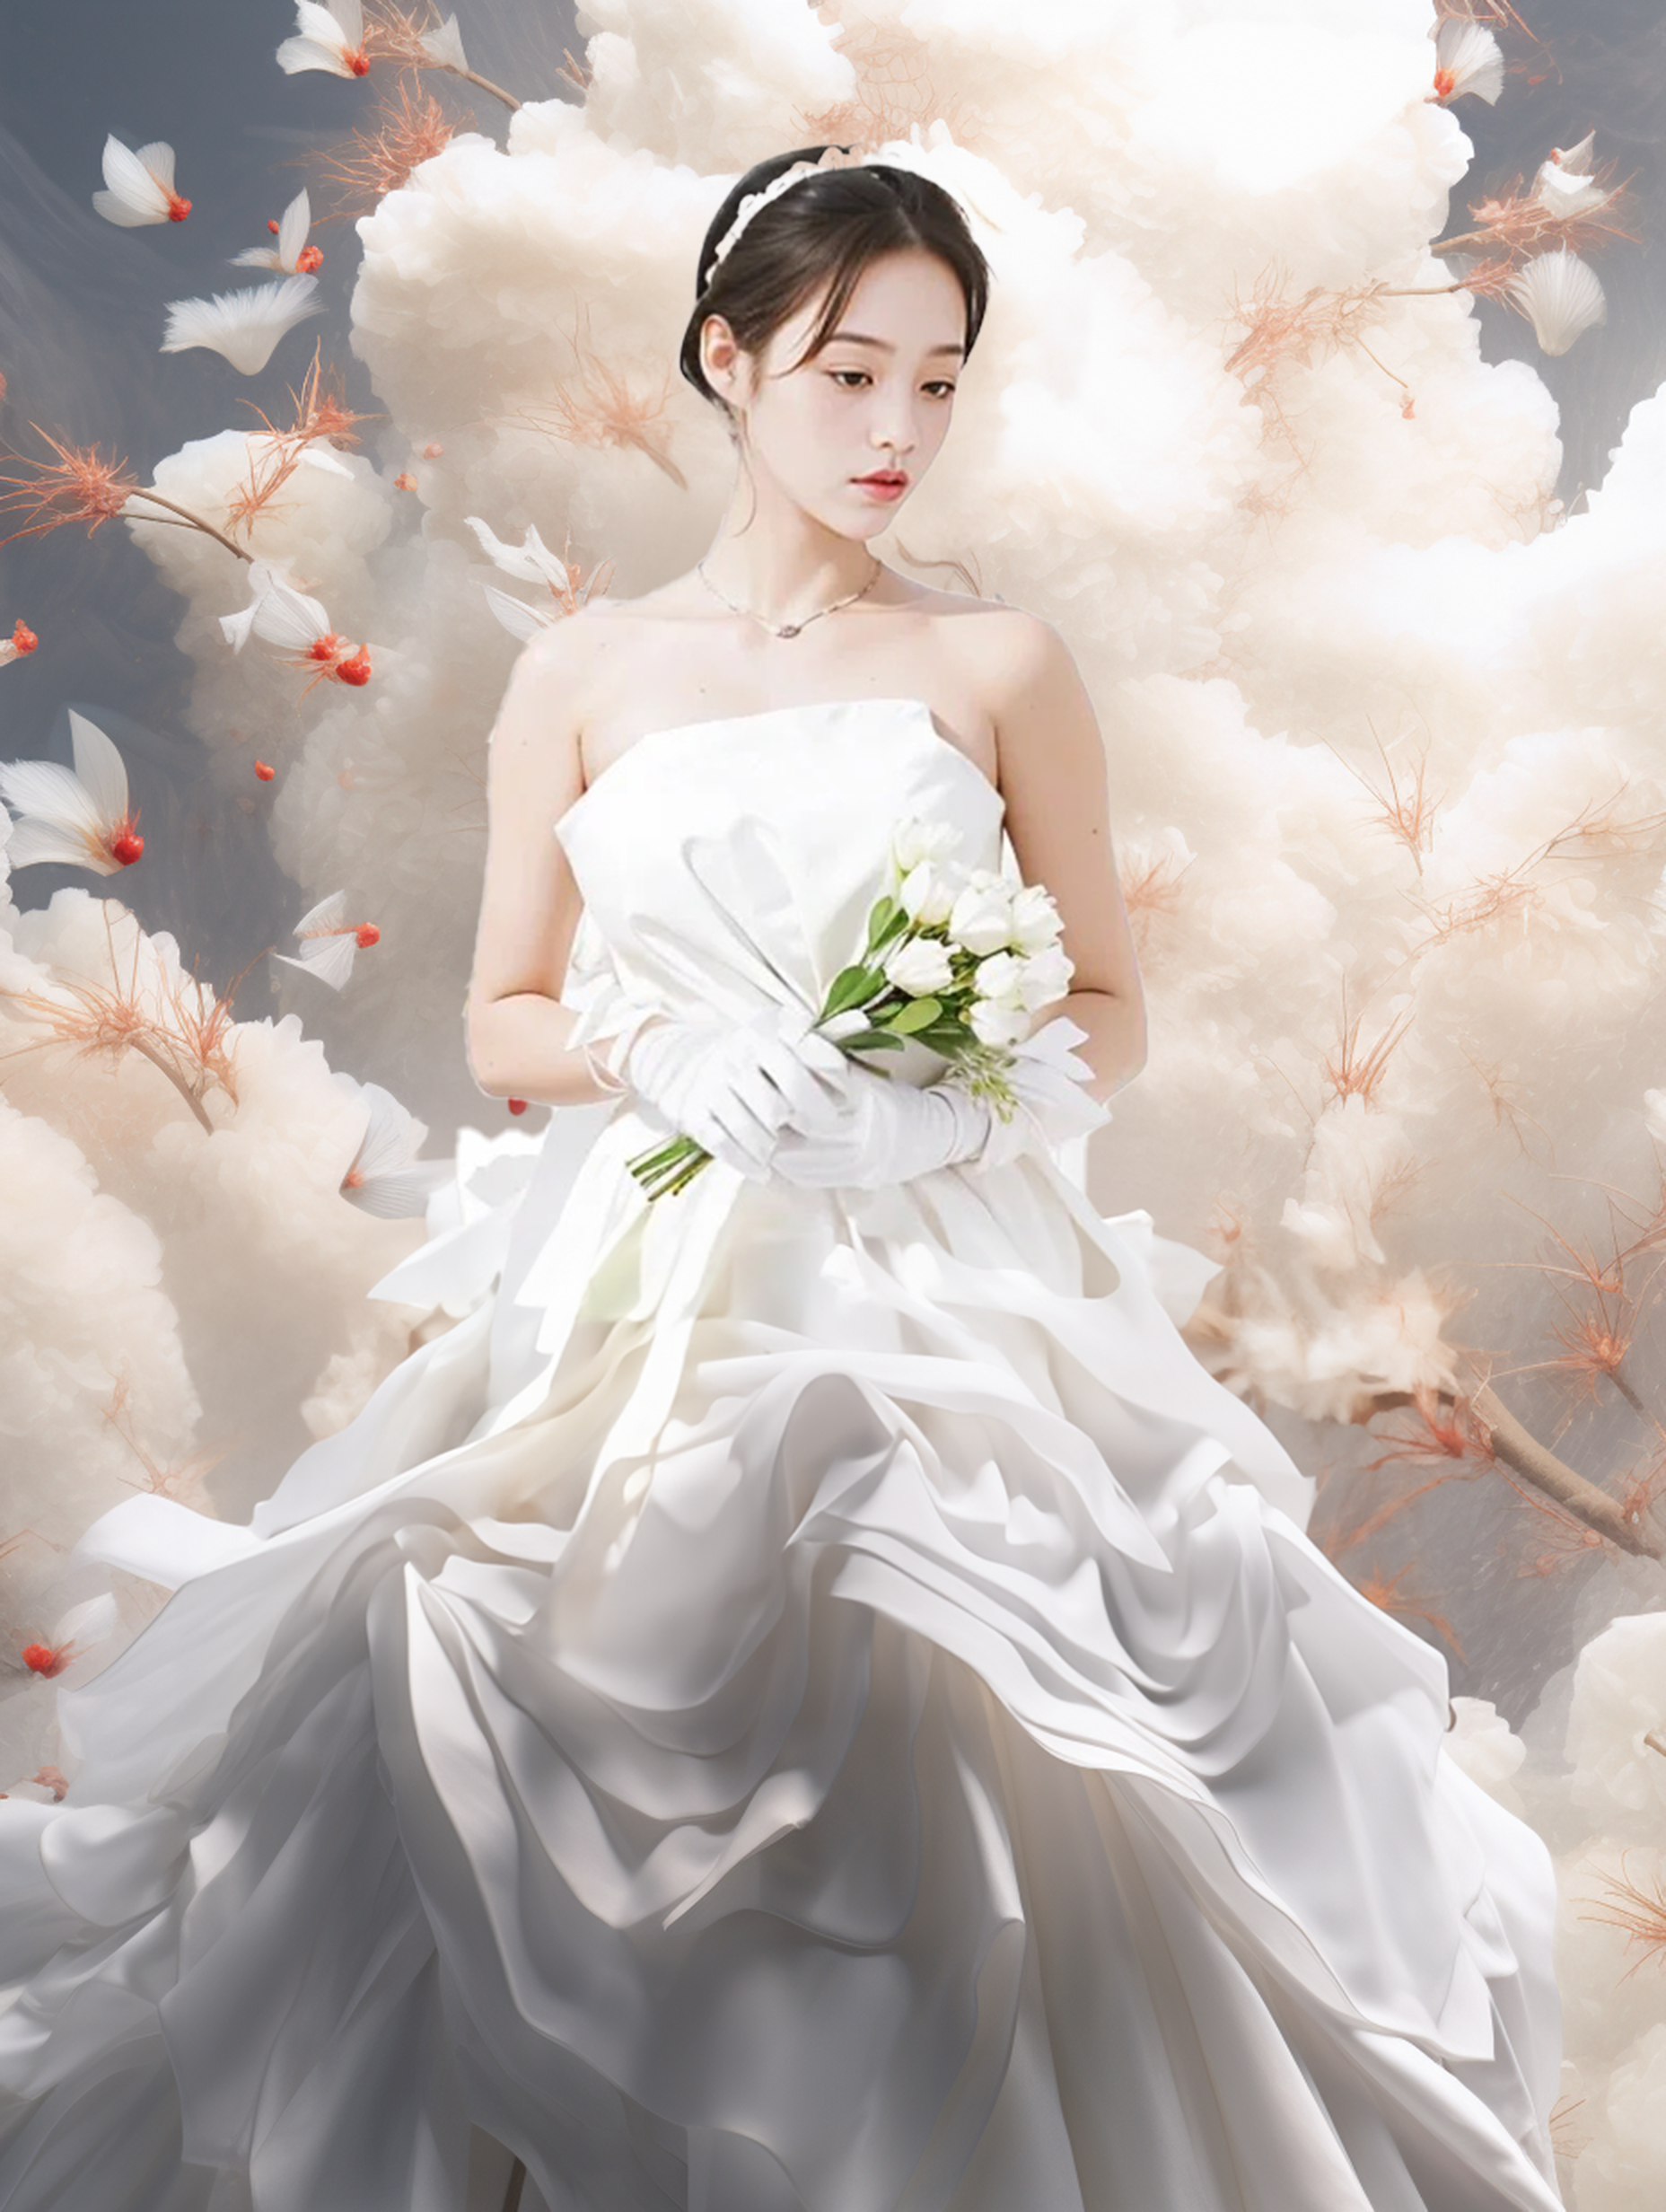
下面是一组对比图
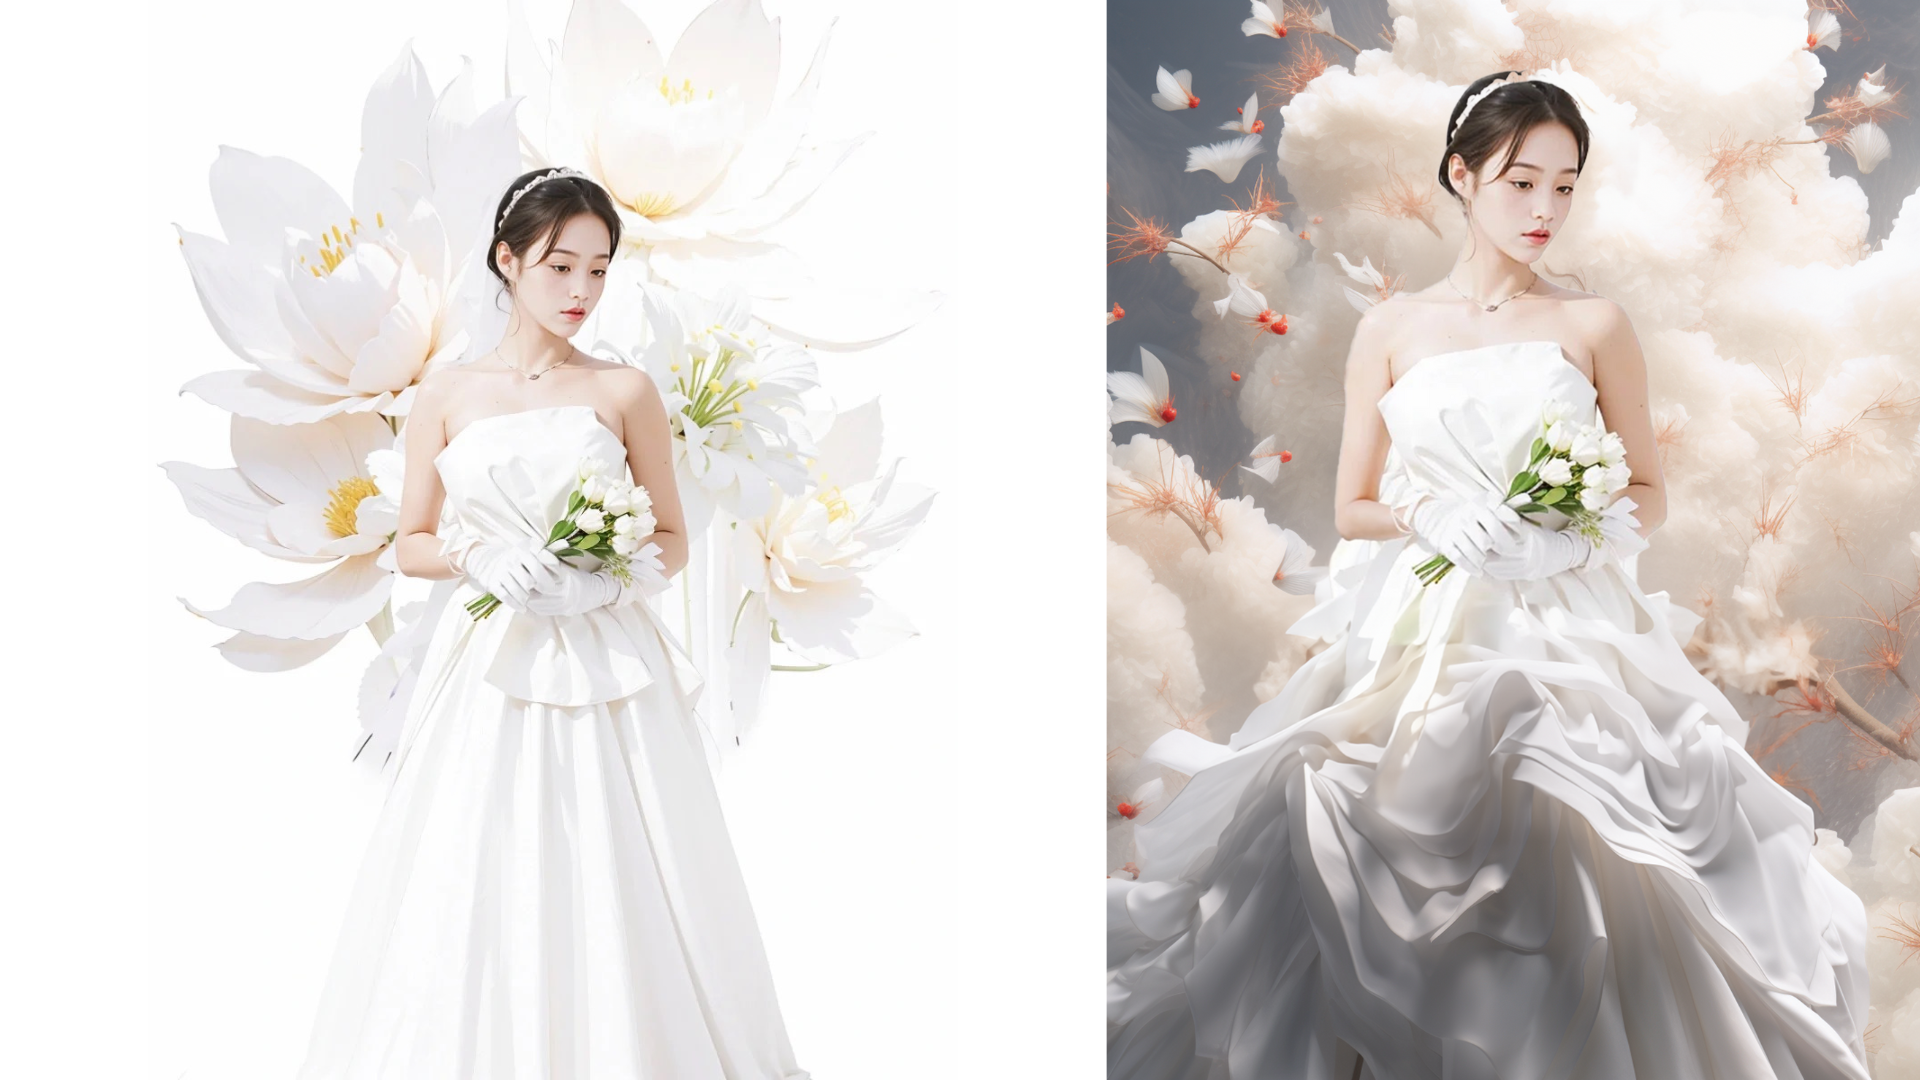
生成海报
增加一些婚礼主题的文字及其他元素。
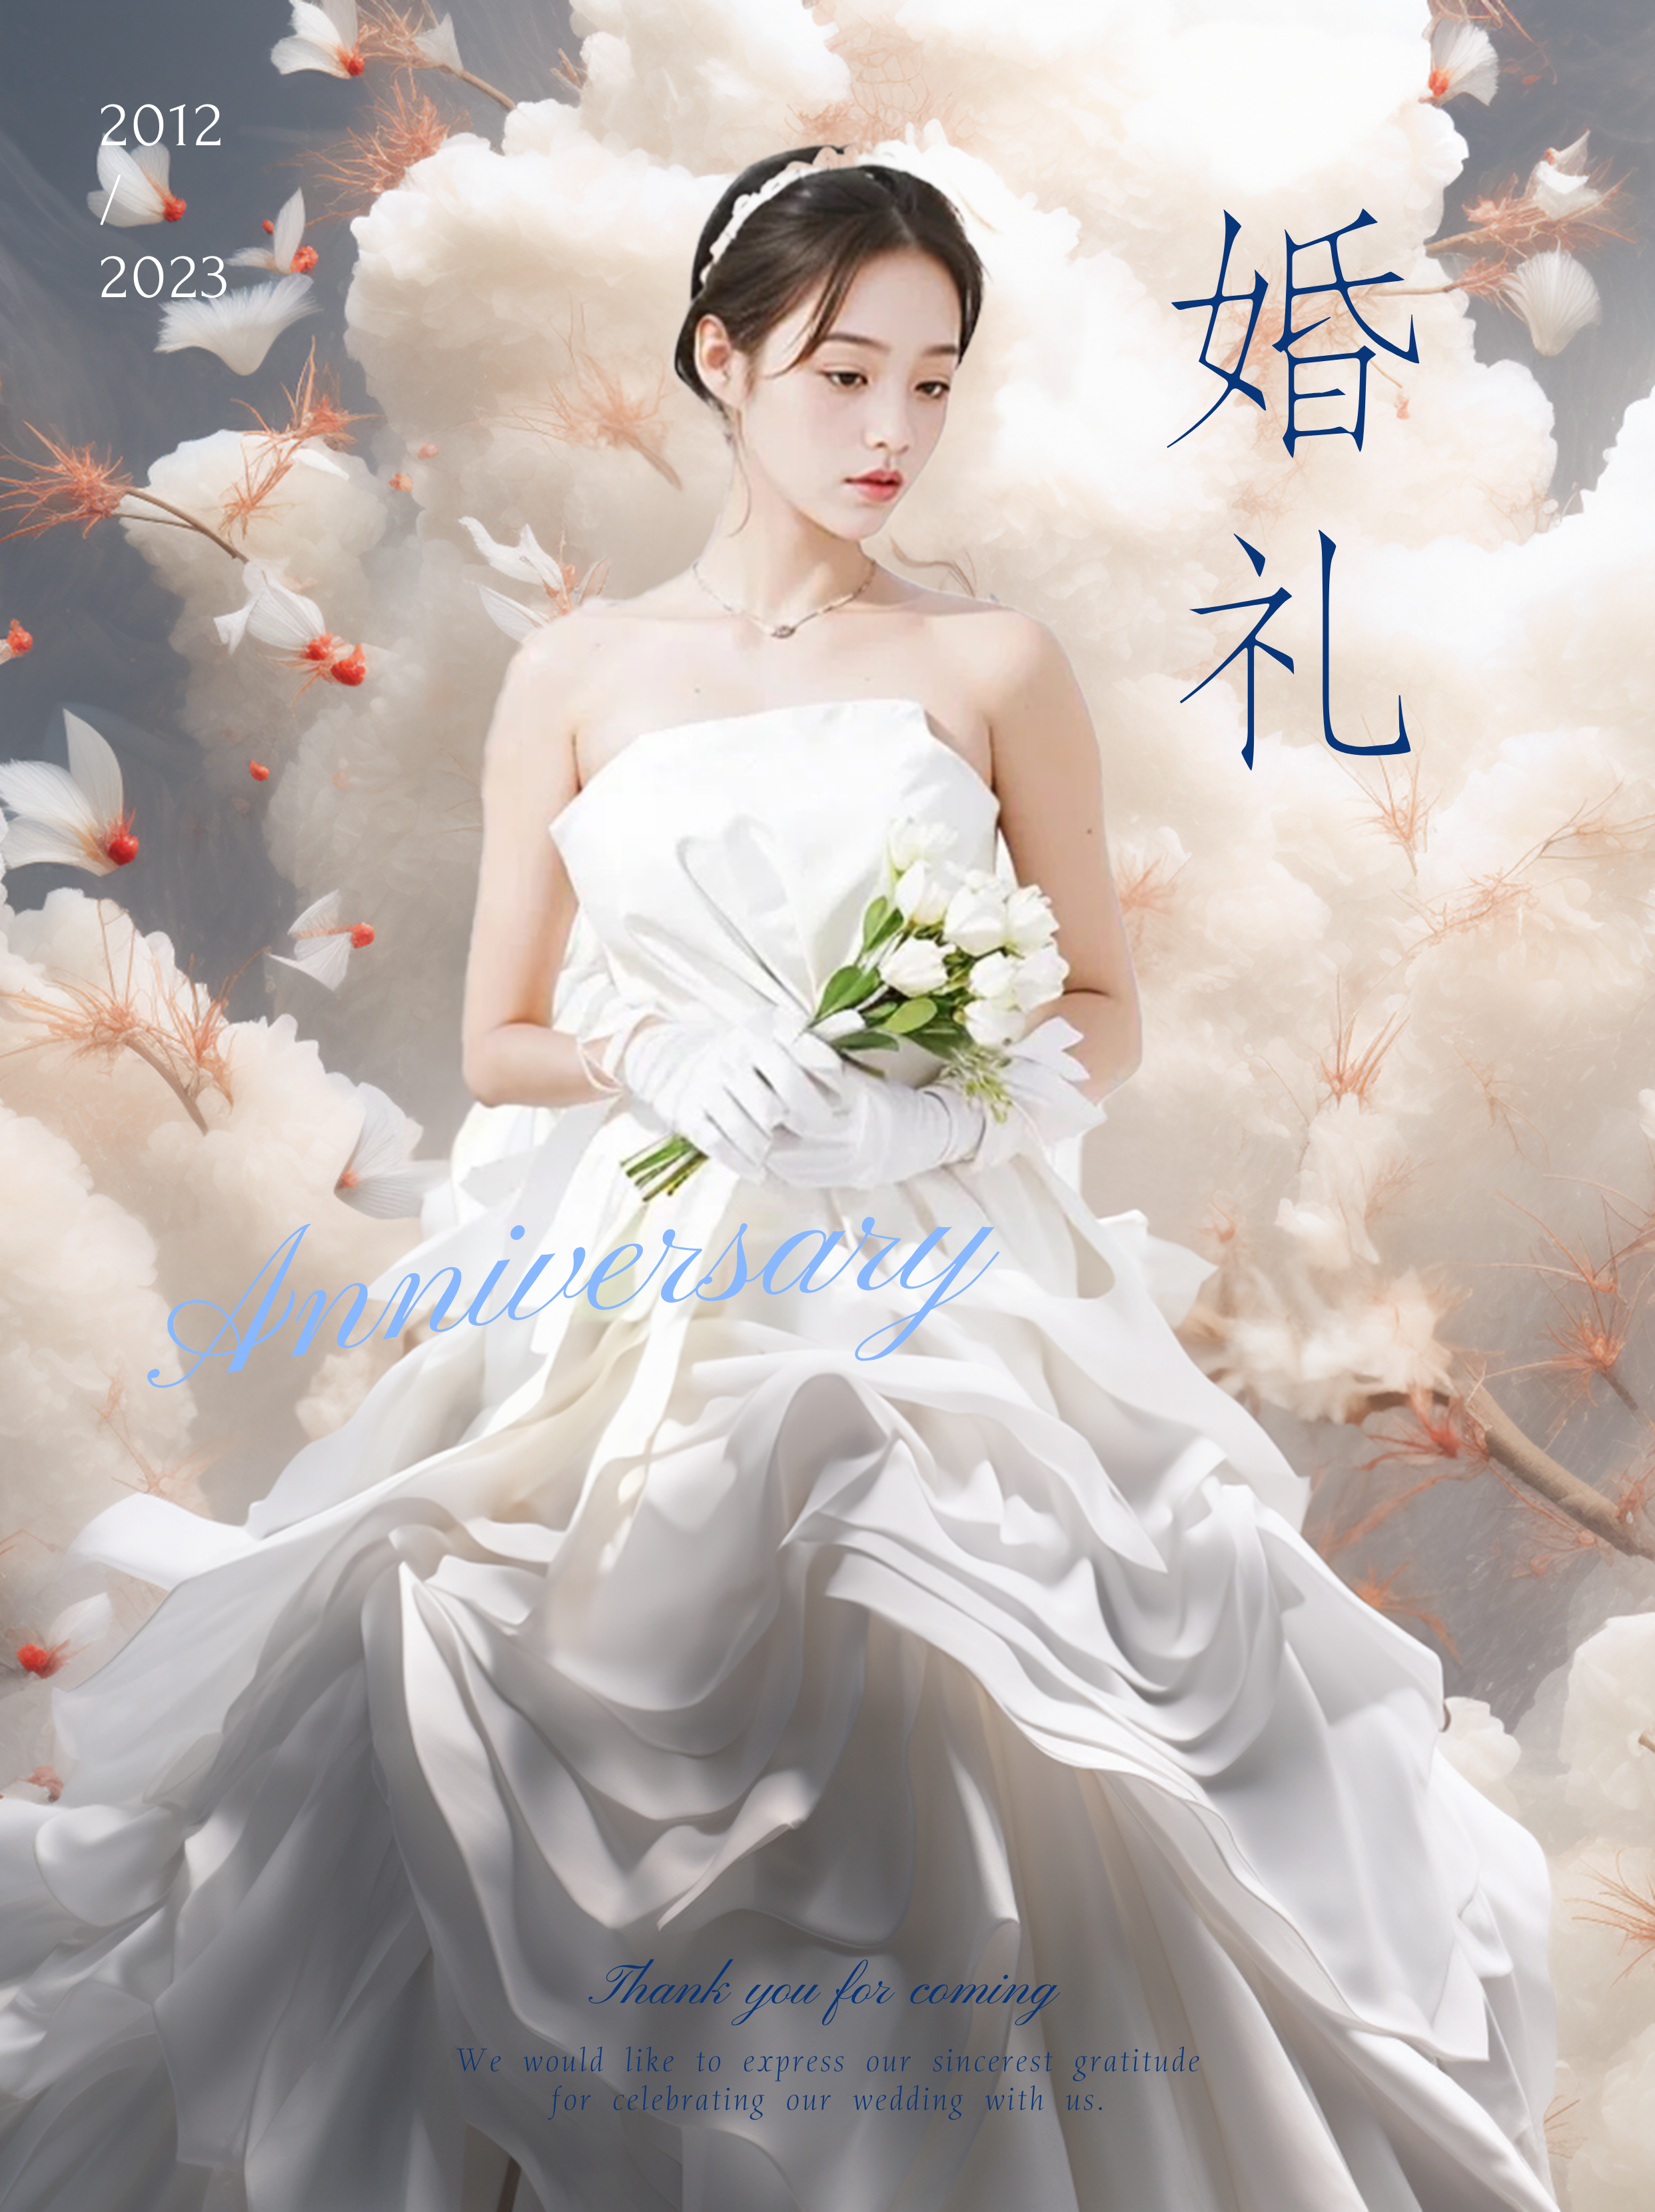
其他几张图也做同样的动作即可。
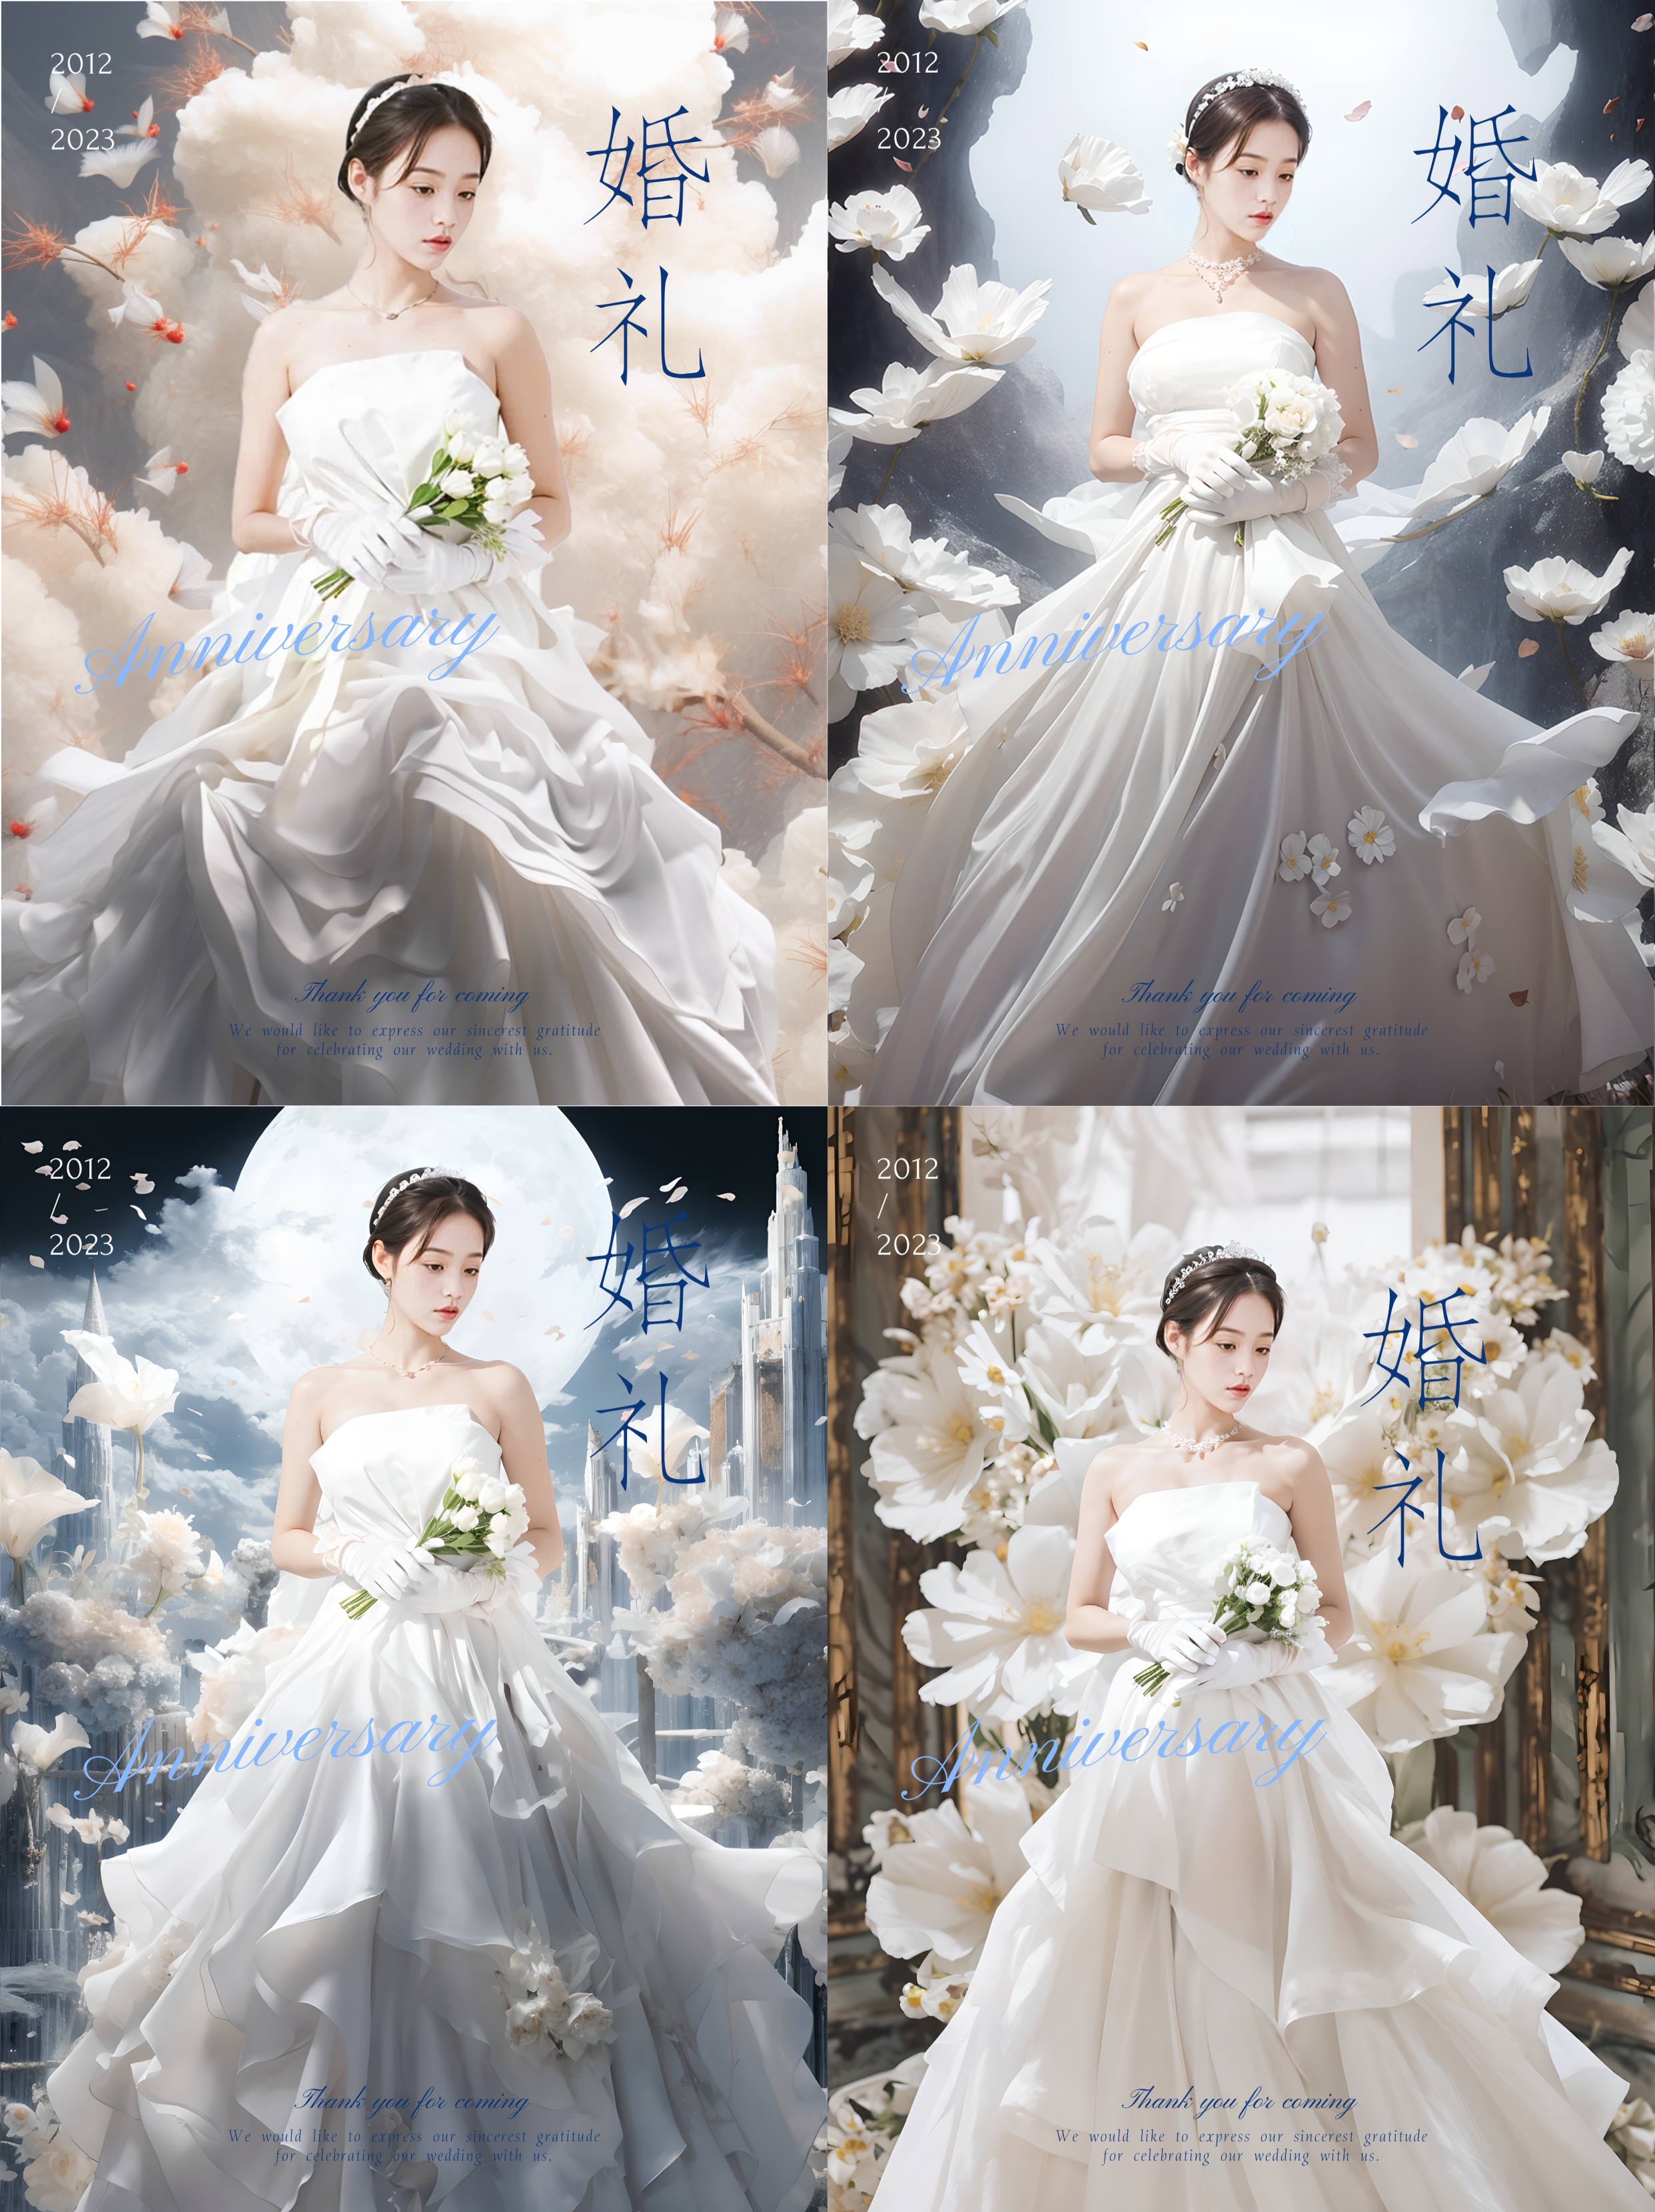
已经有目标风格
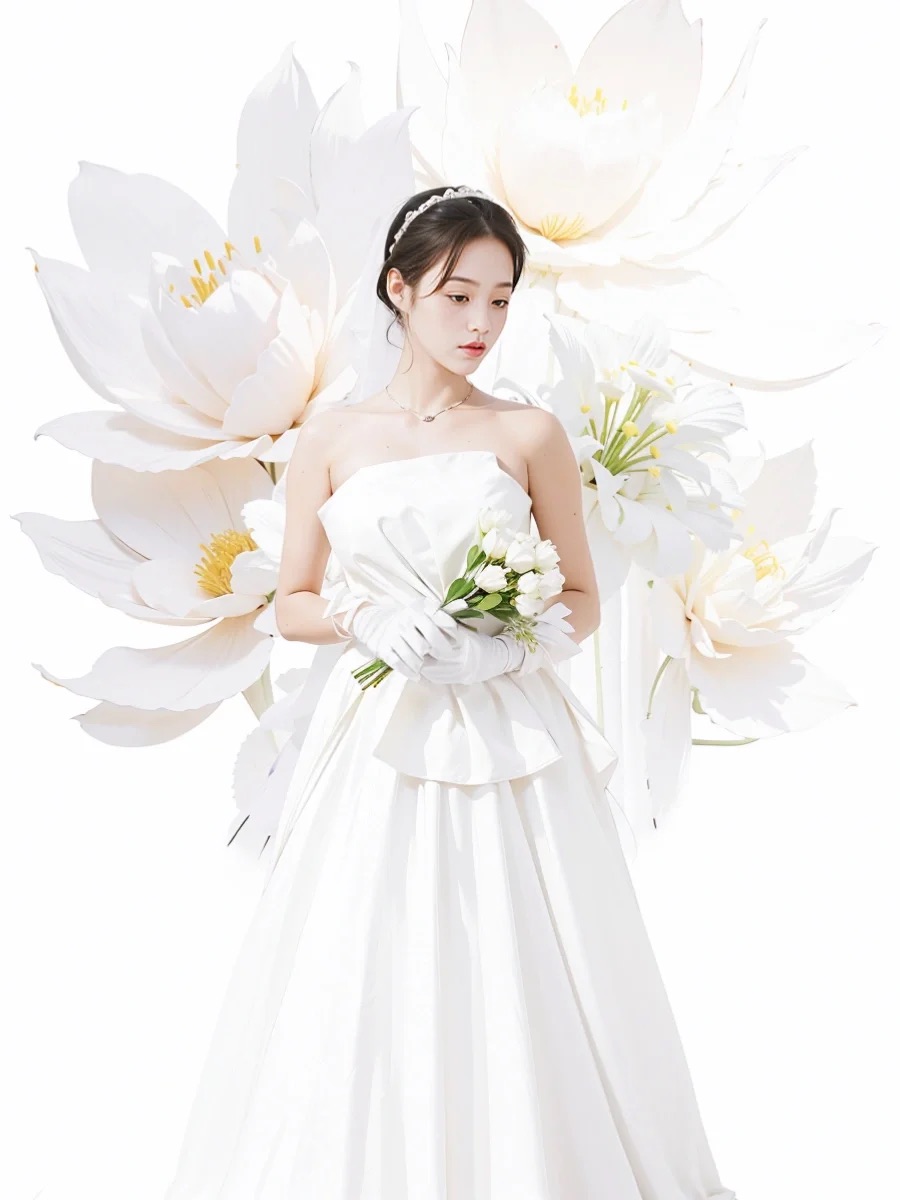
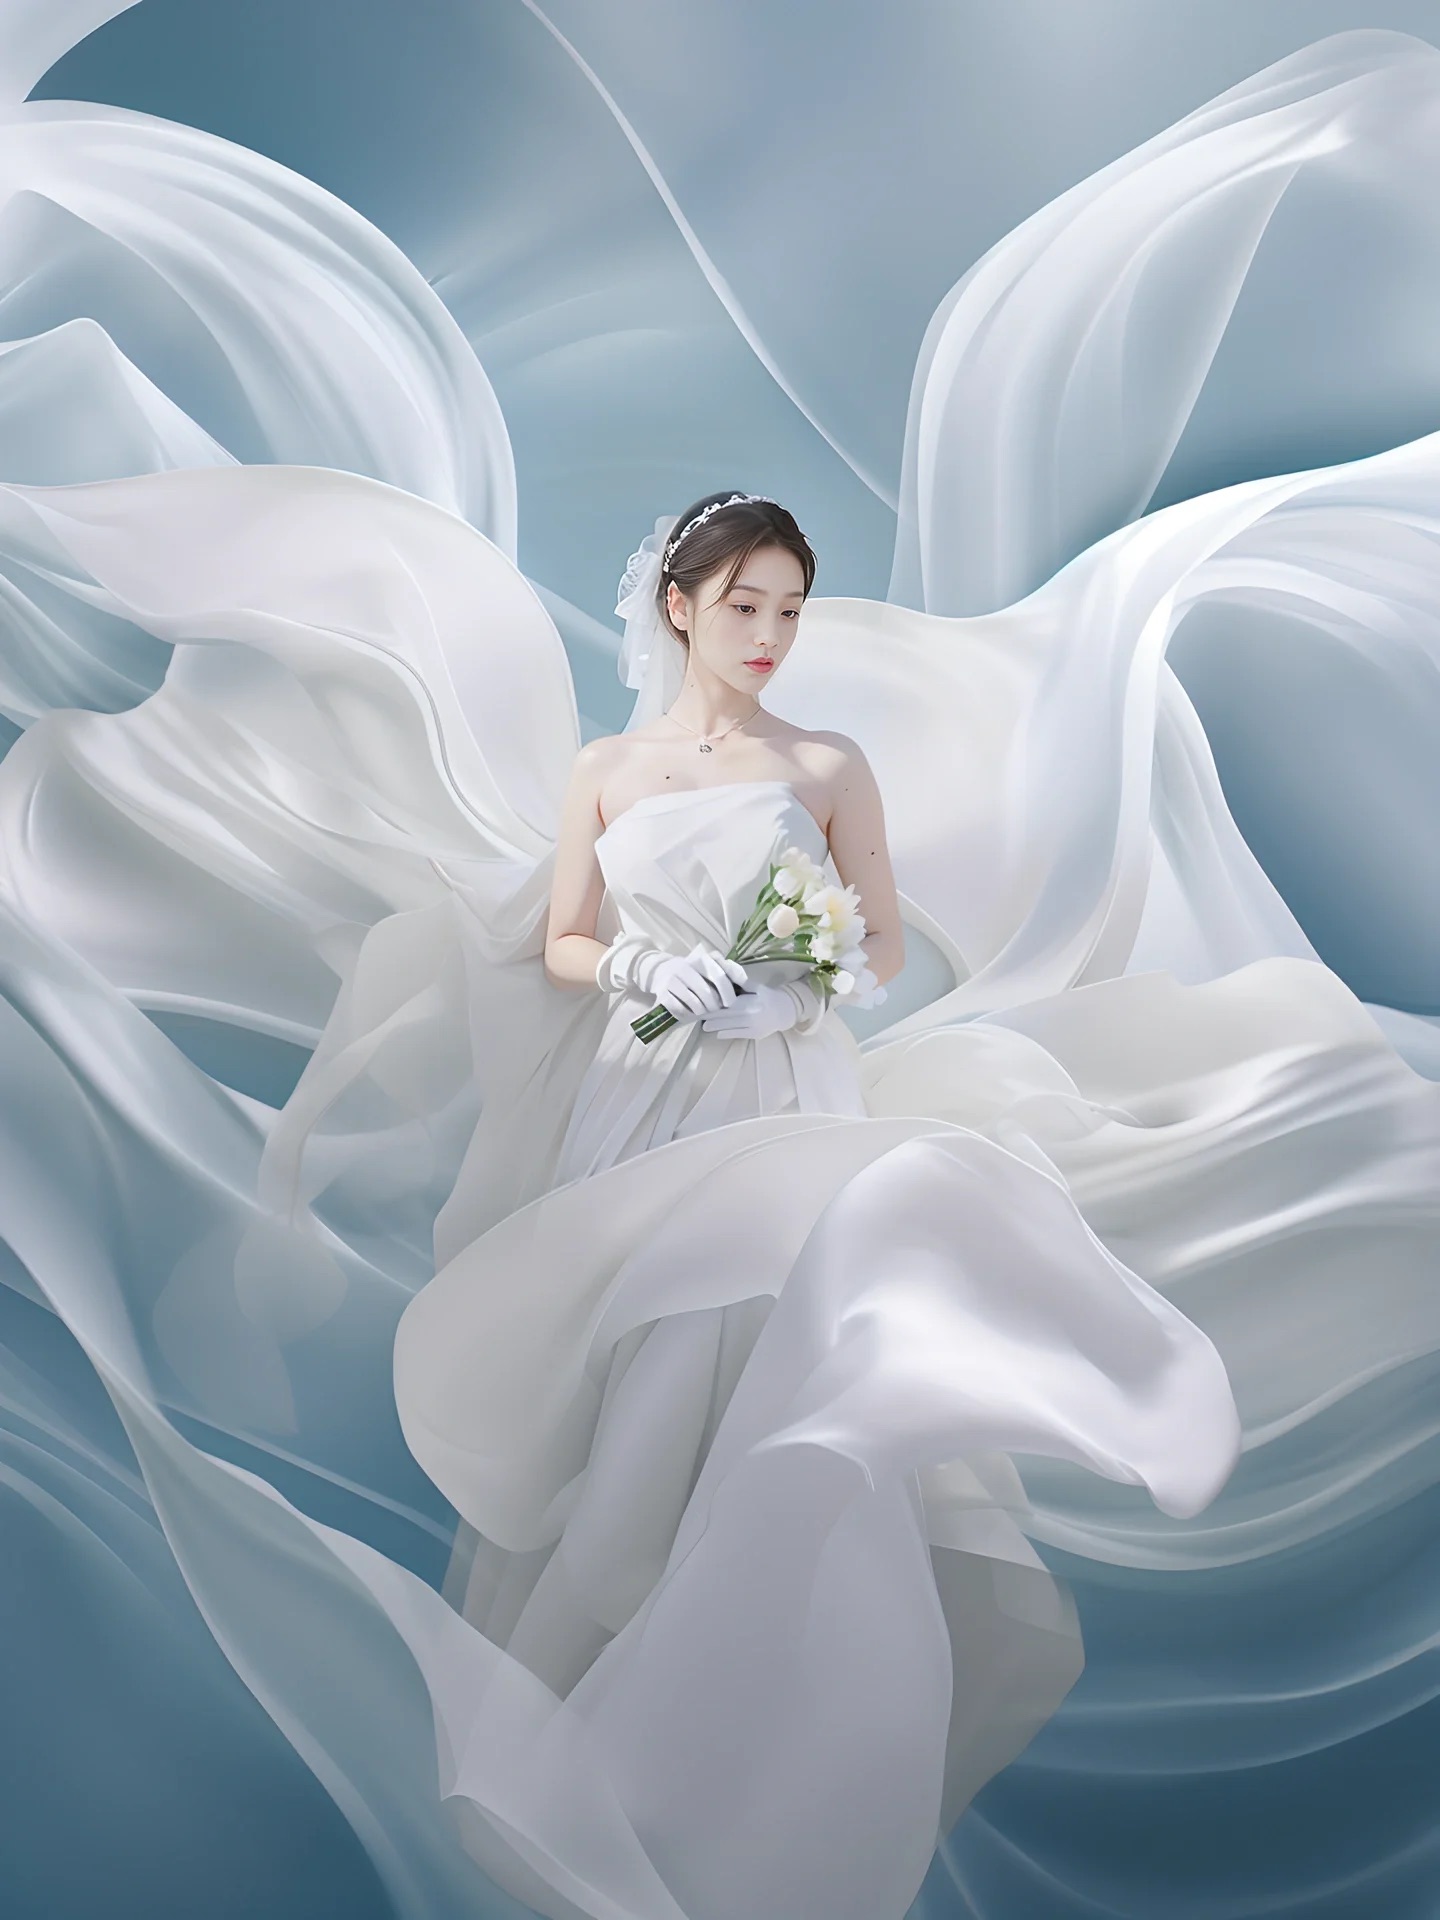
例如上面这组图右边效果感觉还不错,也想实现这样的效果。则可用下面的路径来实现。
操作路径:MJ 的 Describe 反推提示词——MJ 出图(可选垫图)——稿图调整(PS AI)
Describe 反推 + 人物替换
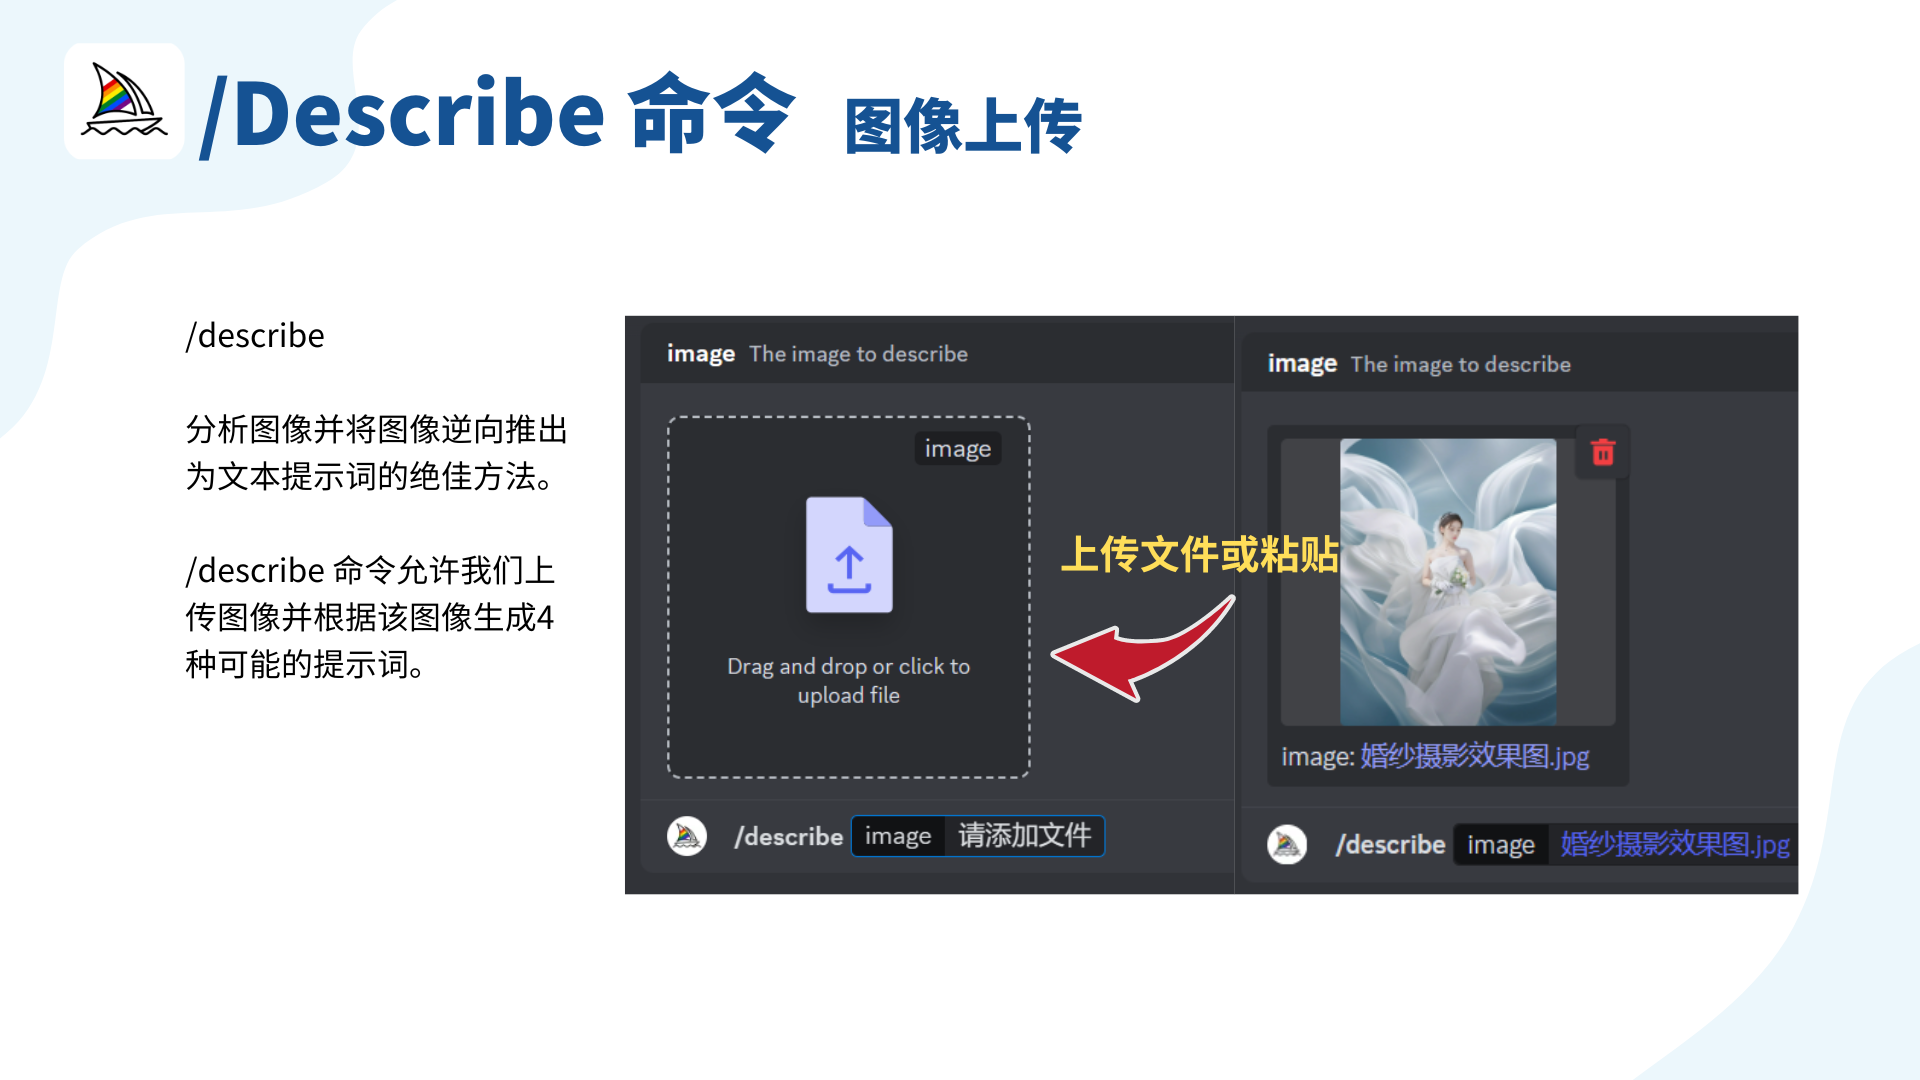
在 Discord 中输入“/describe”命令,上传或者粘贴图片。
提交之后得到 4 条提示词,然后分别点击序号来出图,找到自己满意的一组图。
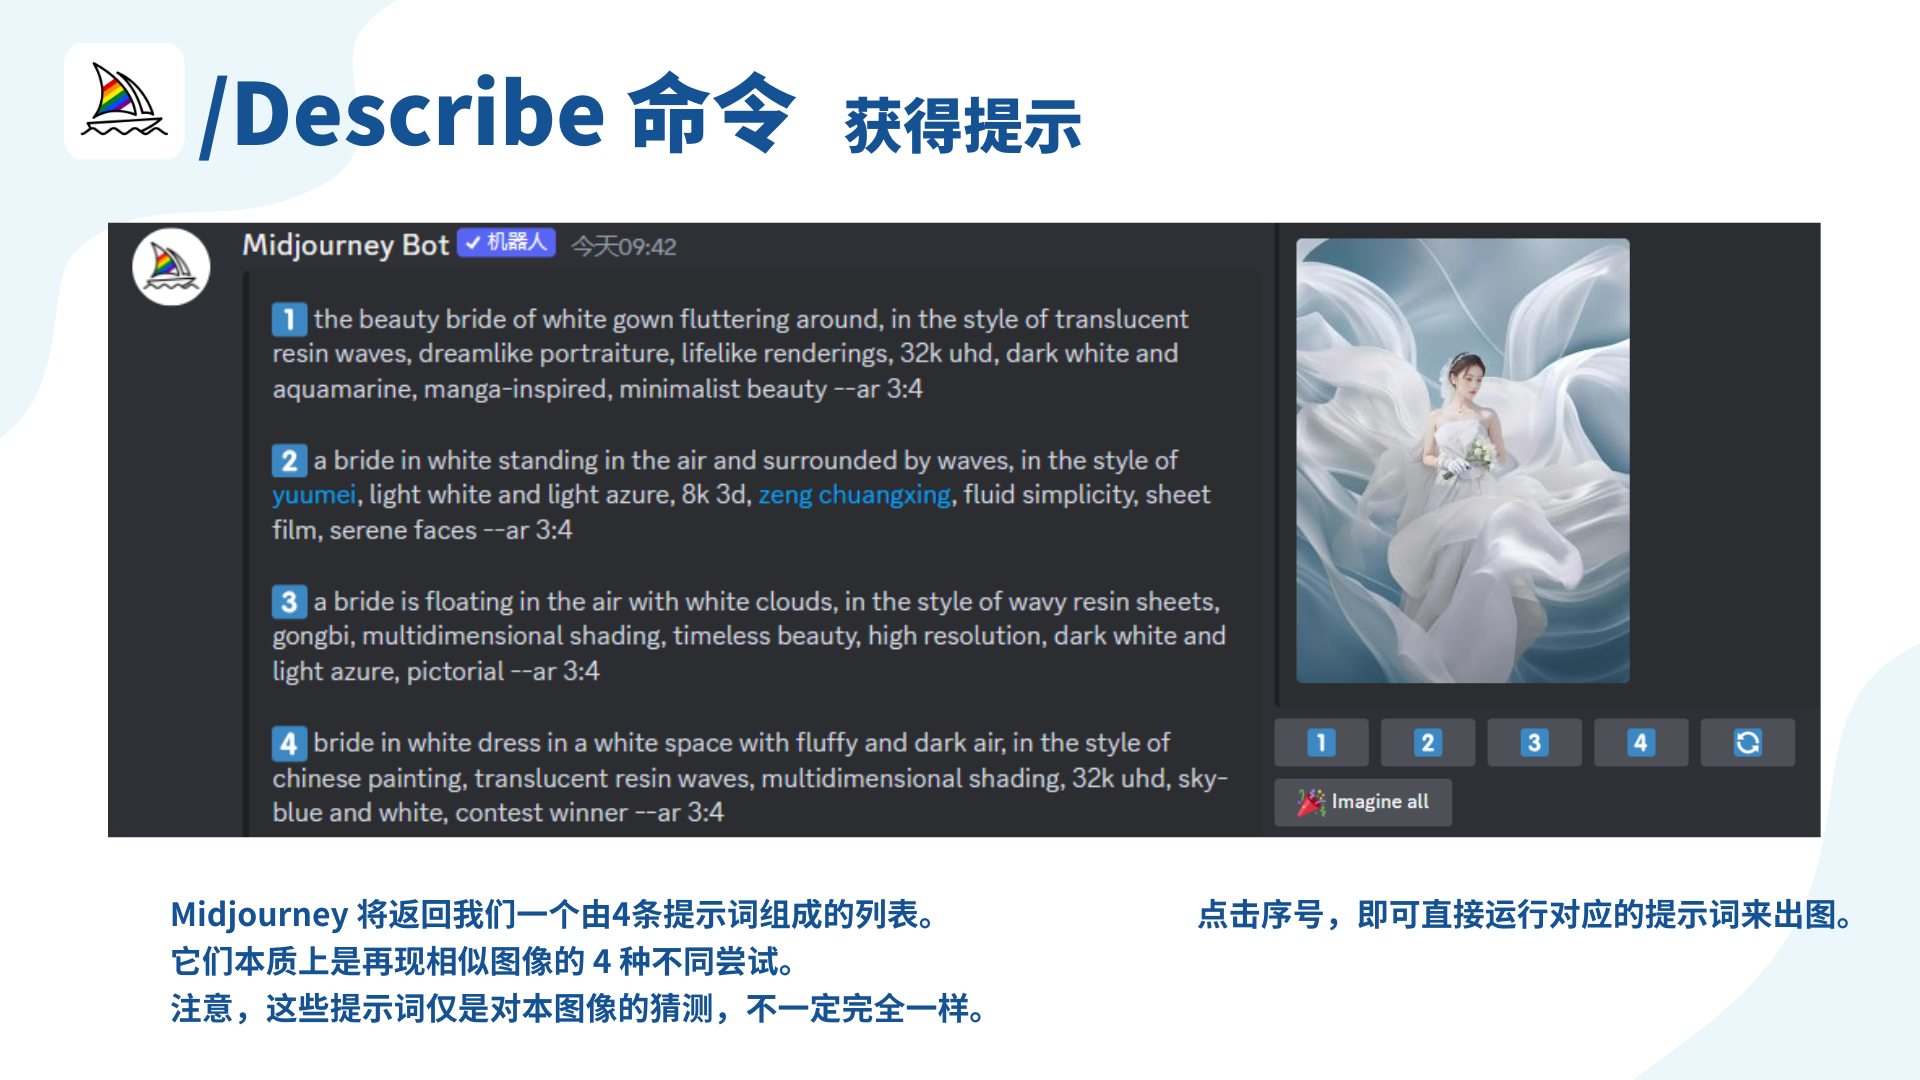
a bride in white standing in the air and surrounded by waves, in the style of yuumei, light white and light azure, 8k 3d, zeng chuangxing, fluid simplicity, sheet film, serene faces --ar 3:4 --s 250
继续使用 1.6 中的 PS AI 操作步骤进行融合操作。
绘制背景 + 目标主体
还有一种办法是,把原来效果图中的人物移除,生成原摄影图类似风格的背景,然后进行融合。
PS 移除目标人物
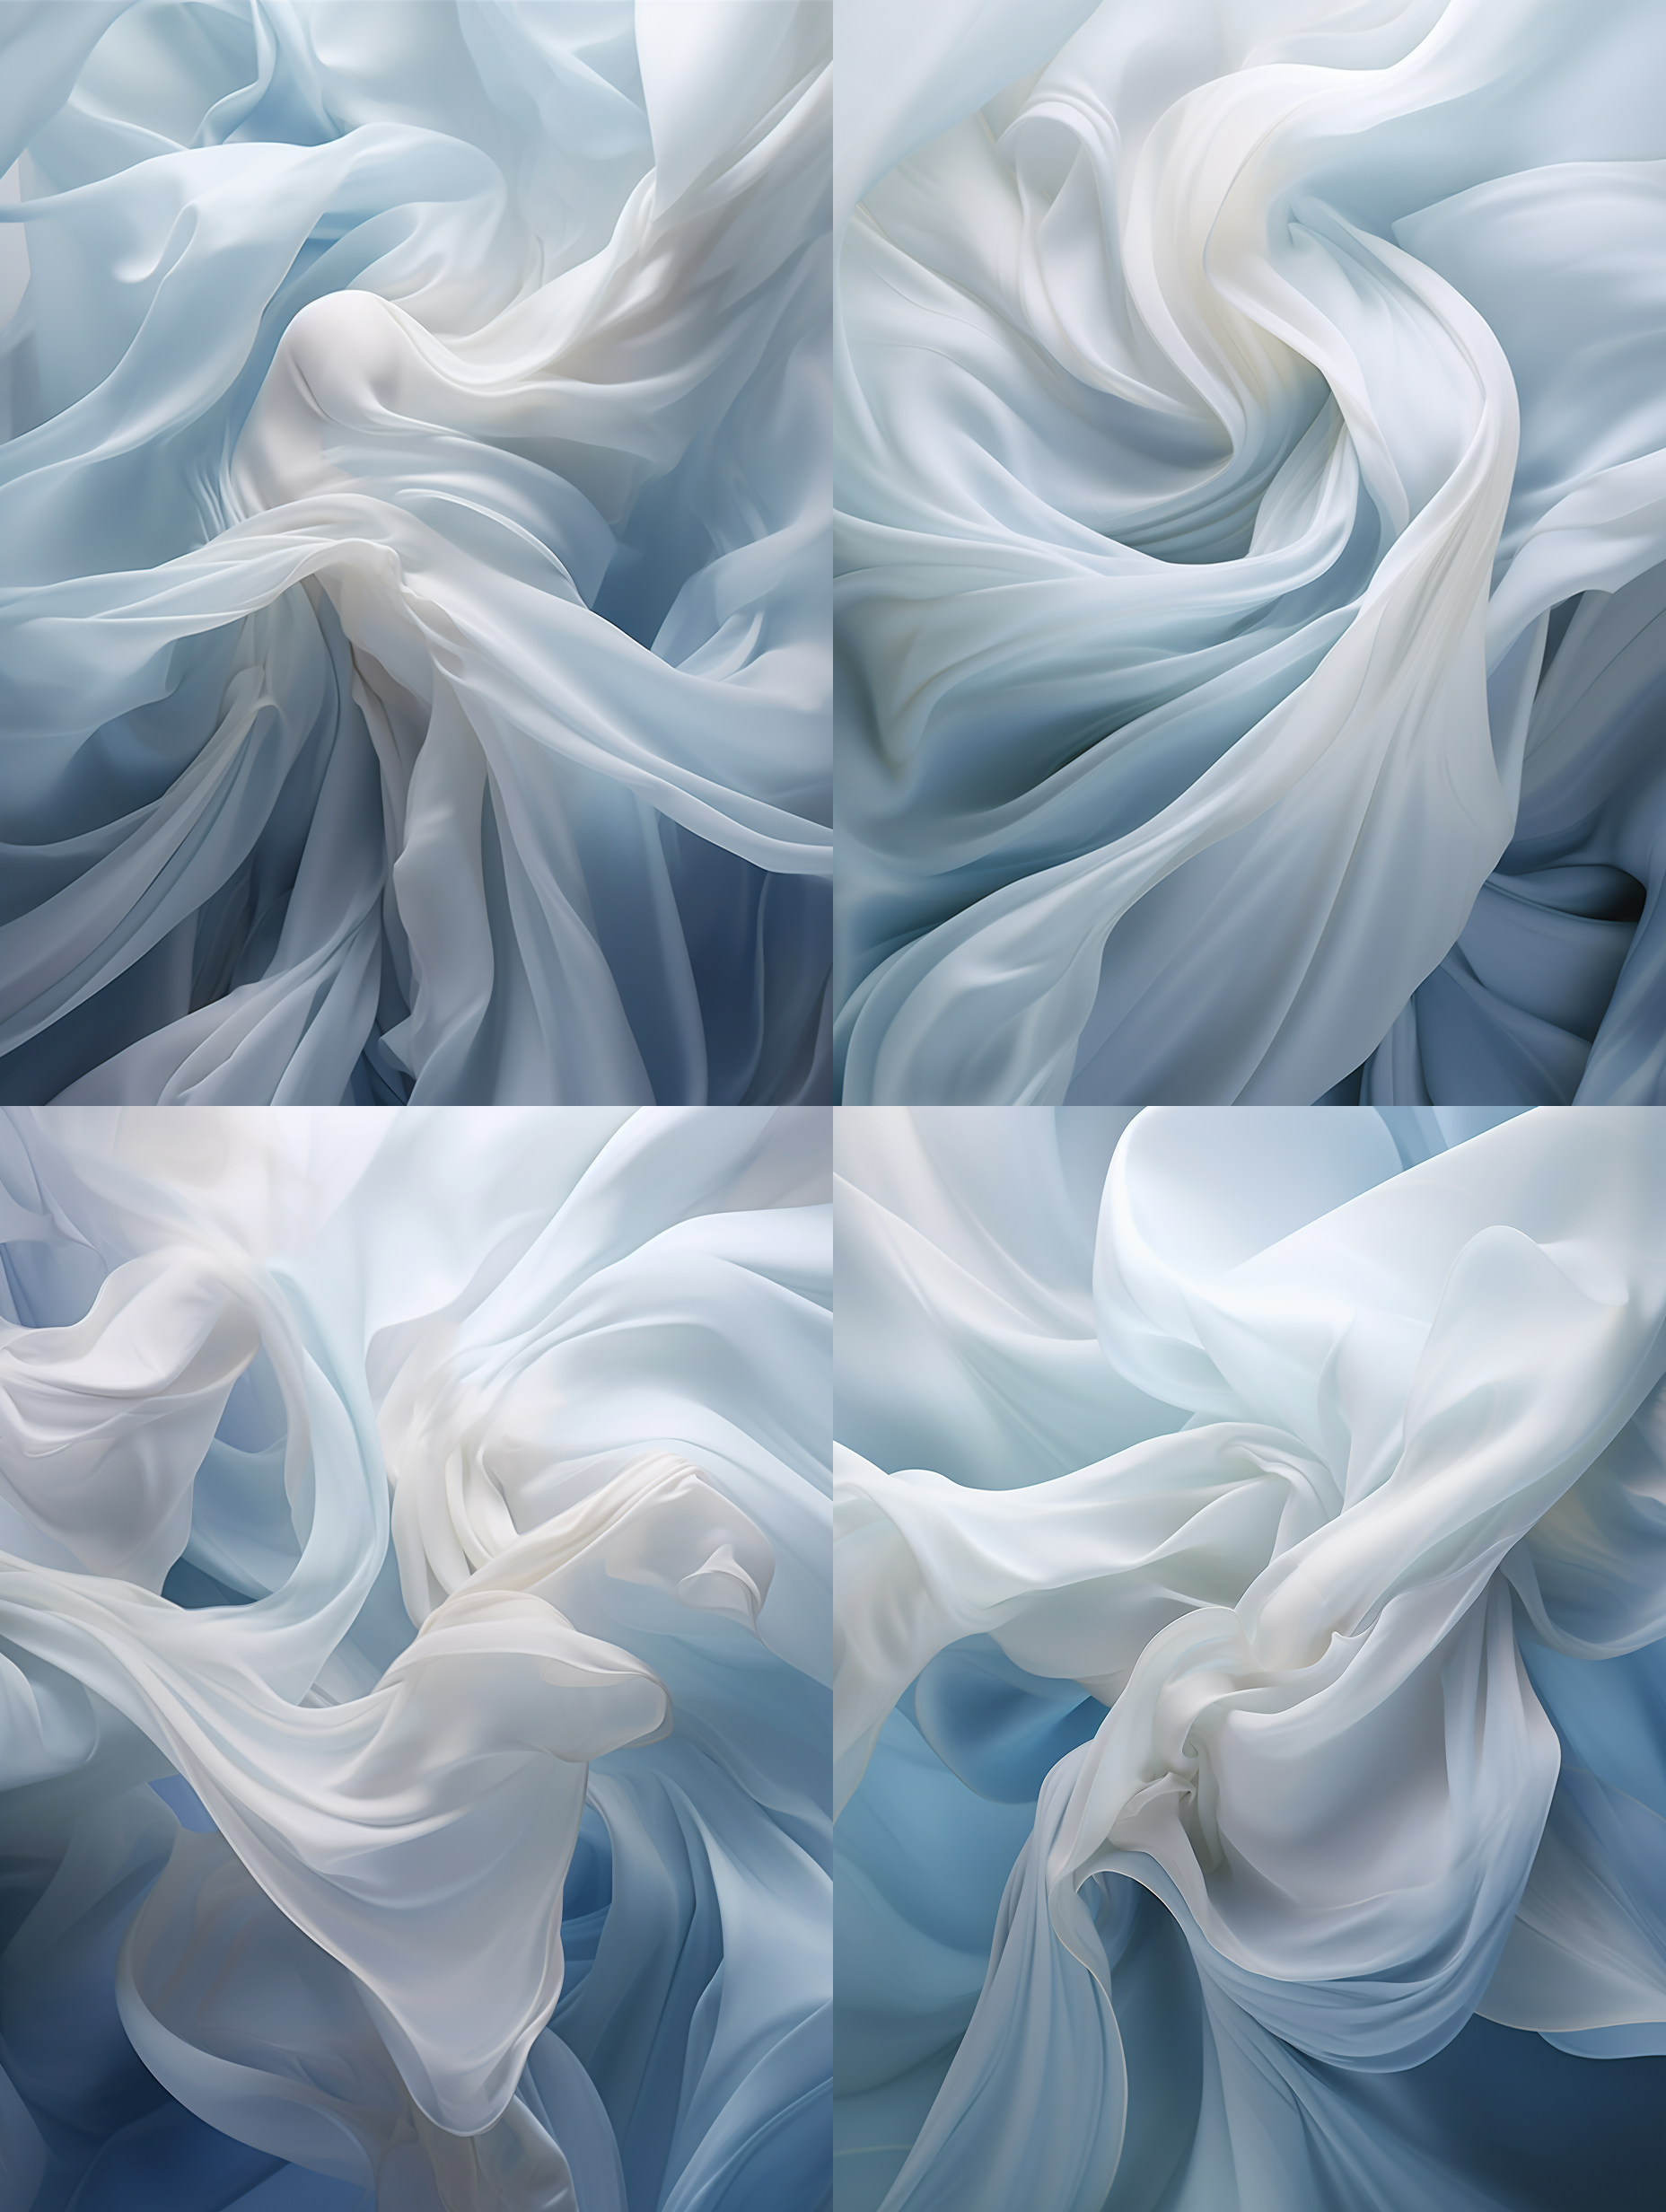
MJ Describe
使用移除人物后空的背景图,使用 Midjourney Describe 出一组背景图。
2.2.3. 使用 PS AI 融合
在 PS 中,将摄影原图与上面的背景图进行融合。依旧使用 1.6 中的步骤来进行操作。
SD 重绘调整细节
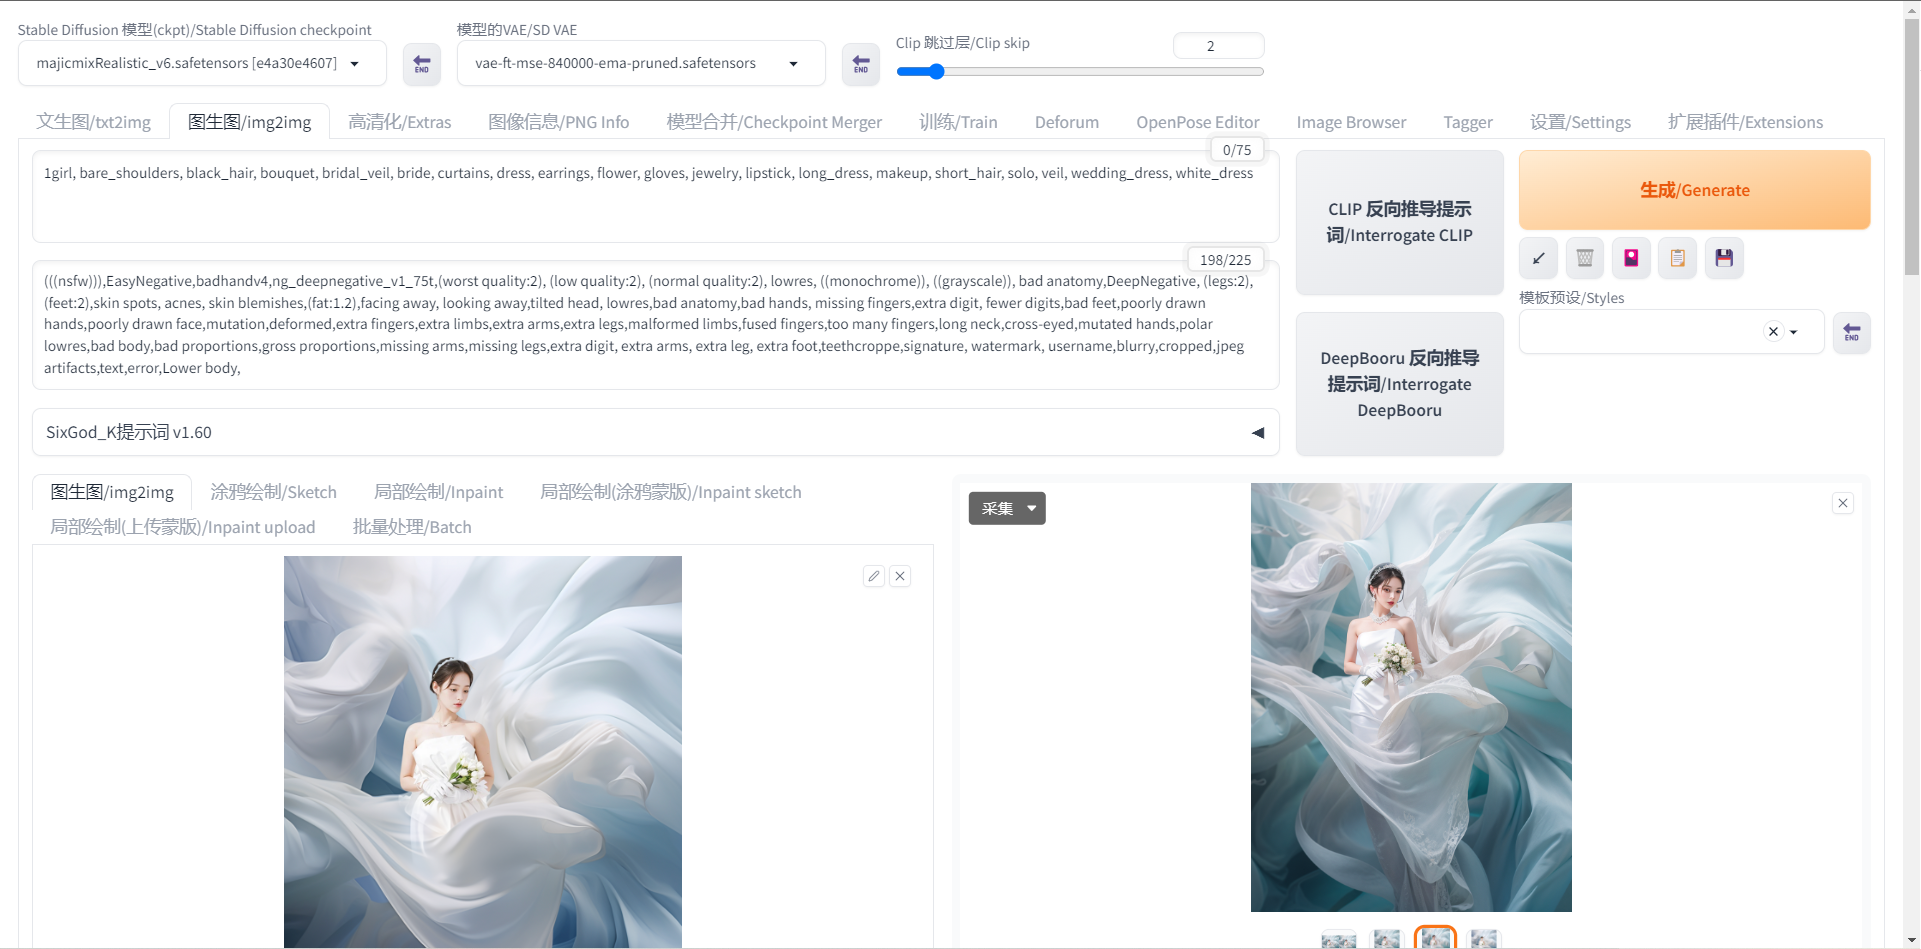
- 跑图必备的基础模型:majicmixRealistic_v6(麦橘写实_v6)
SD 图生图参数配置
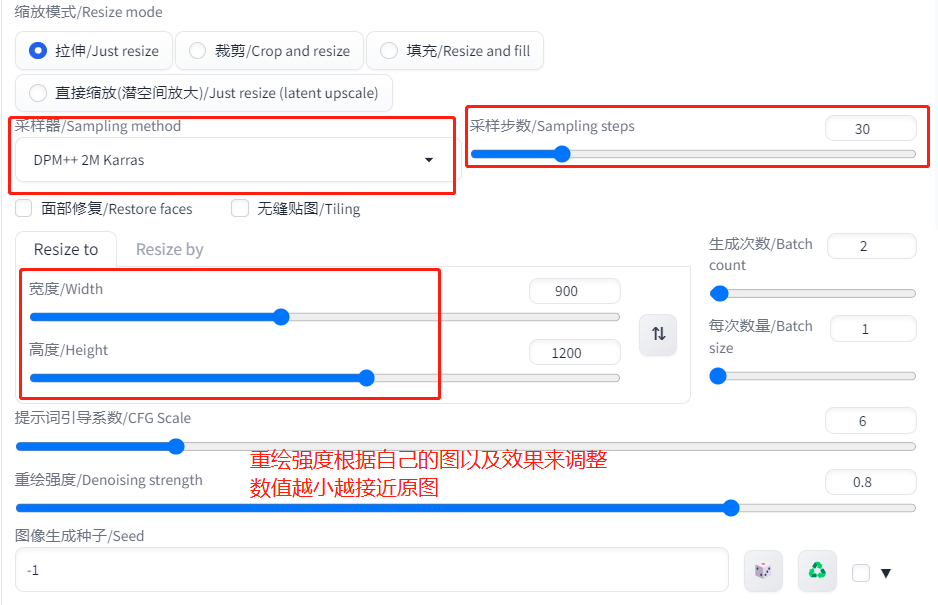
Stable Diffusion 模型(ckpt)/Stable Diffusion checkpoint:majicmixRealistic_v6
采样器/Sampling method:DPM++2M Karras
采样步数/Sampling steps:一般选择 25-30 之间
宽度和高度:根据自己图片宽高比自己设定(3:4,16:9),我这里是横图 1200:900,竖图 900:1200
生成次数/Batch count:2,每次抽卡个数
提示词
利用图生图的 DeepBooru 反推功能
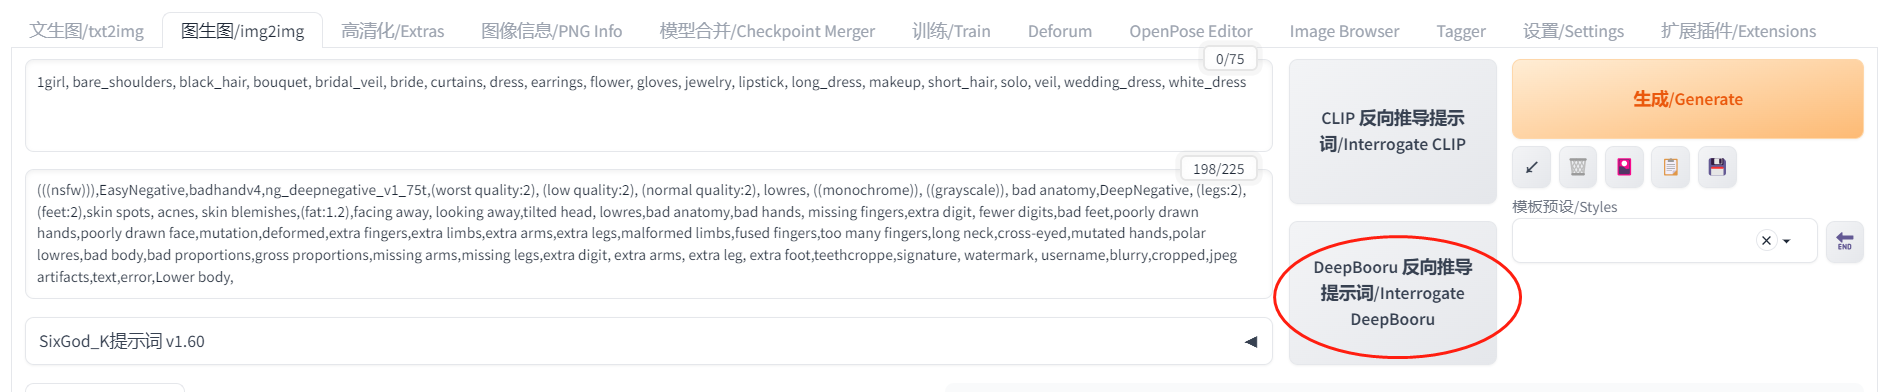
或者使用 Tagger 反推插件
安装地址:https://github.com/toriato/stable-diffusion-webui-wd14-tagger
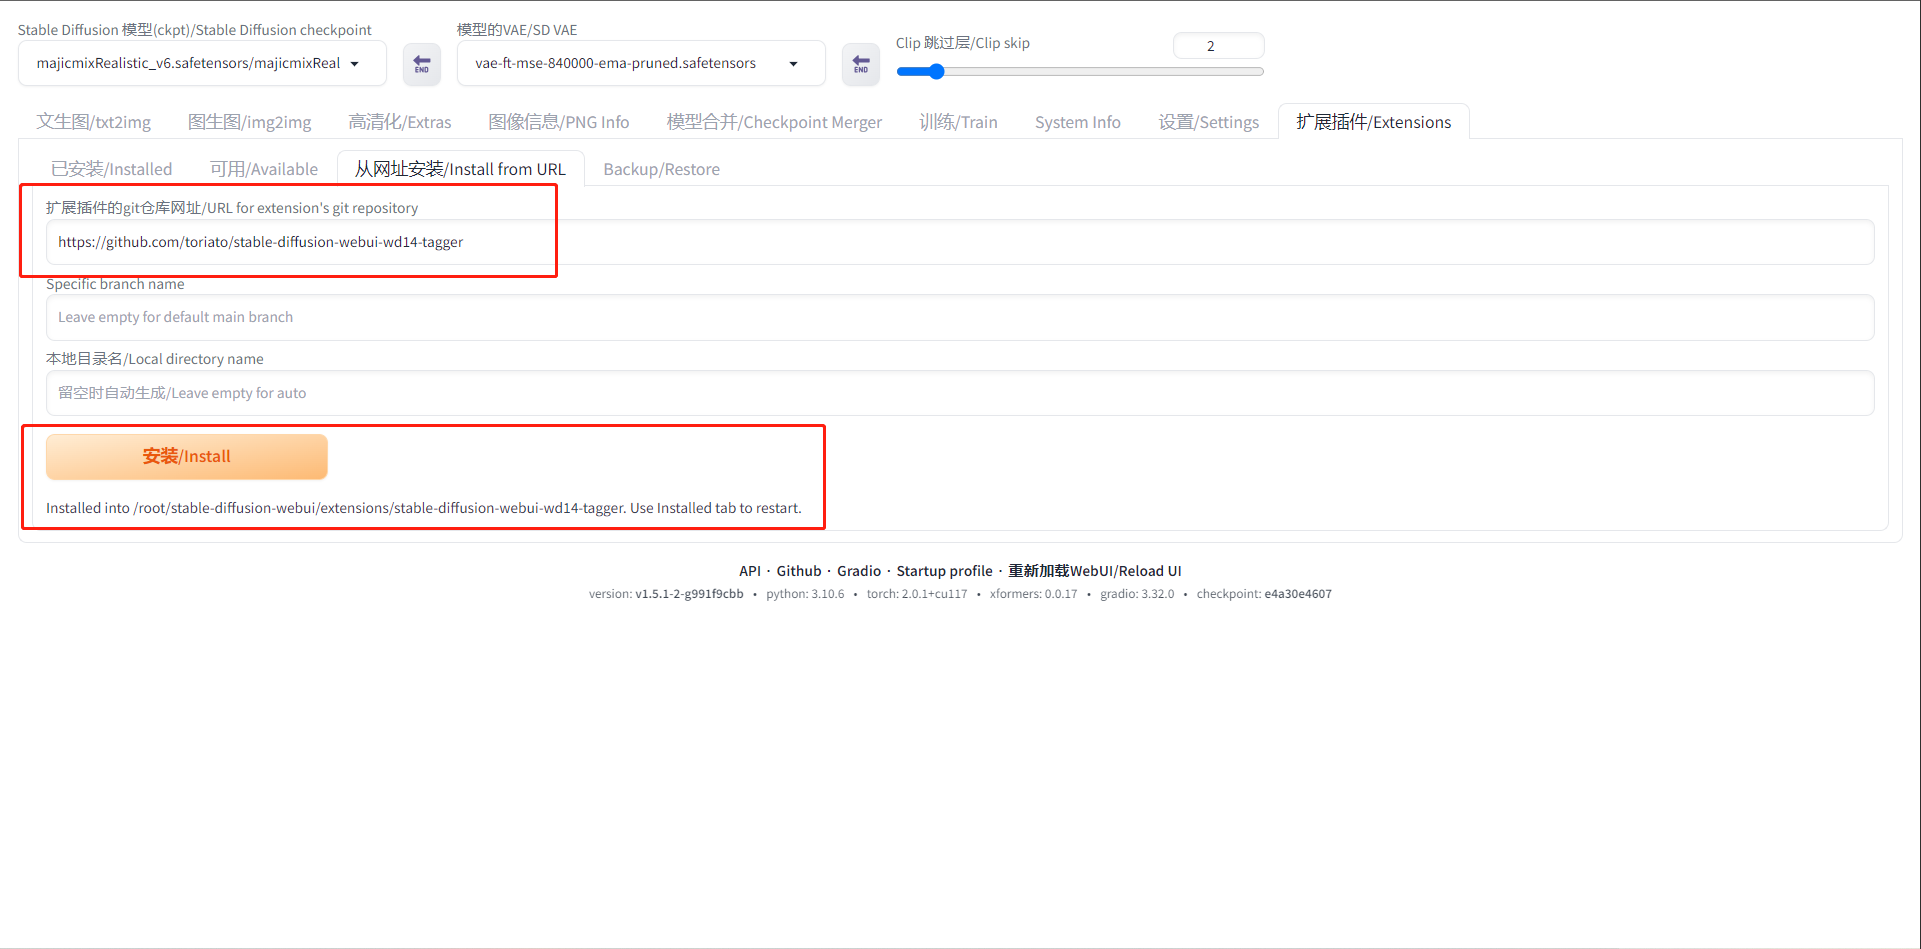
安装完成之后,重新启动 SD后进行操作。
然后上传图片,点击反向推导即可得到提示词。
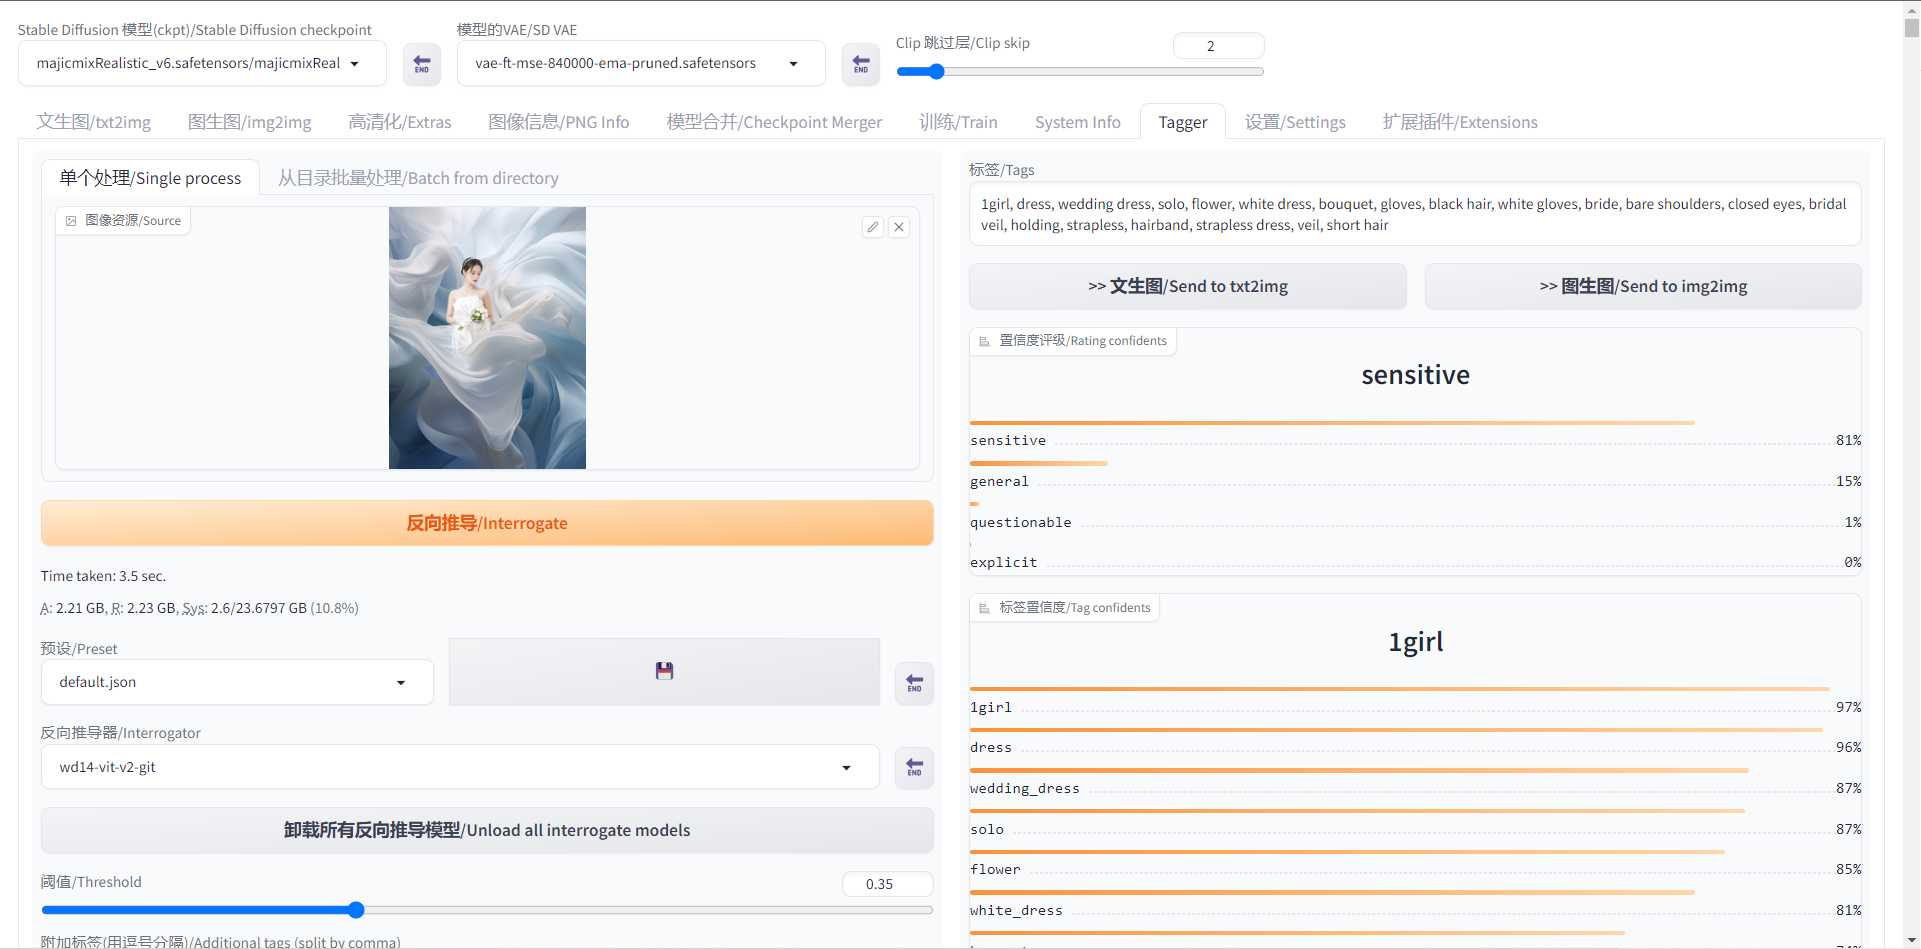
反推得到的正向提示词:
1girl, dress, wedding dress, solo, flower, white dress, bouquet, gloves, black hair, white gloves, bride, bare shoulders, closed eyes, bridal veil, holding, strapless, hairband, strapless dress, veil, short hair
**反向提示词:
**(((nsfw))),EasyNegative,badhandv4,ng_deepnegative_v1_75t,(worst quality:2), (low quality:2), (normal quality:2), lowres, ((monochrome)), ((grayscale)), bad anatomy,DeepNegative, skin spots, acnes, skin blemishes,(fat:1.2),facing away, looking away,tilted head, lowres,bad anatomy,bad hands, missing fingers,extra digit, fewer digits,bad feet,poorly drawn hands,poorly drawn face,mutation,deformed,extra fingers,extra limbs,extra arms,extra legs,malformed limbs,fused fingers,too many fingers,long neck,cross-eyed,mutated hands,polar lowres,bad body,bad proportions,gross proportions,missing arms,missing legs,extra digit, extra arms, extra leg, extra foot,teethcroppe,signature, watermark, username,blurry,cropped,jpeg artifacts,text,error,Lower body exposure
ControlNet 参数配置
设置参数
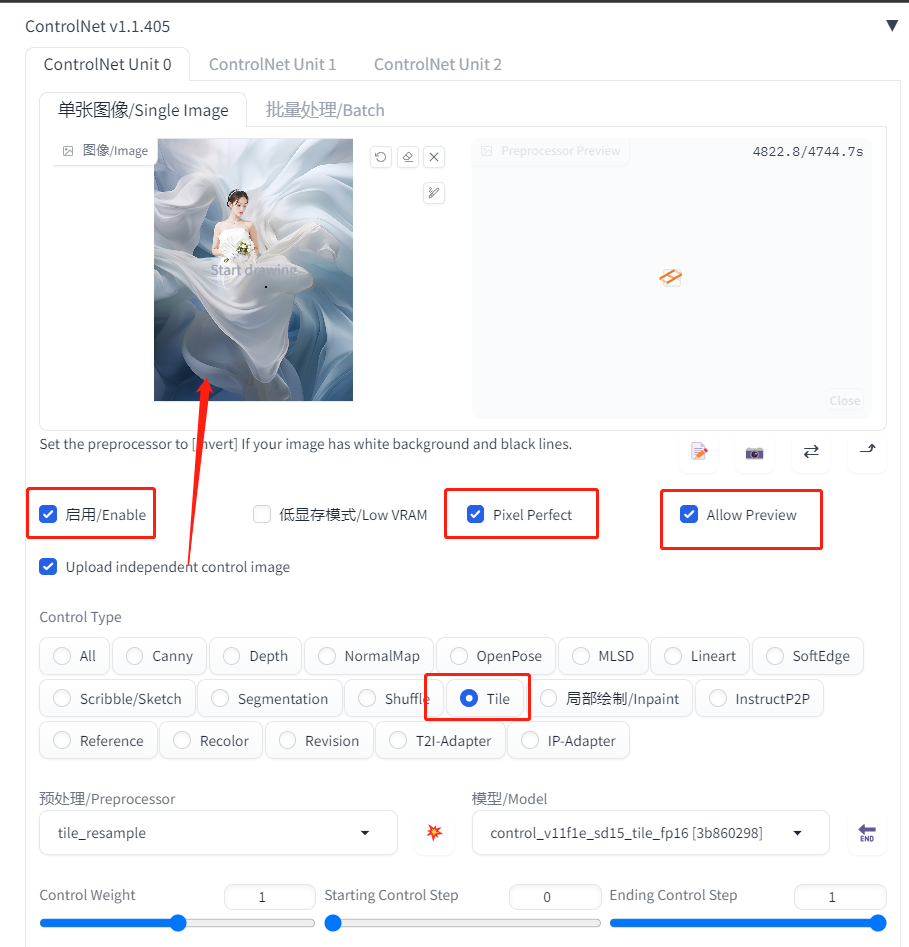
启用:勾选
完美像素模型:勾选
允许预览:勾选
控制类型:Tile
预处理:tile_resample
模型:control_v11p_tile
接下来的两个参数:Control Weight 和 Ending Control Step
Control Weight: 1
Ending Control Step:1,代表着 ControlNet 什么时候停止介入,数值越大后面留给模型处理融合的时间就越少,融合度就会变差,得多尝试,跟你图案的复杂程度也有关系。
可以保持不变,也可进行调整
高清化图像
选中图片,点击 >>高清化。
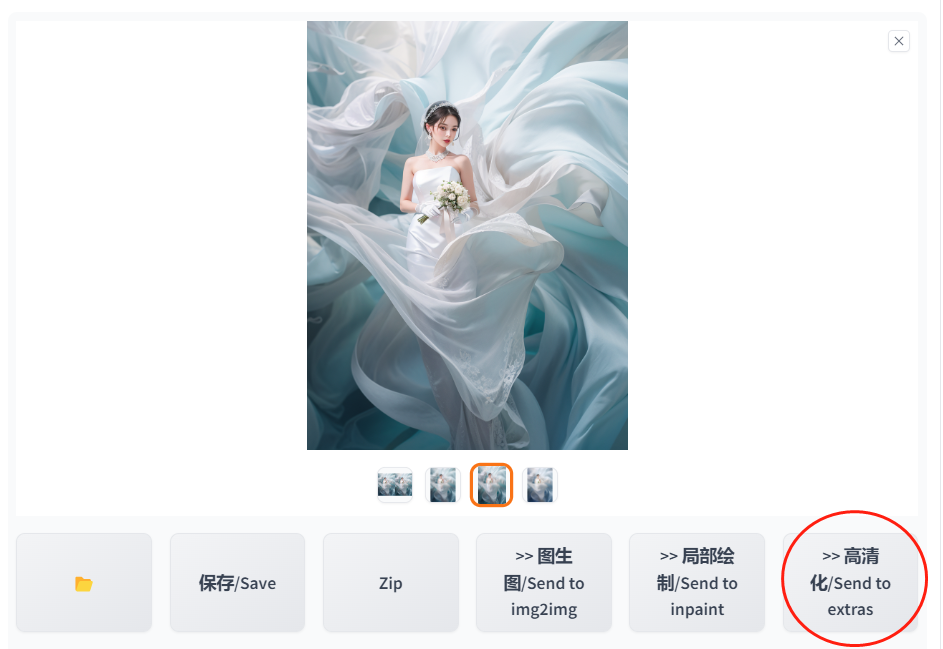
**缩放比例/Resize:**2倍或者4倍还是其它倍,自己设置
**放大模型:**R-ESRGAN 4X+
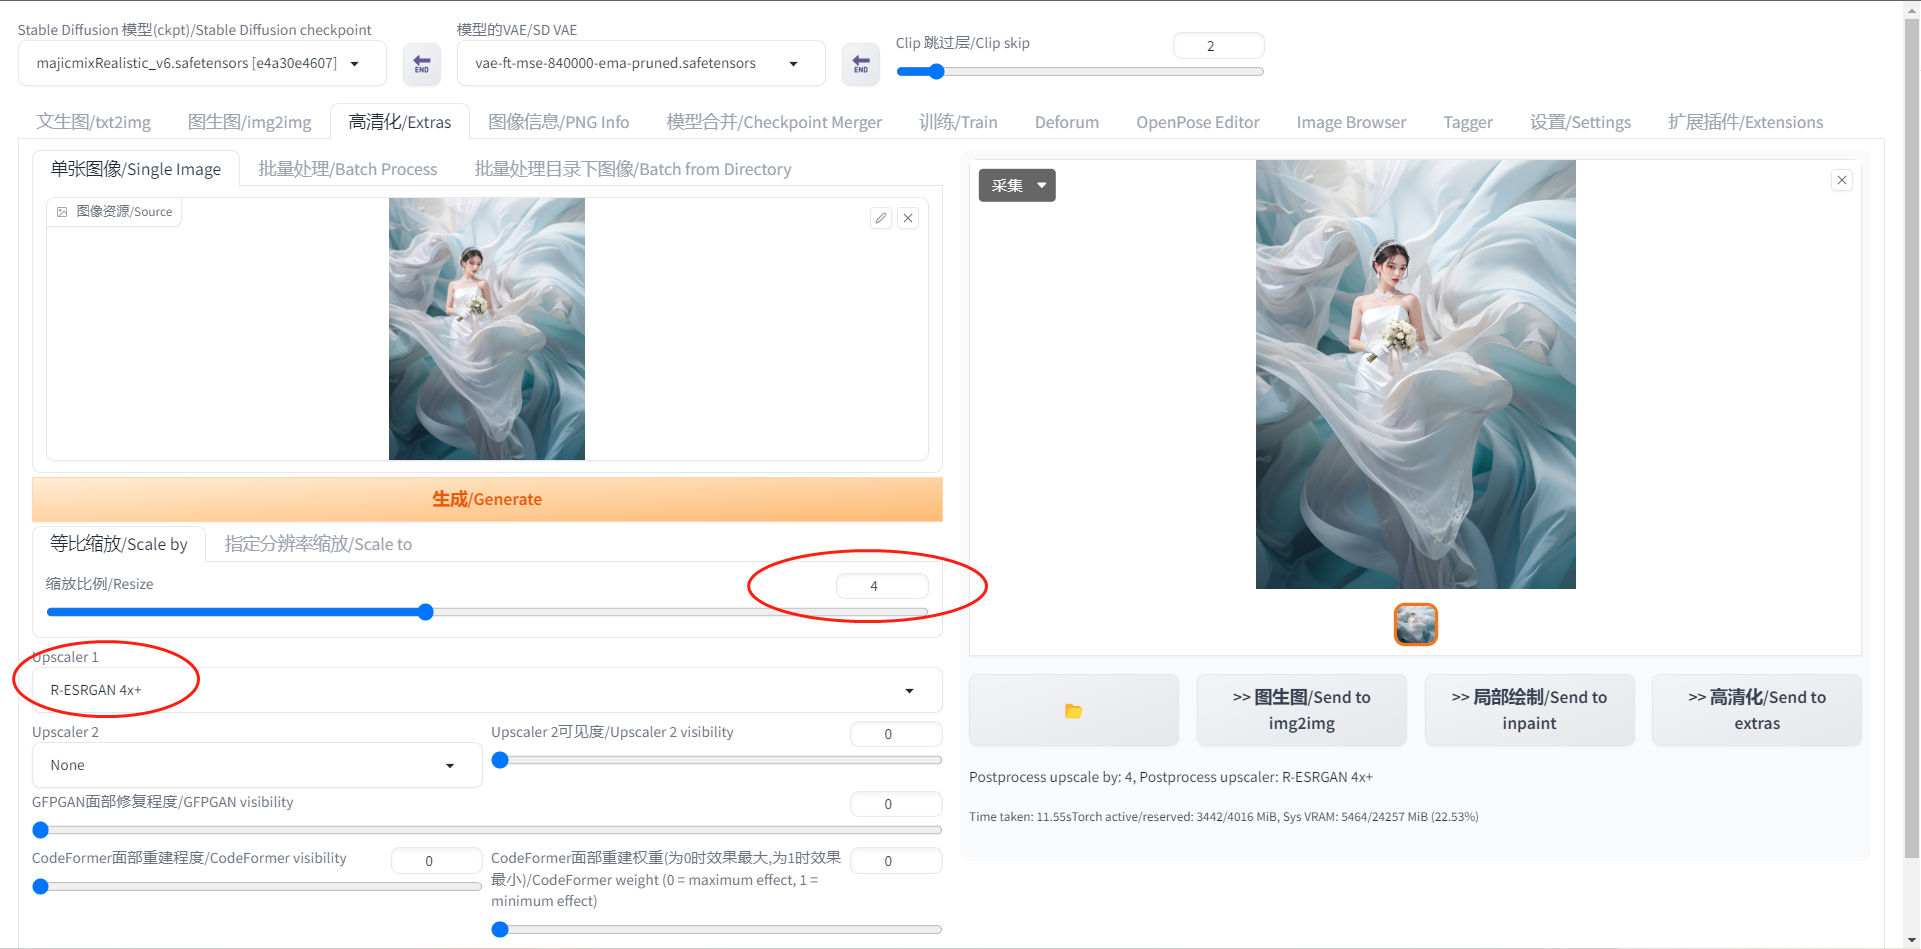
完成之后,下载右边高清图即可。
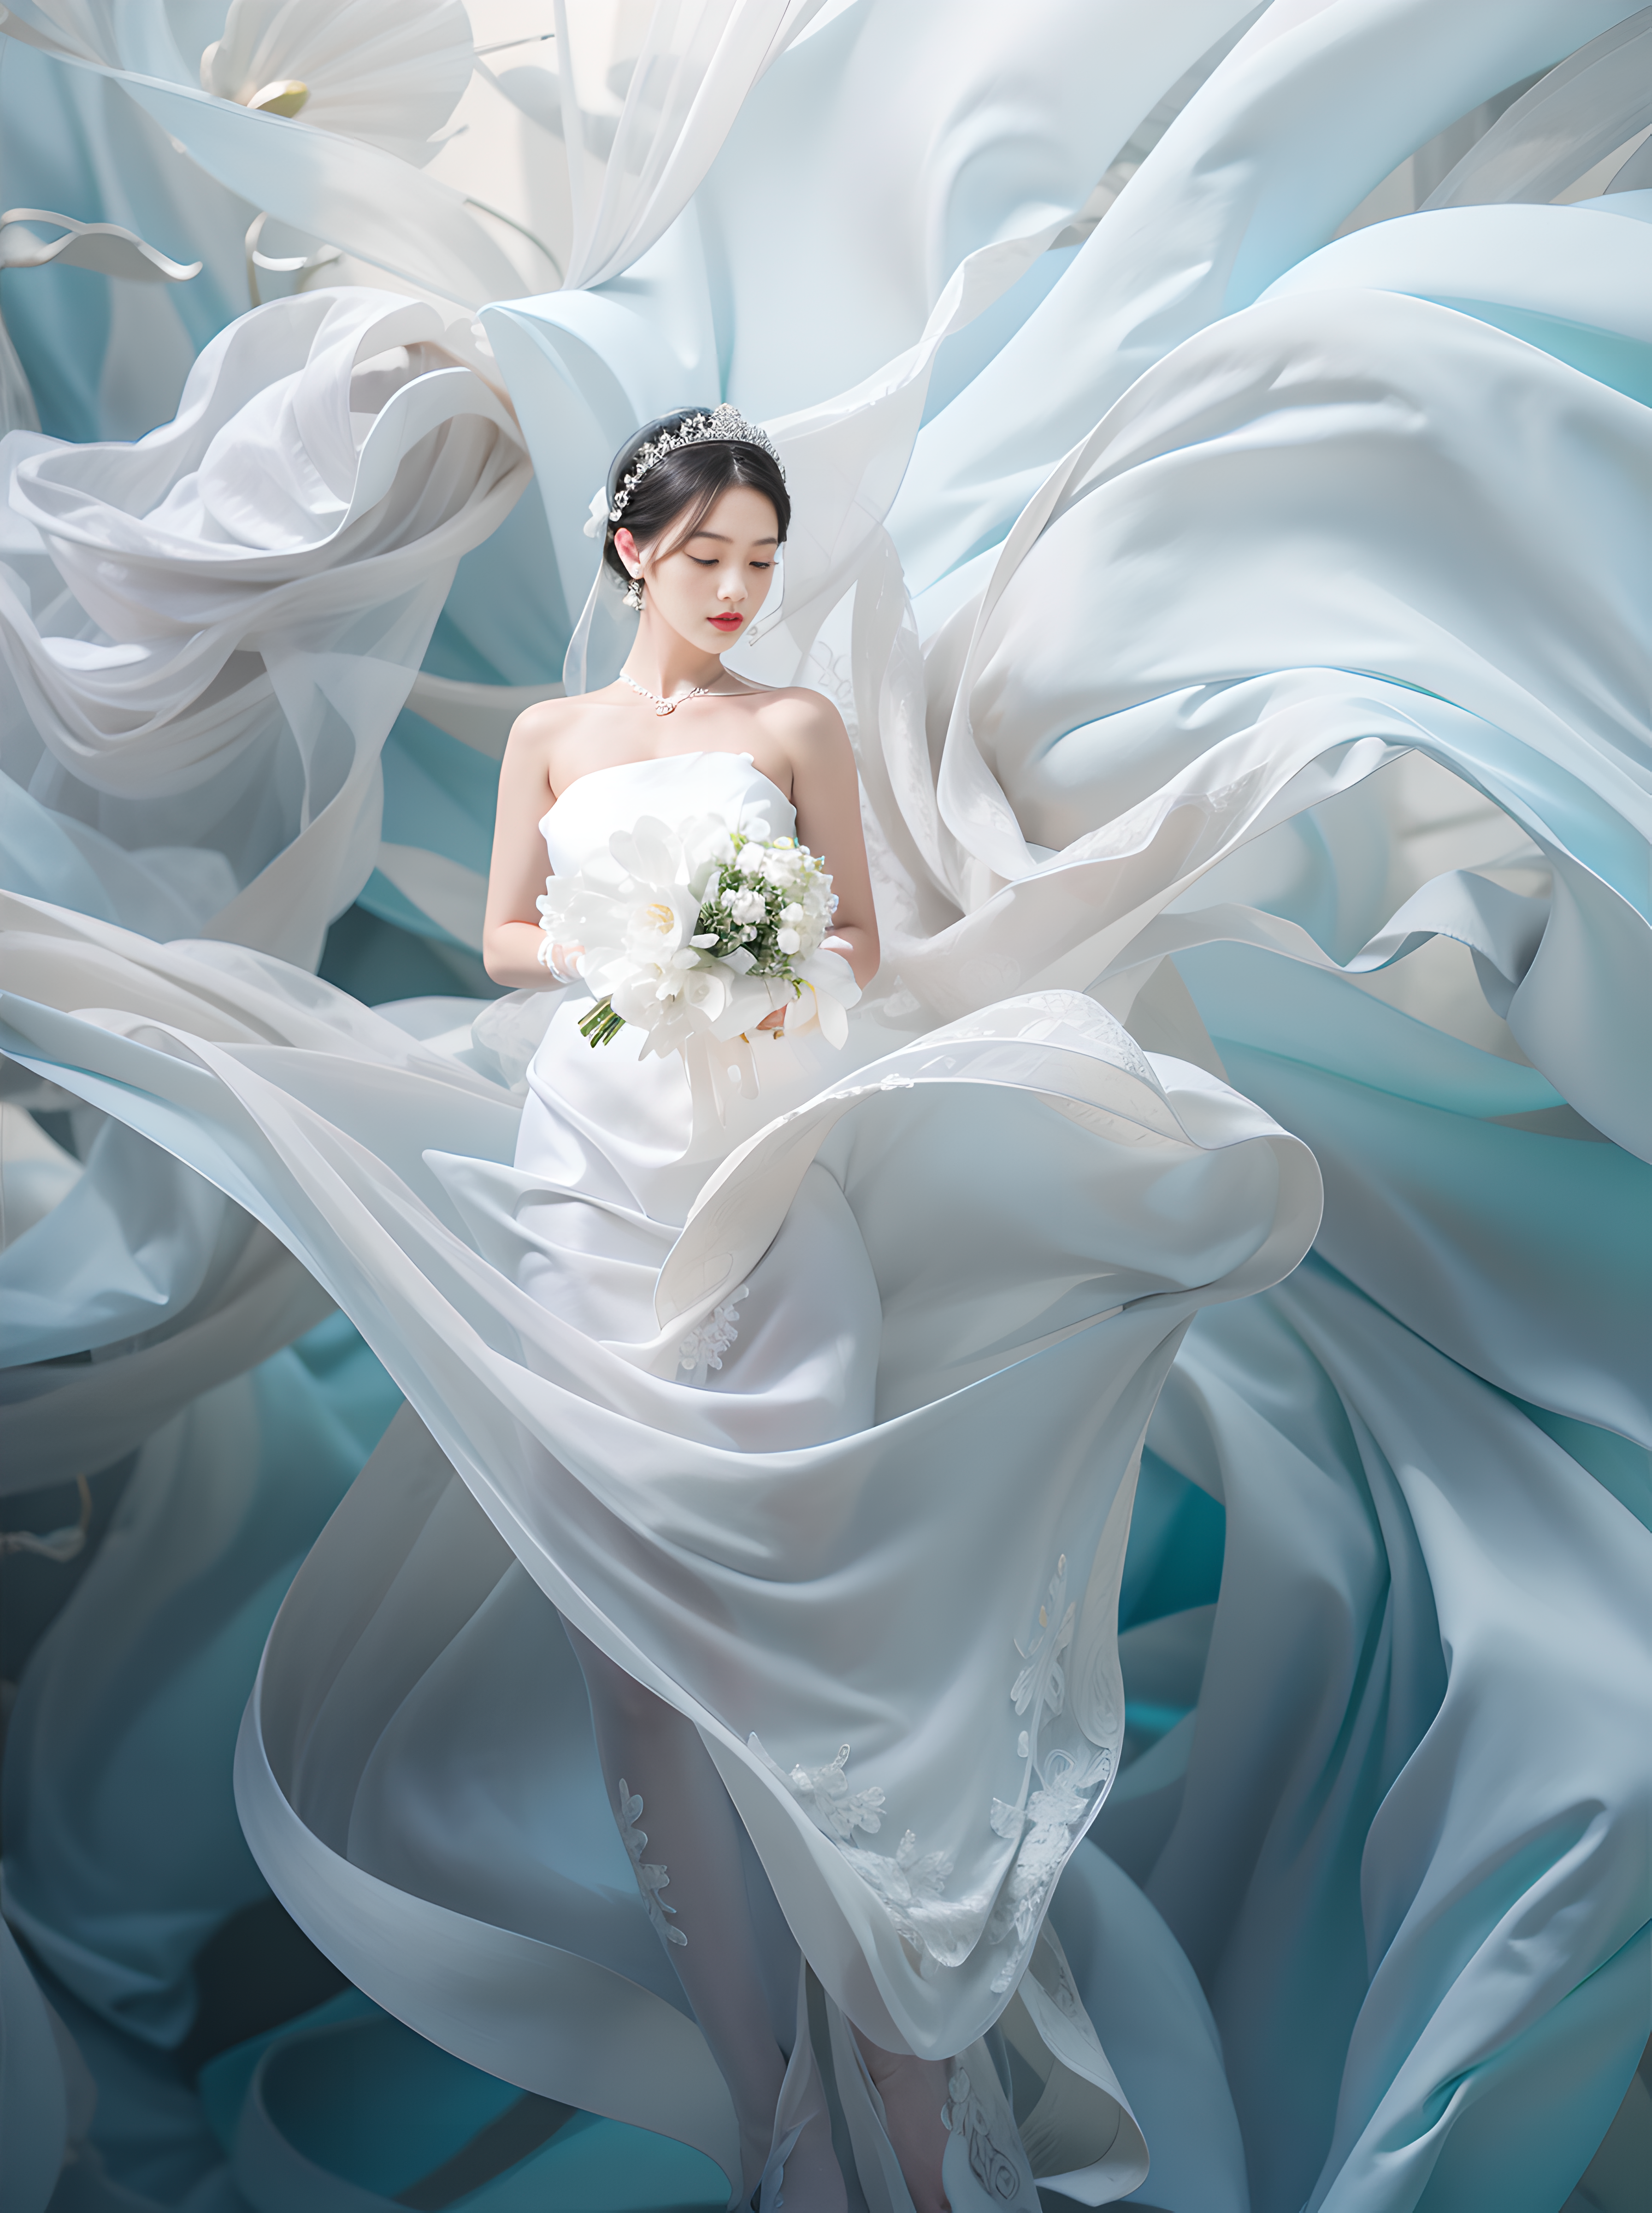
回到 PS 当中,添加蒙版,把原本的人物擦出来即可。
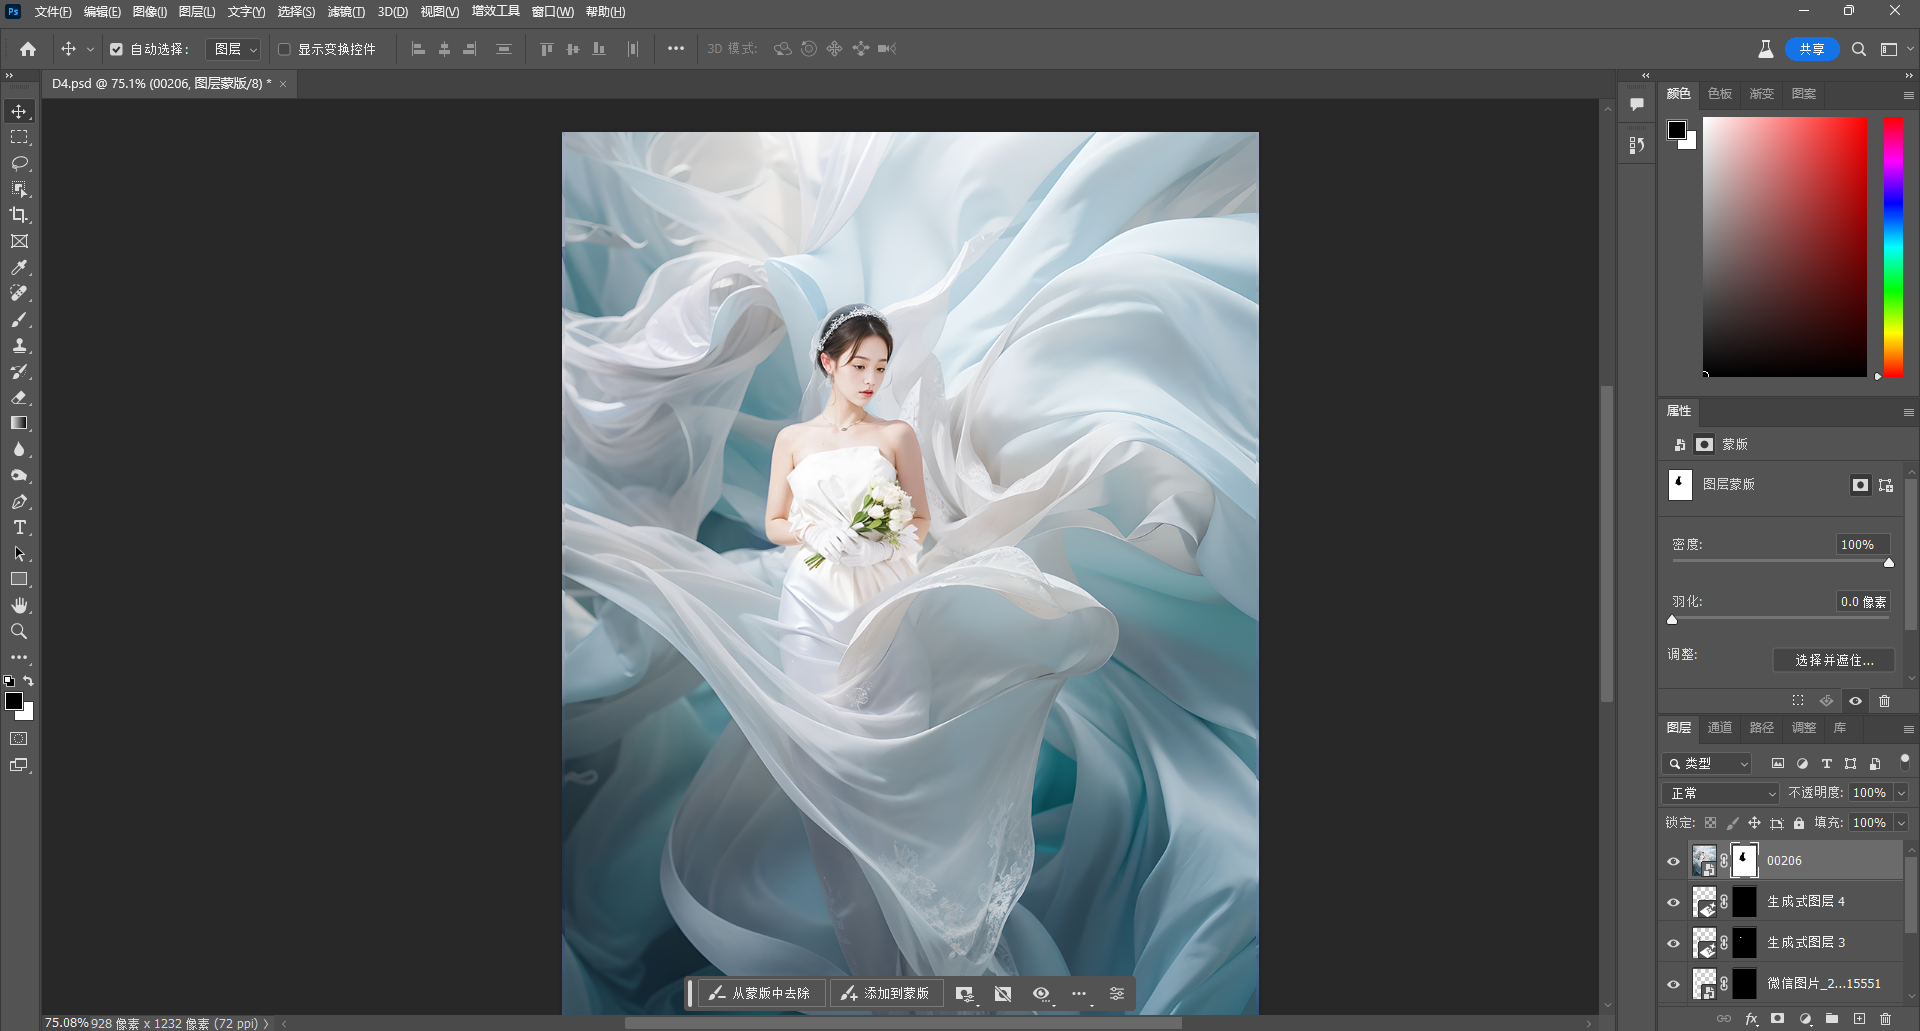
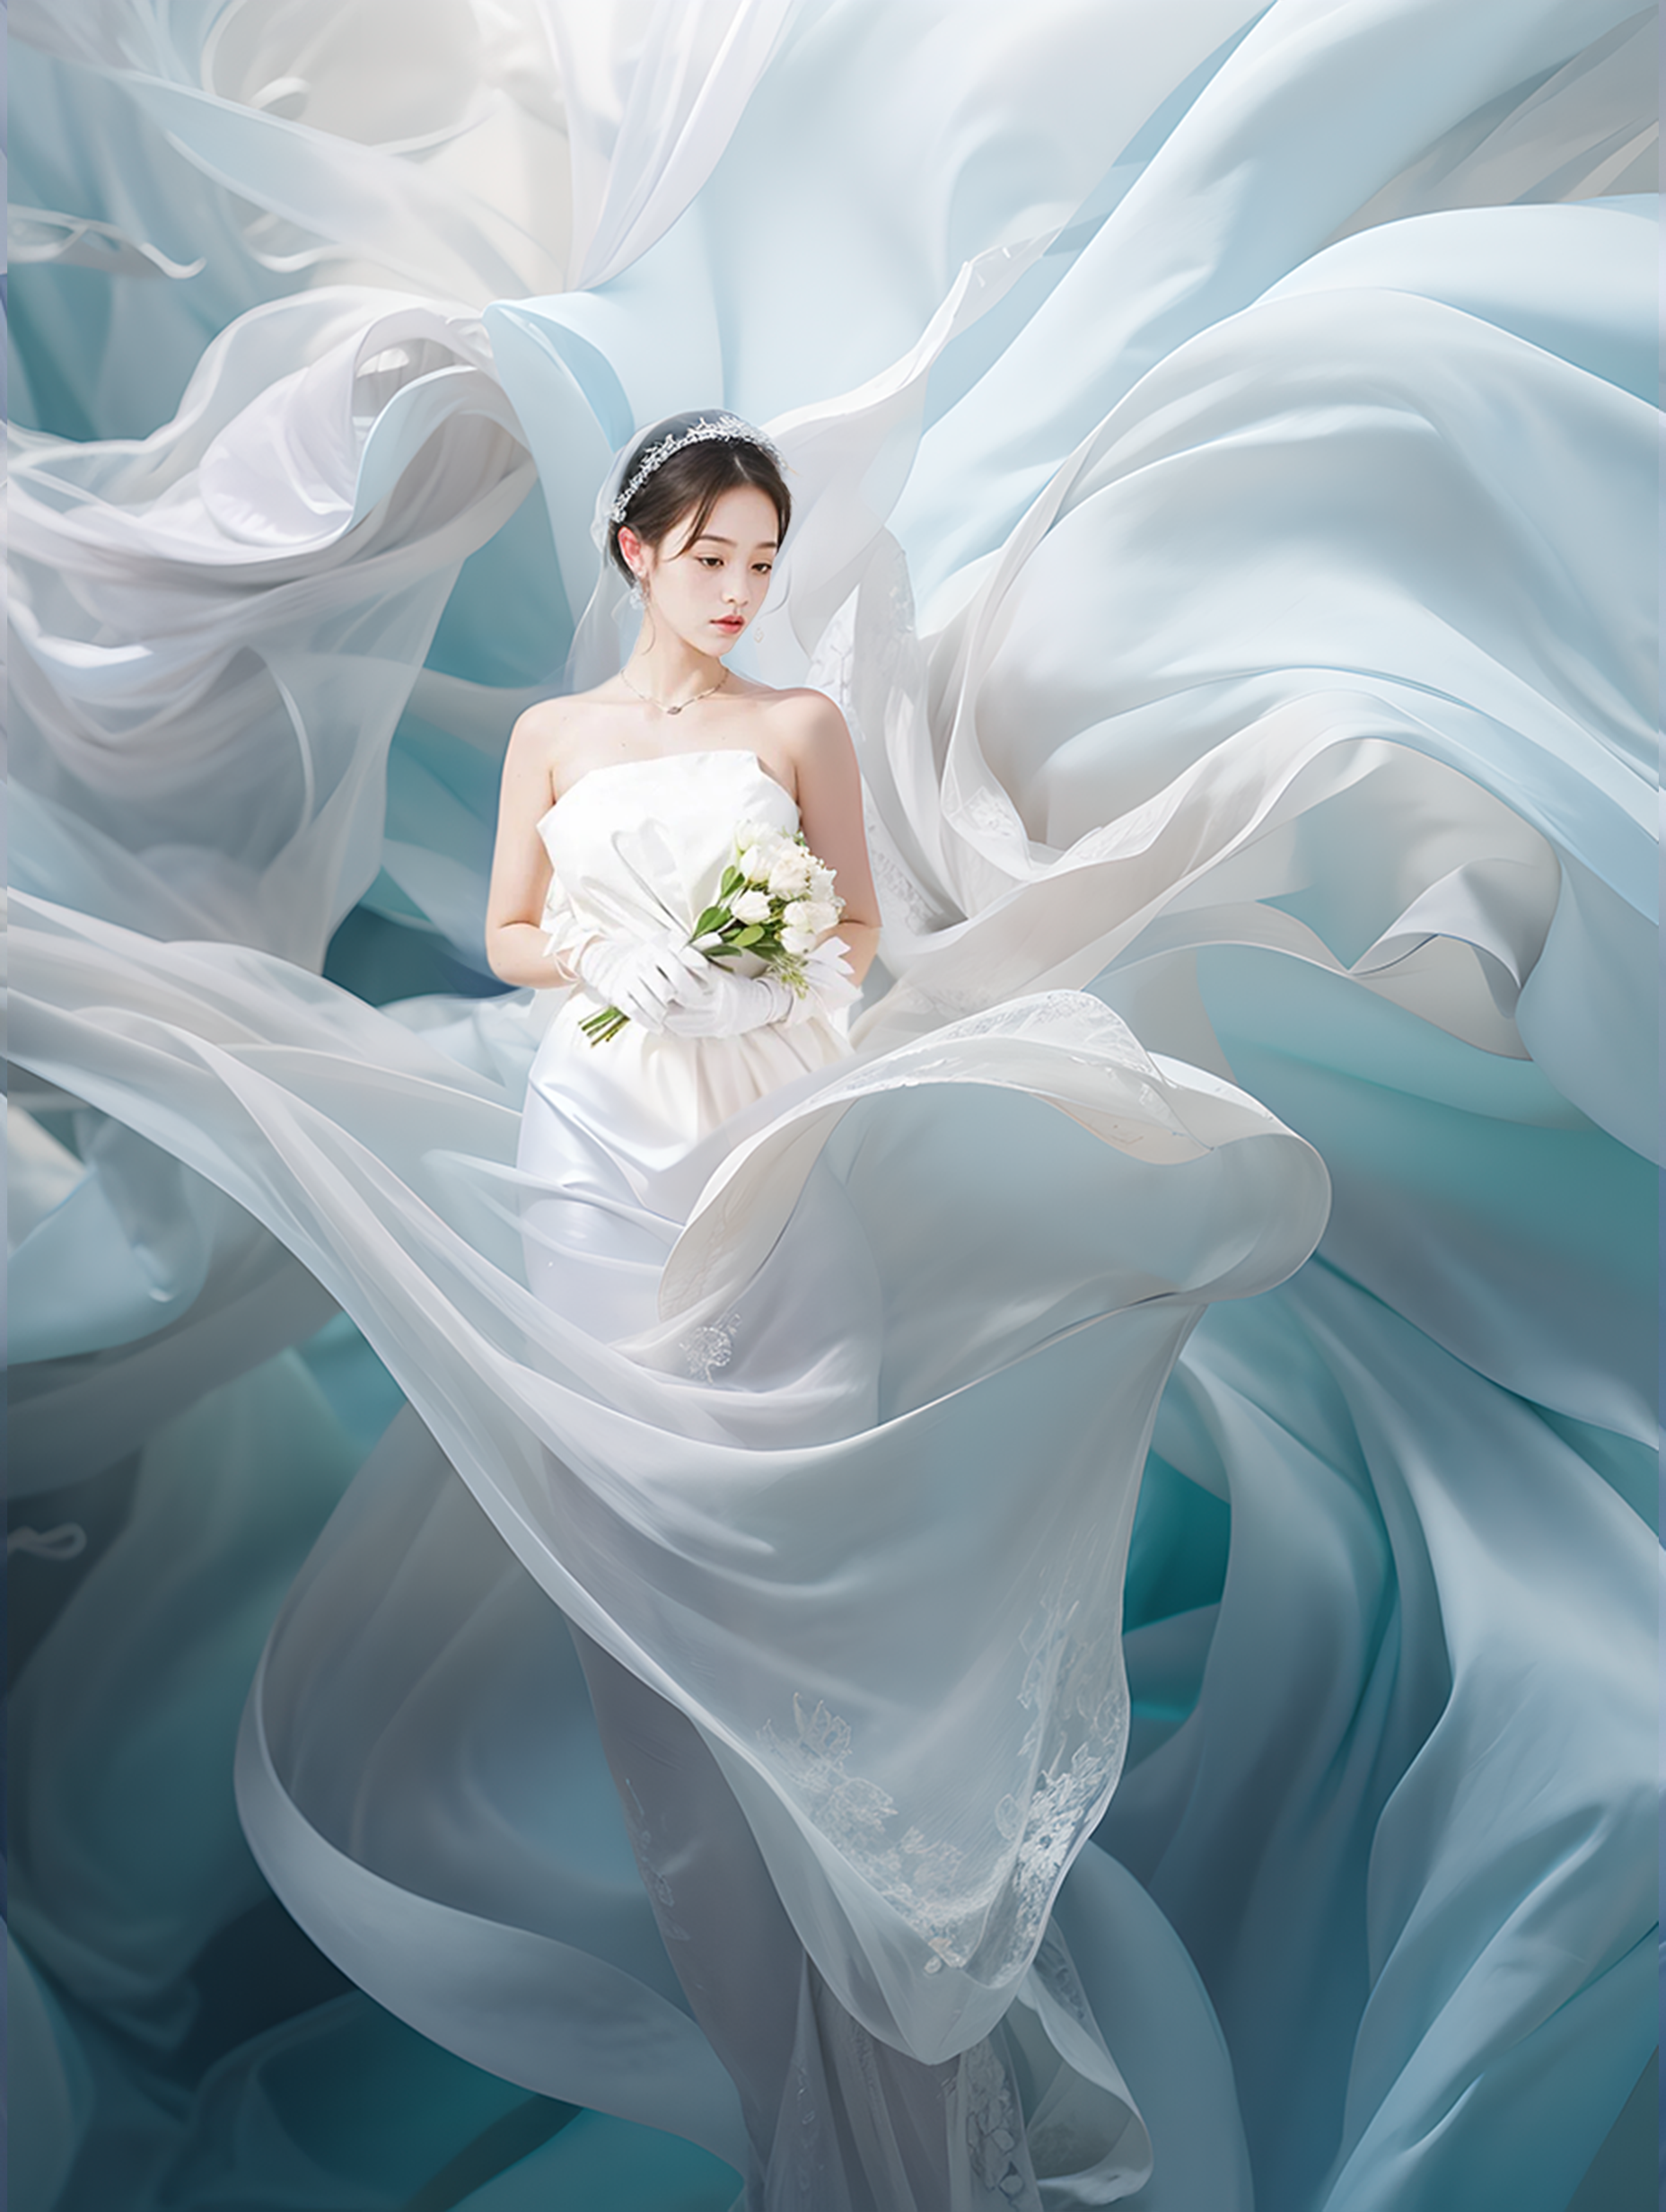
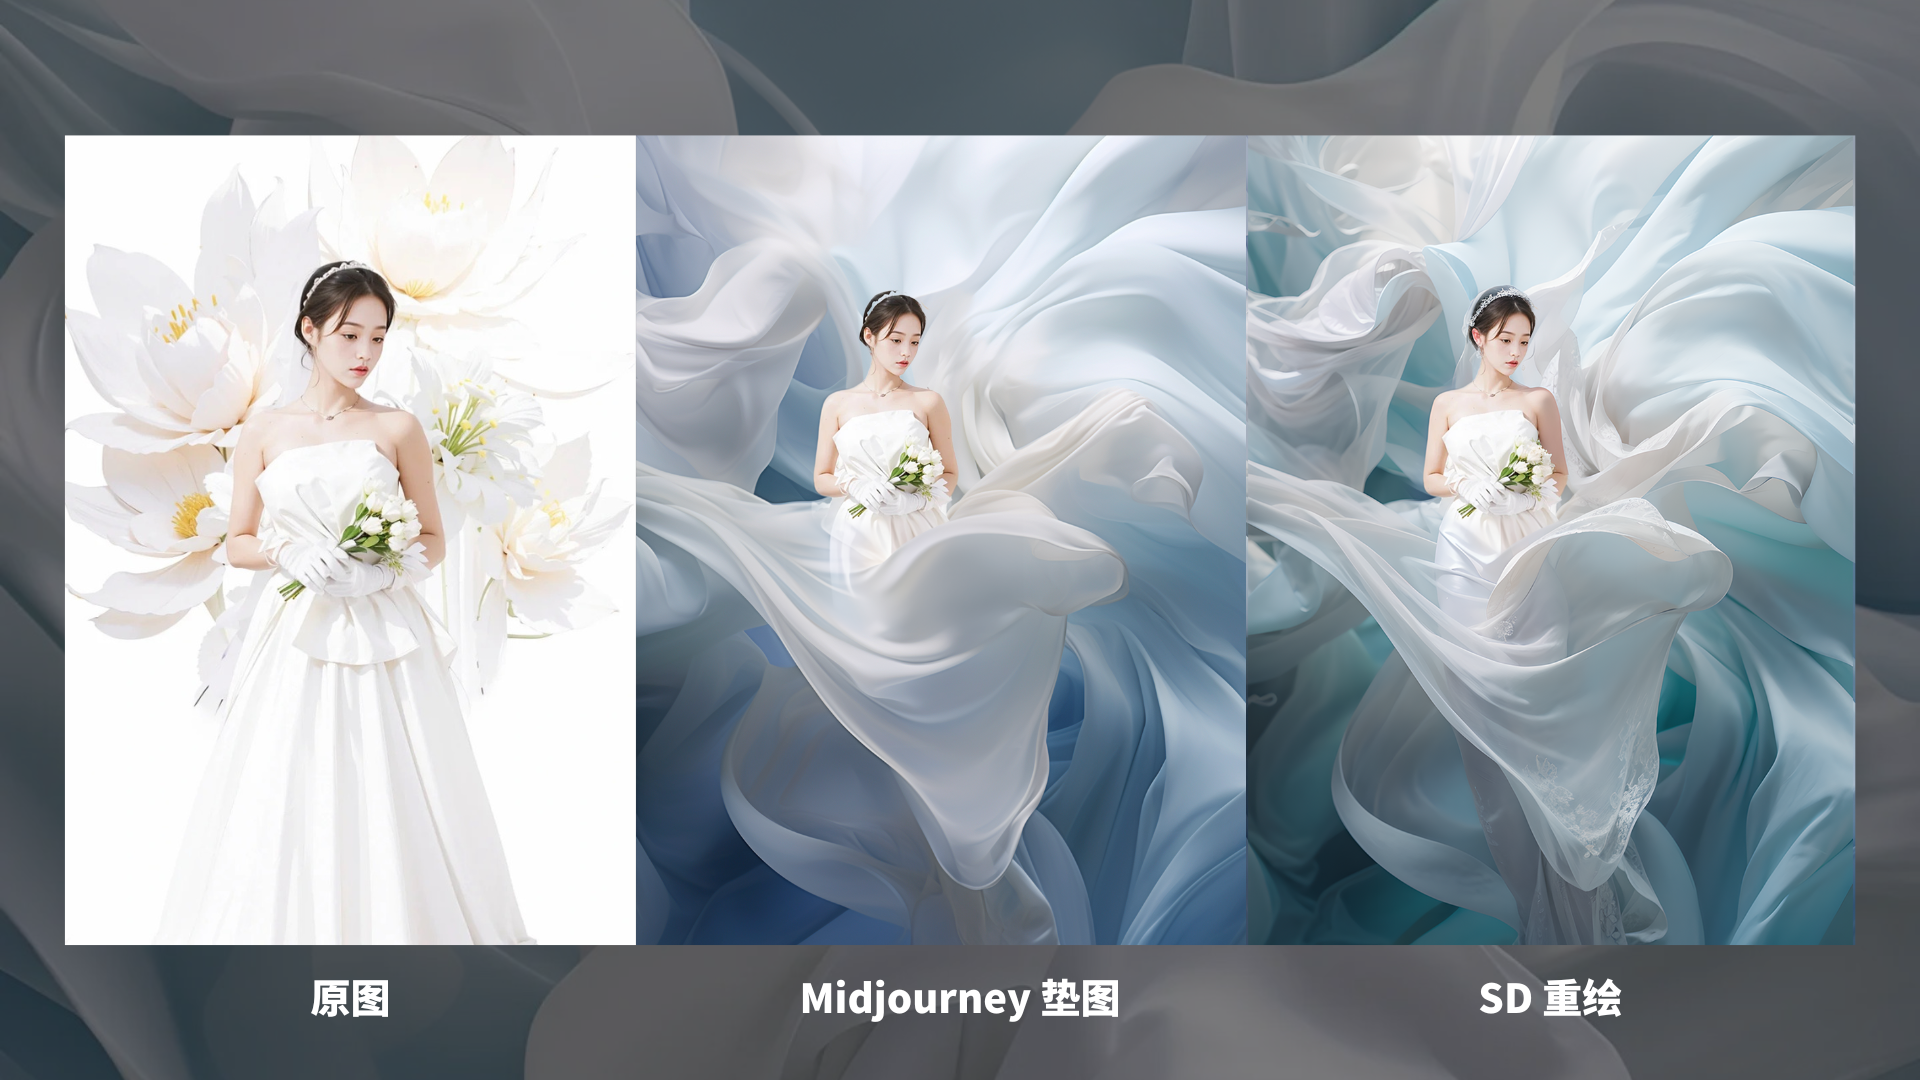
最终效果对比。
其他案例
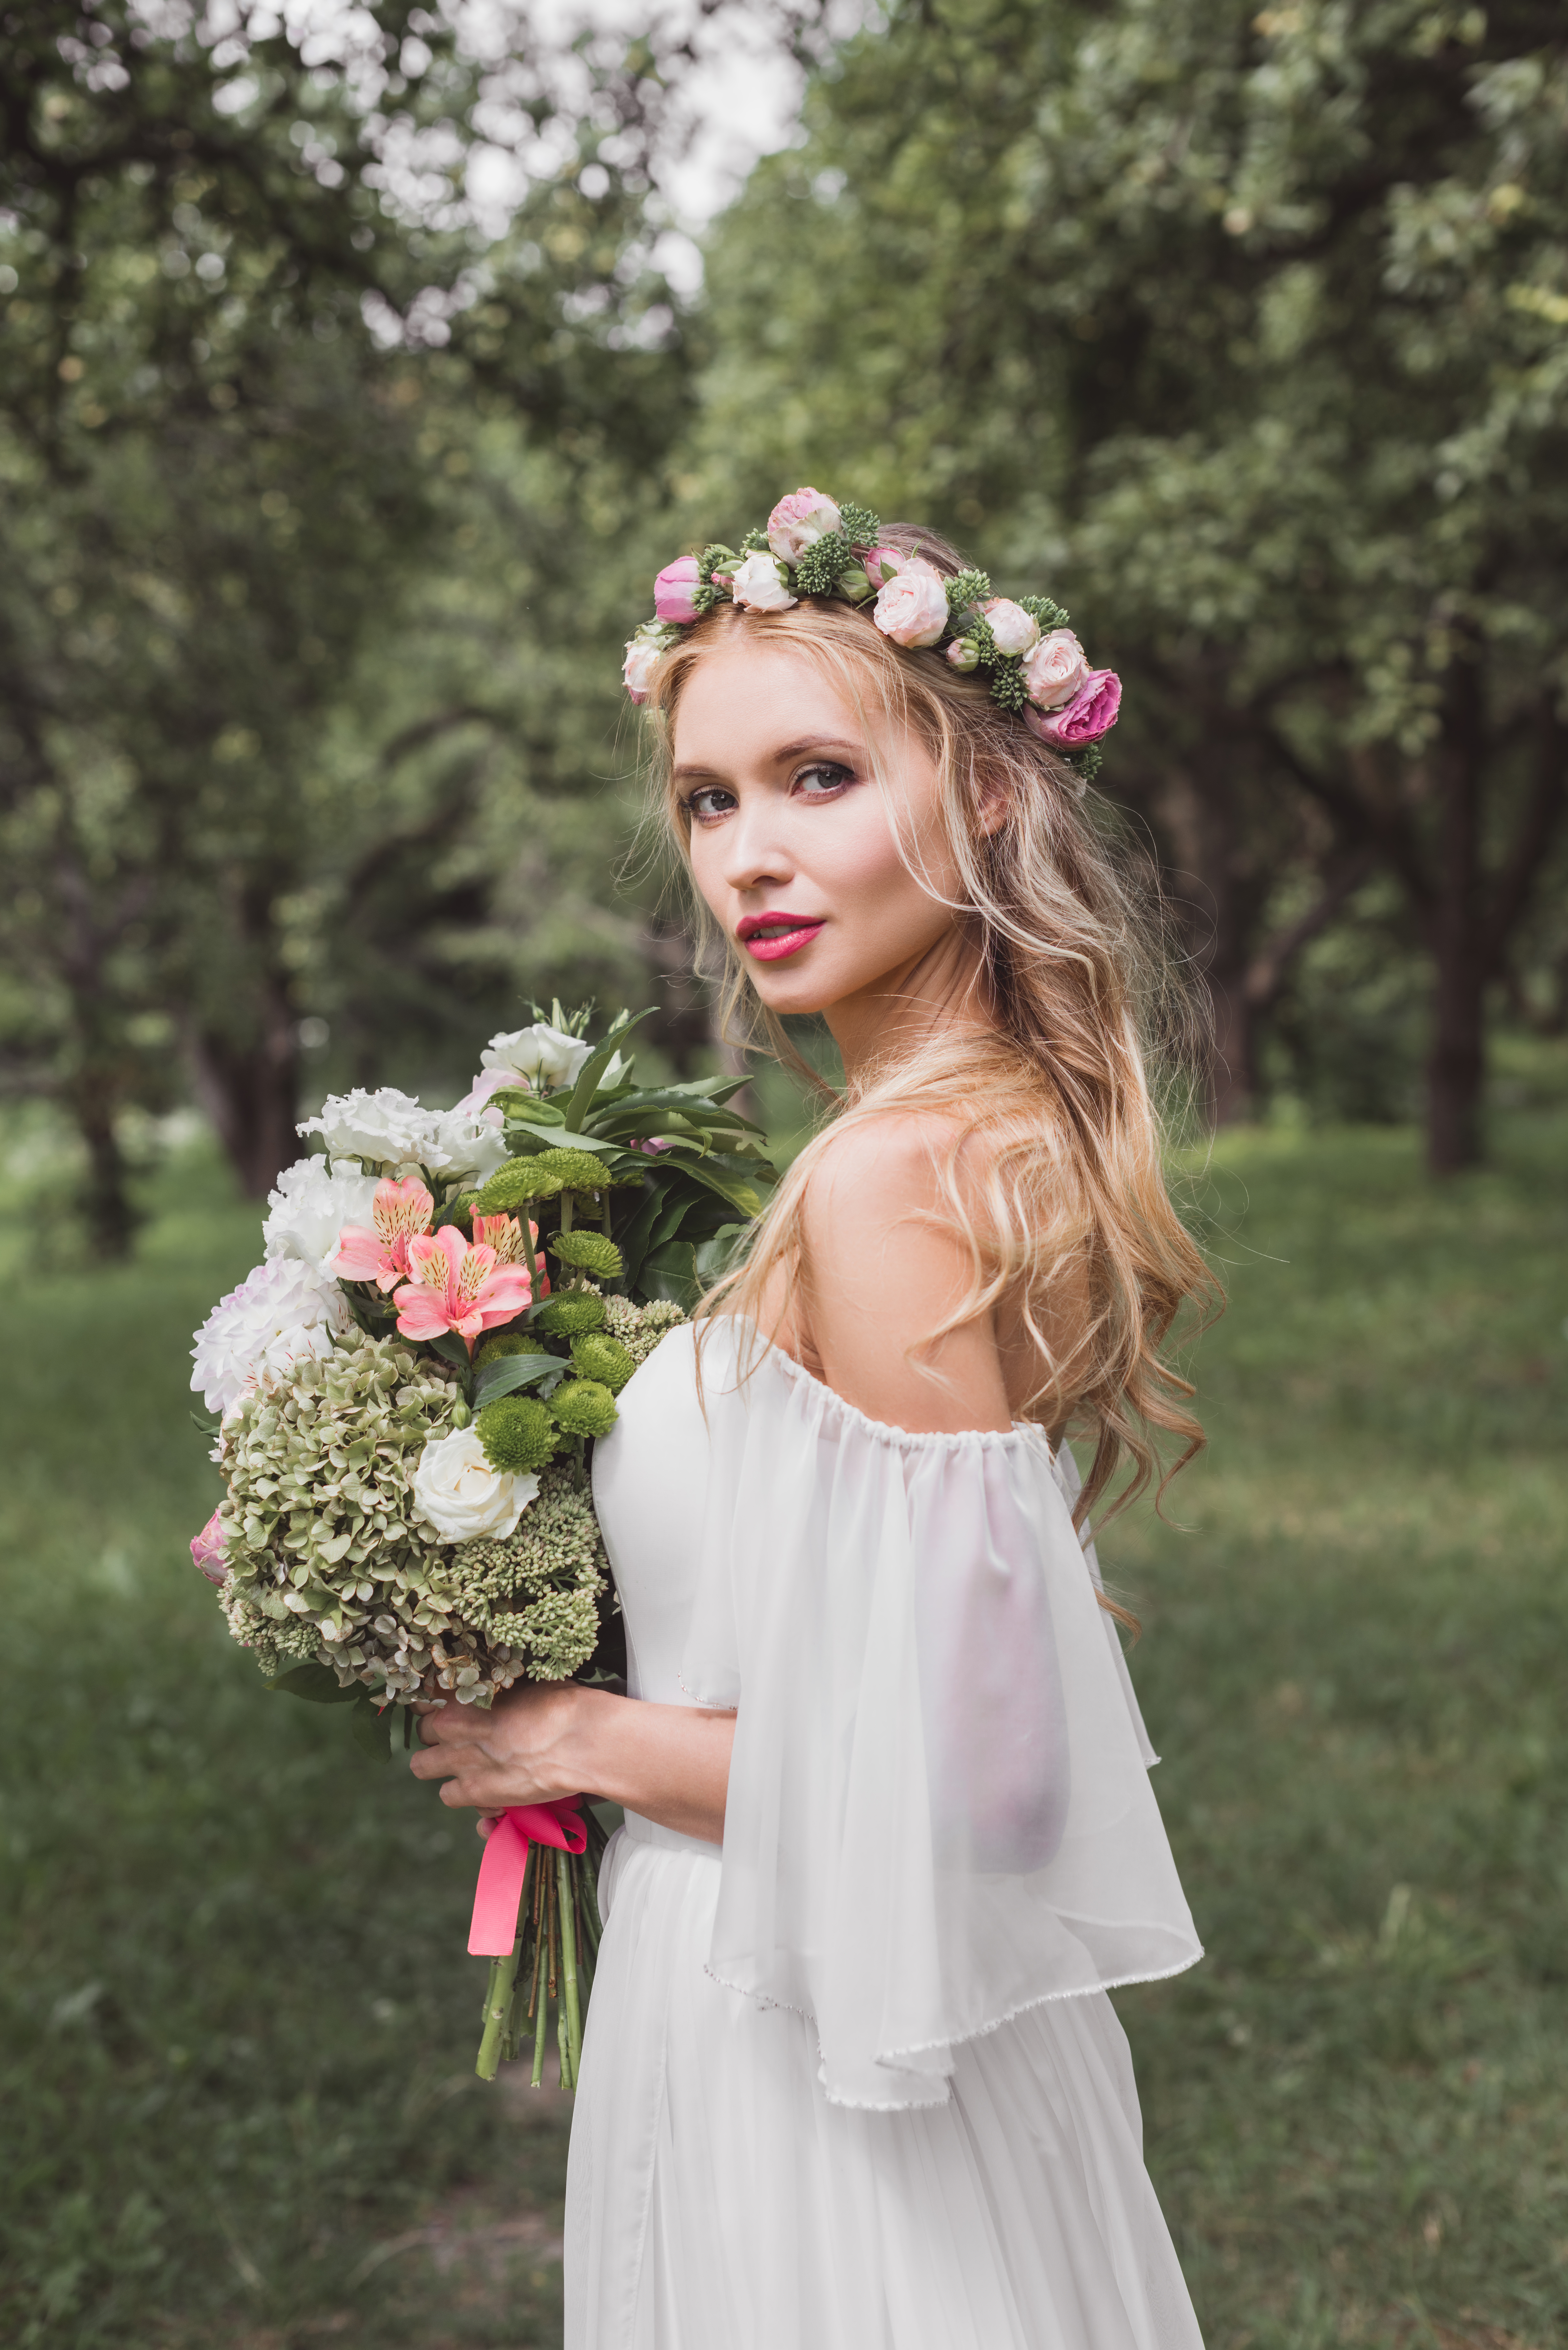
原图
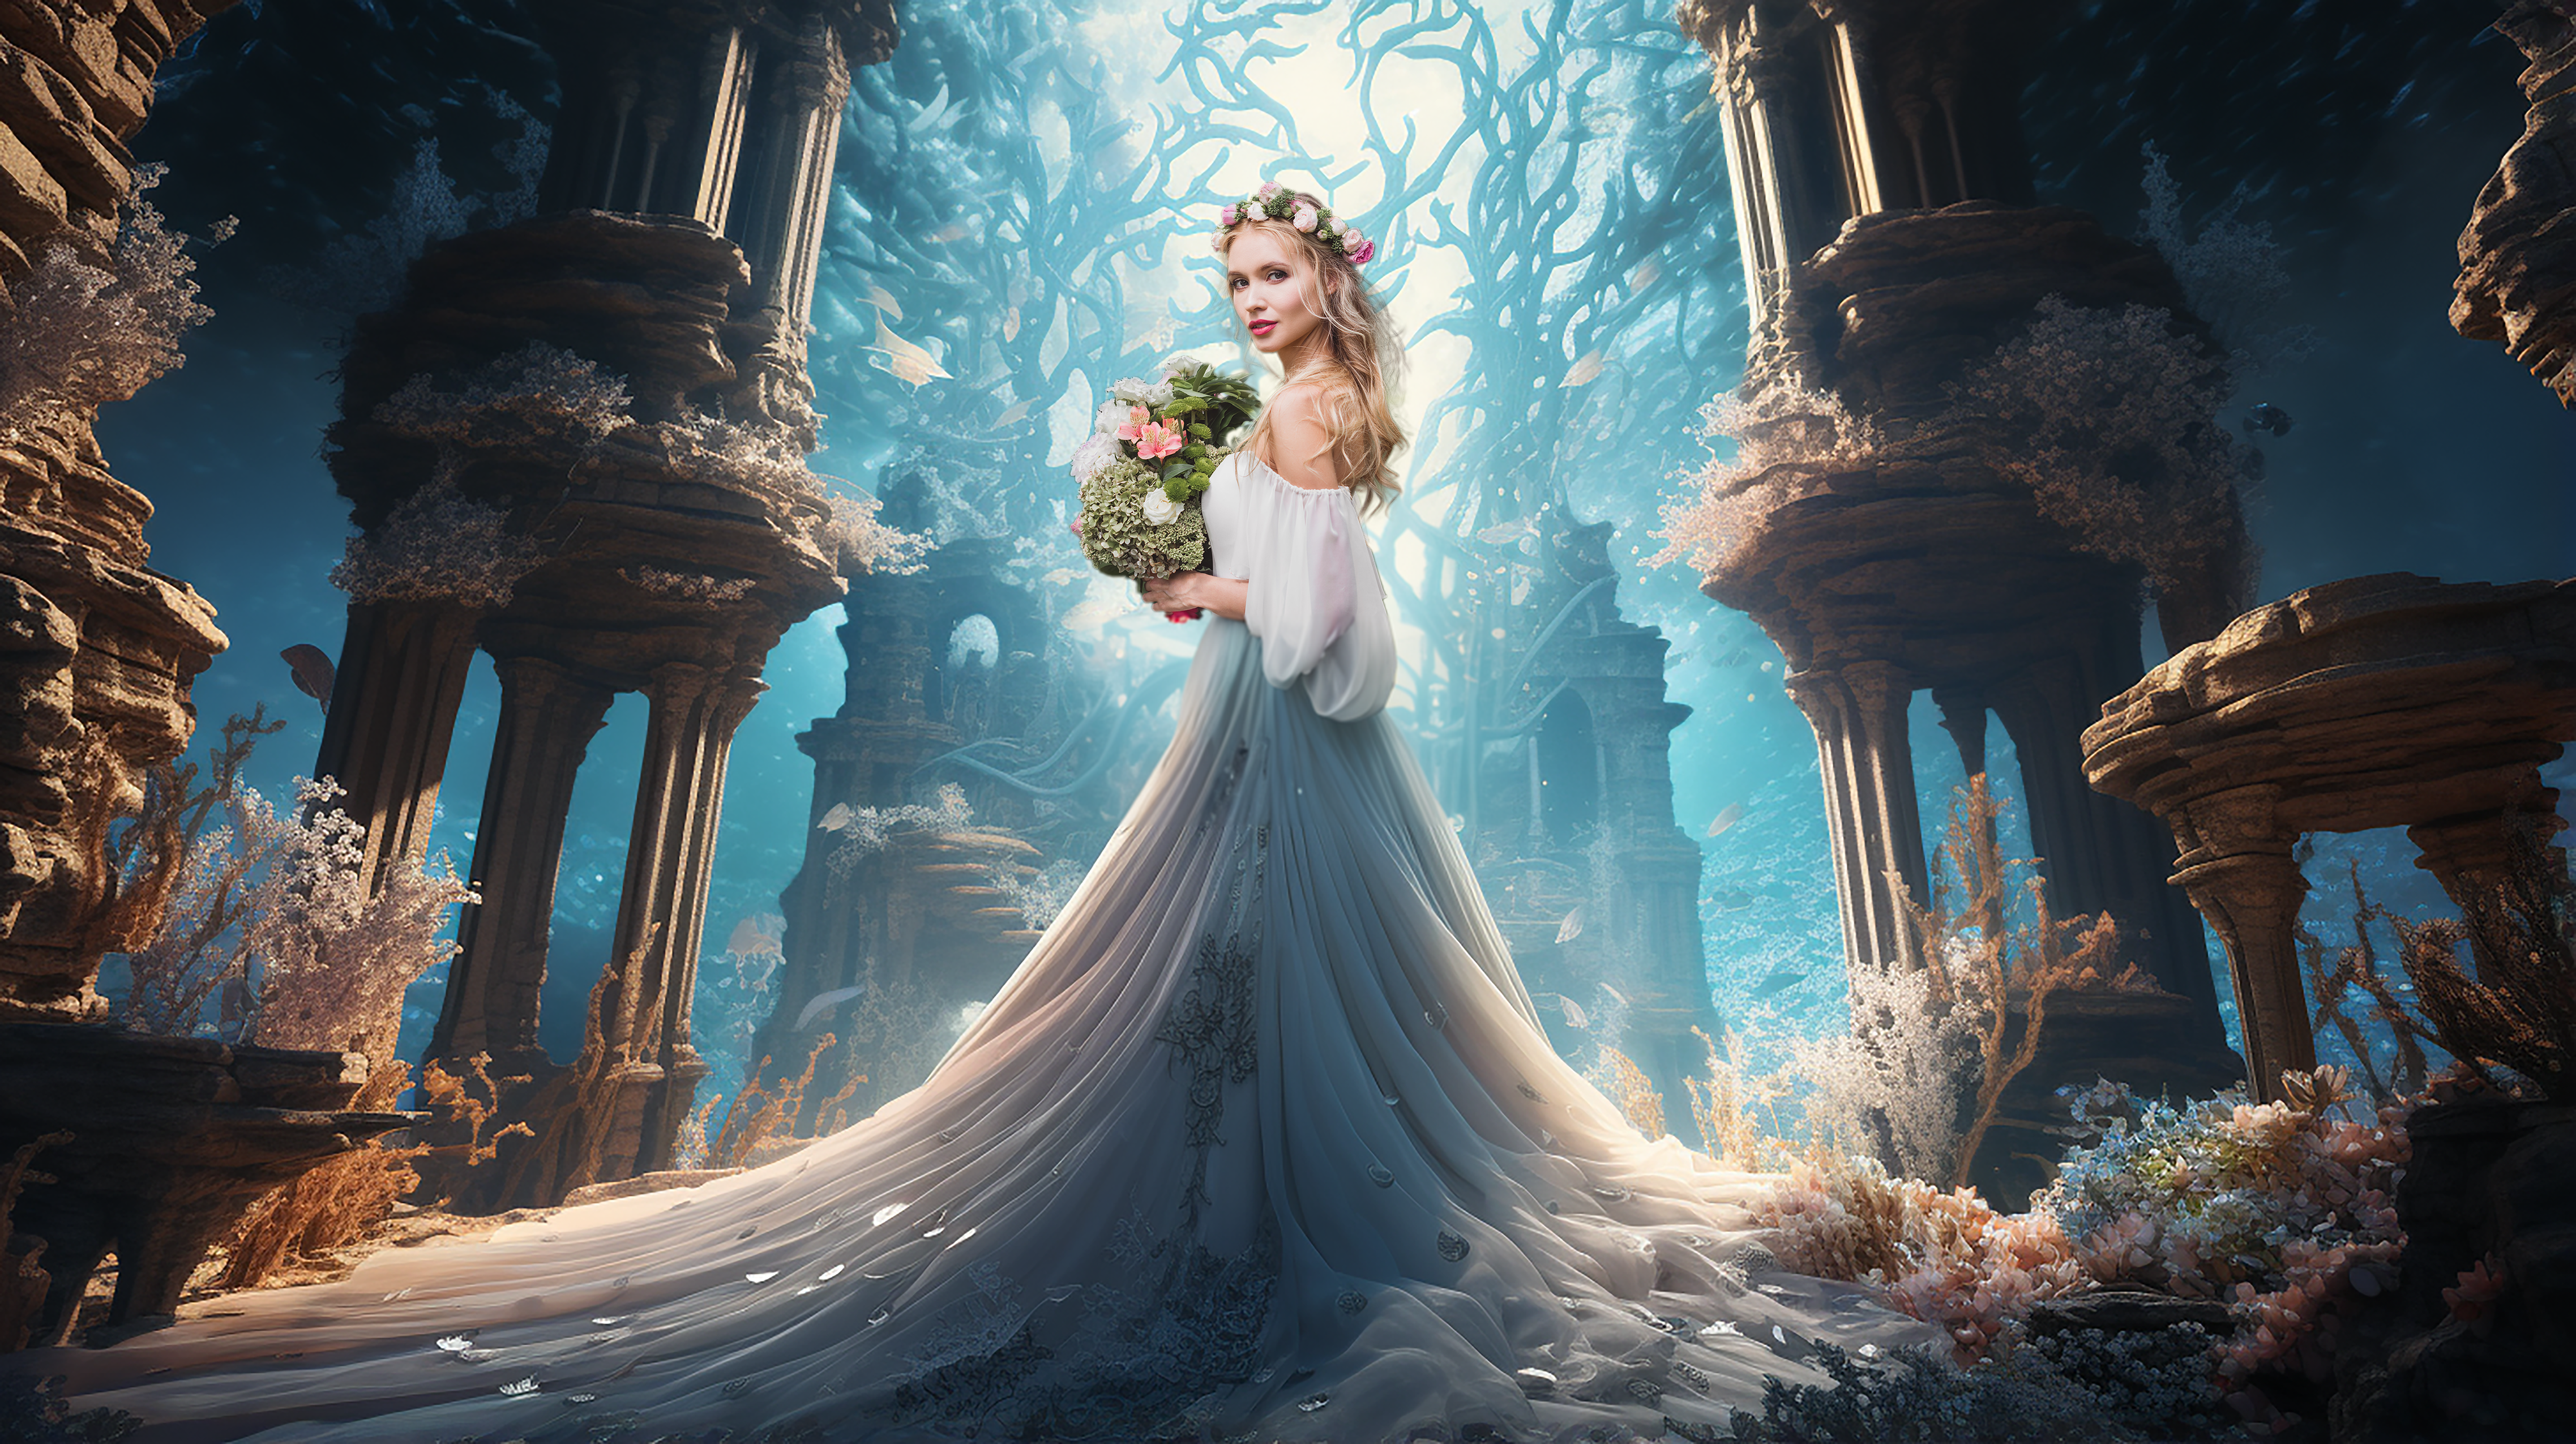
AI修图
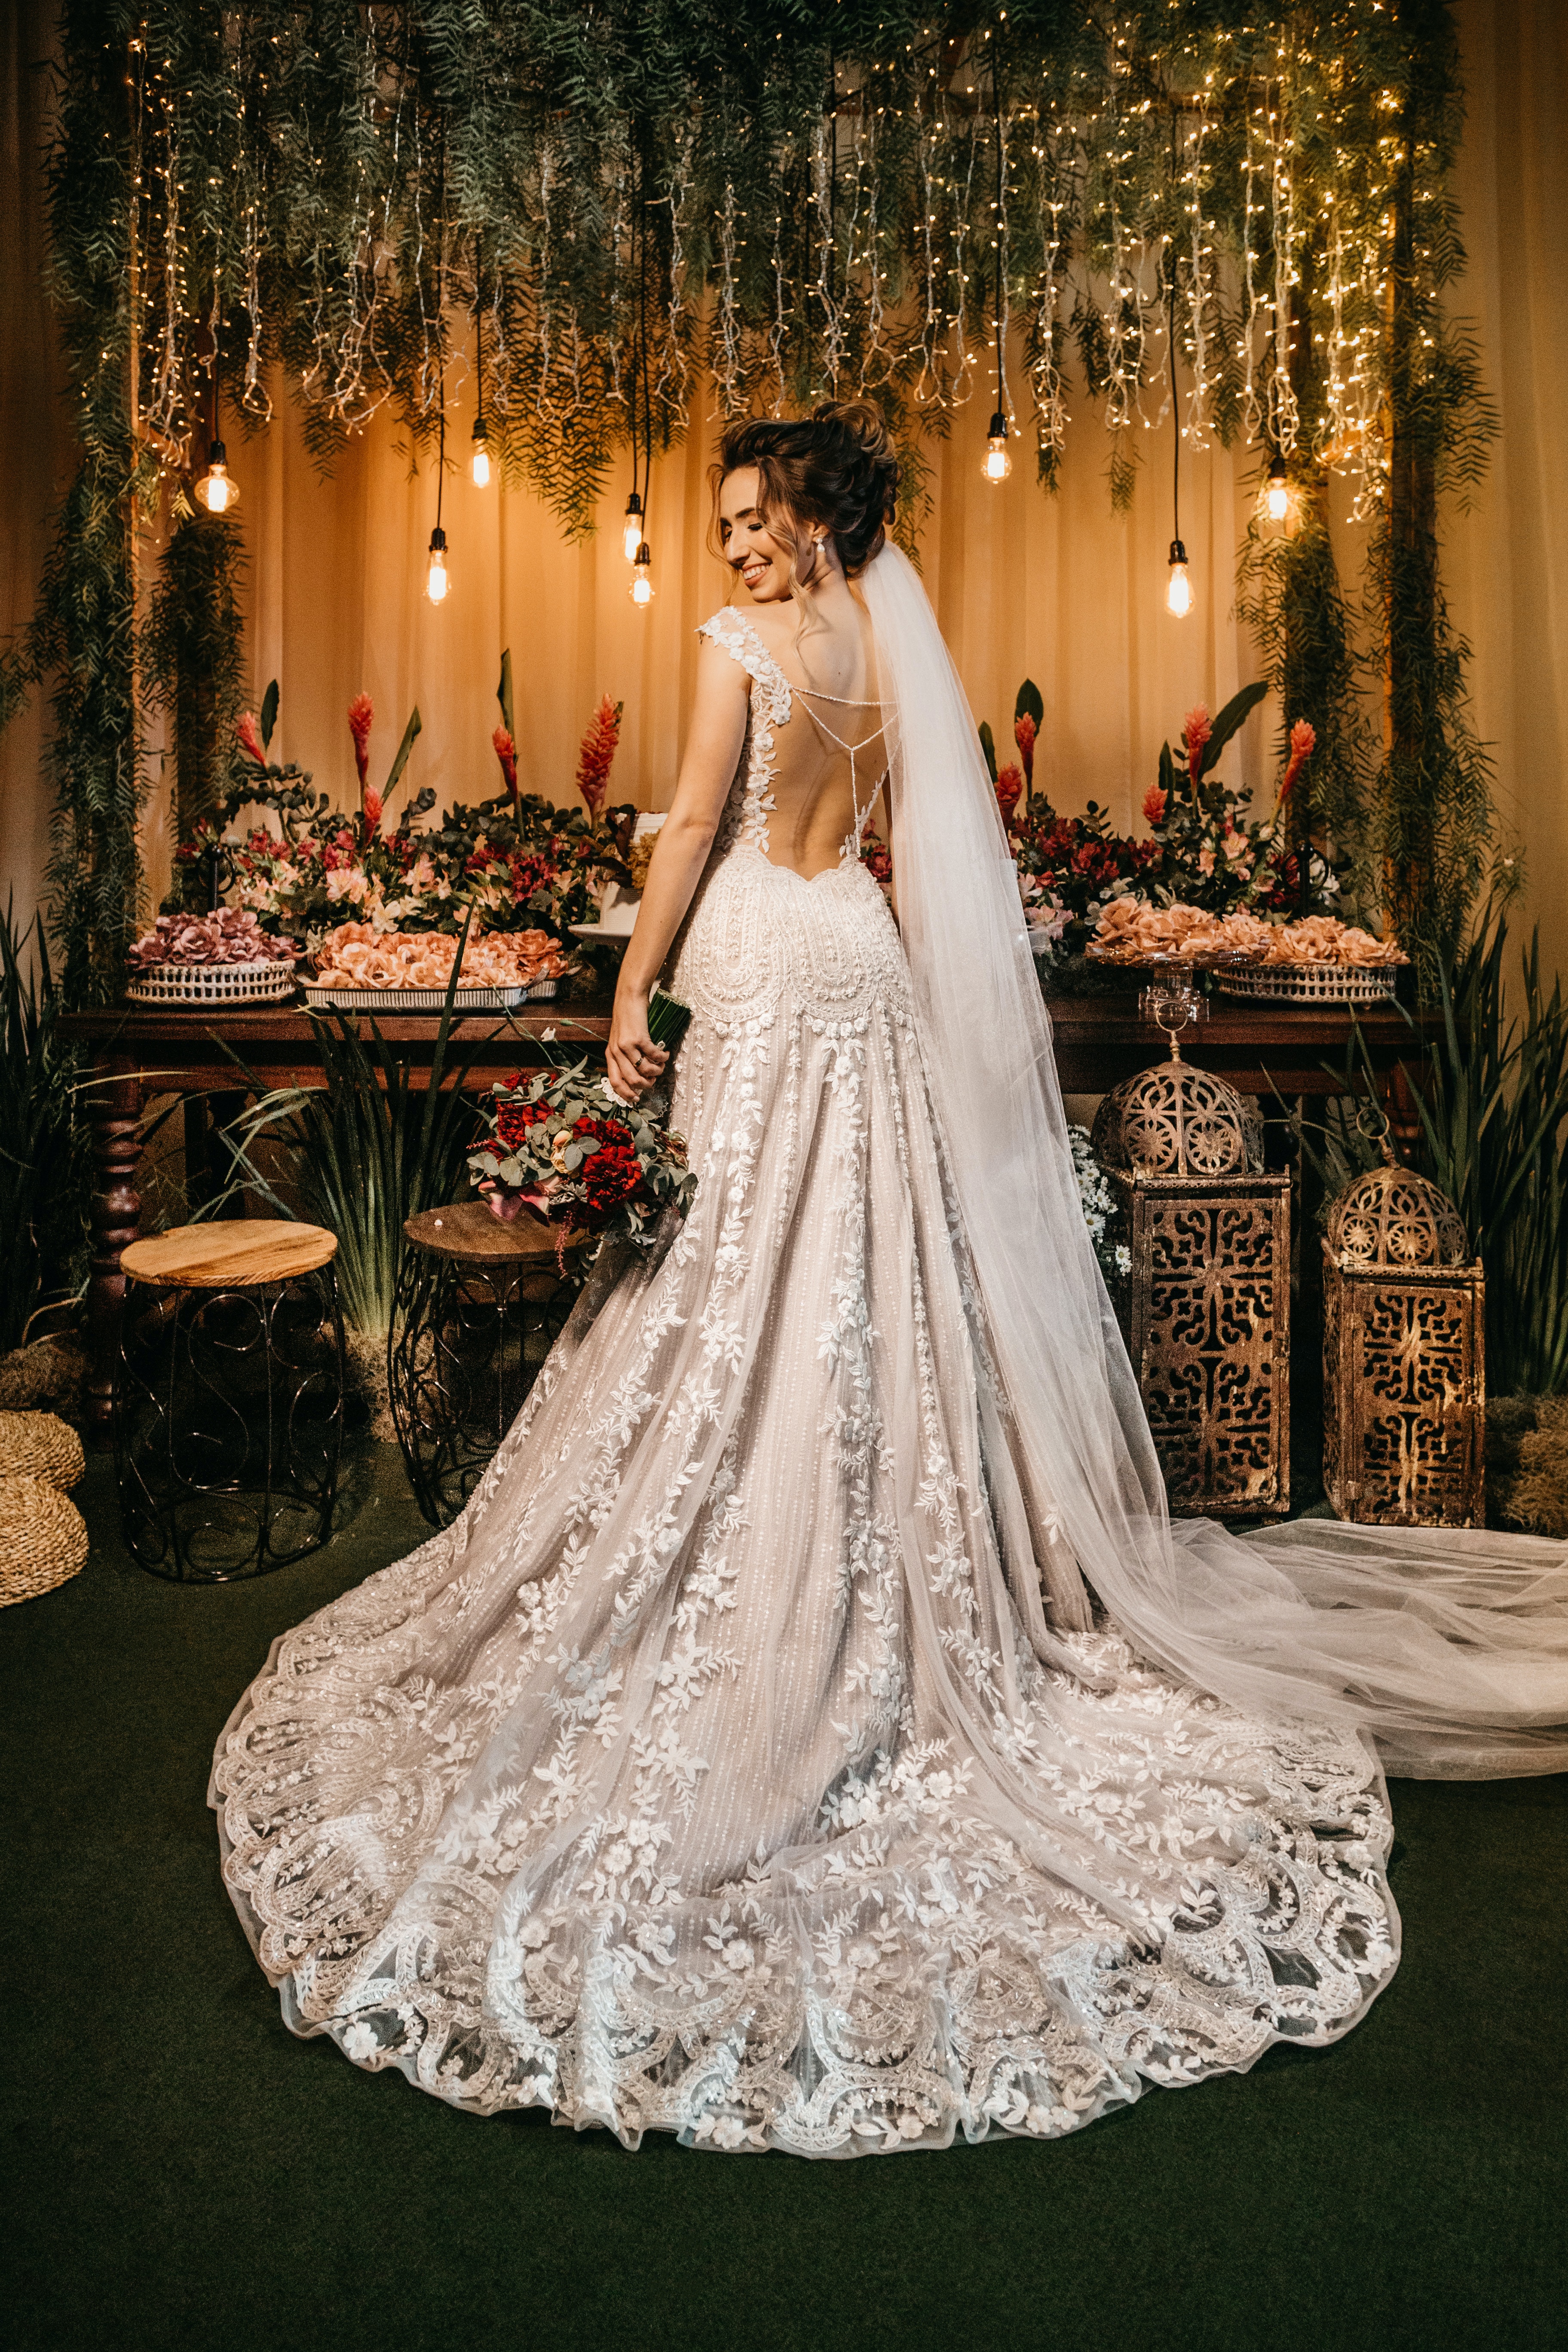
原图
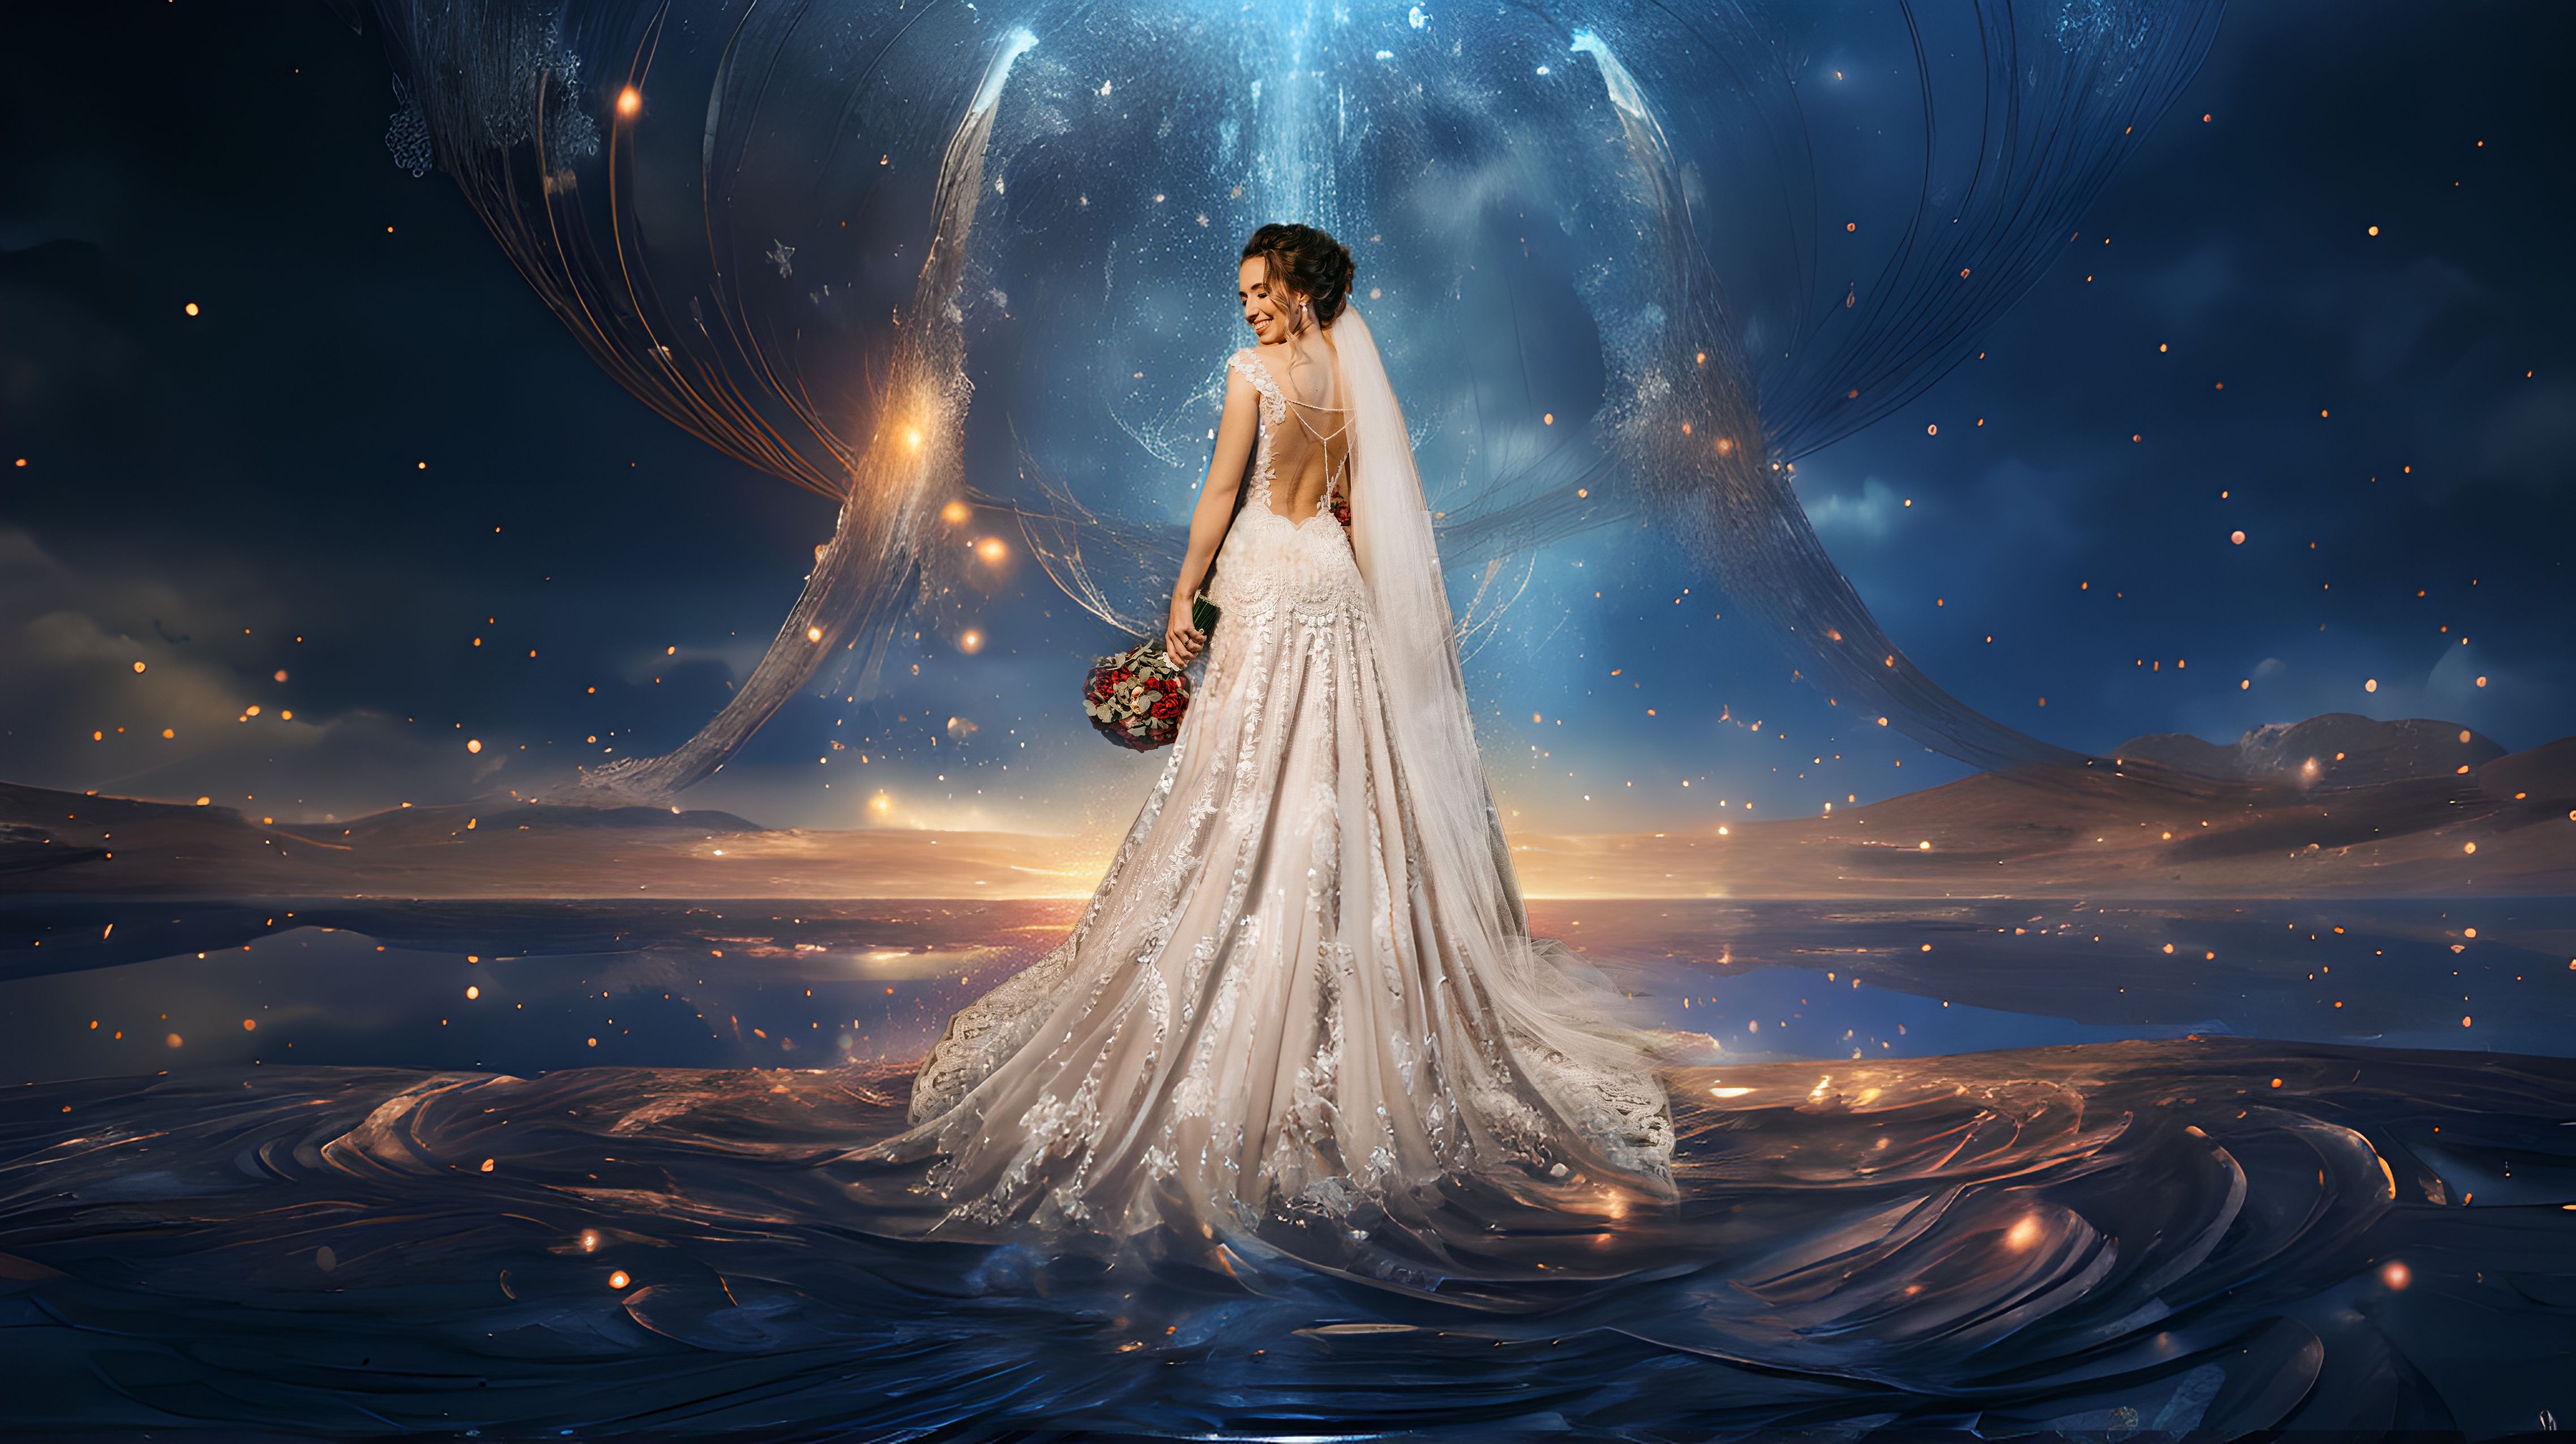
AI修图
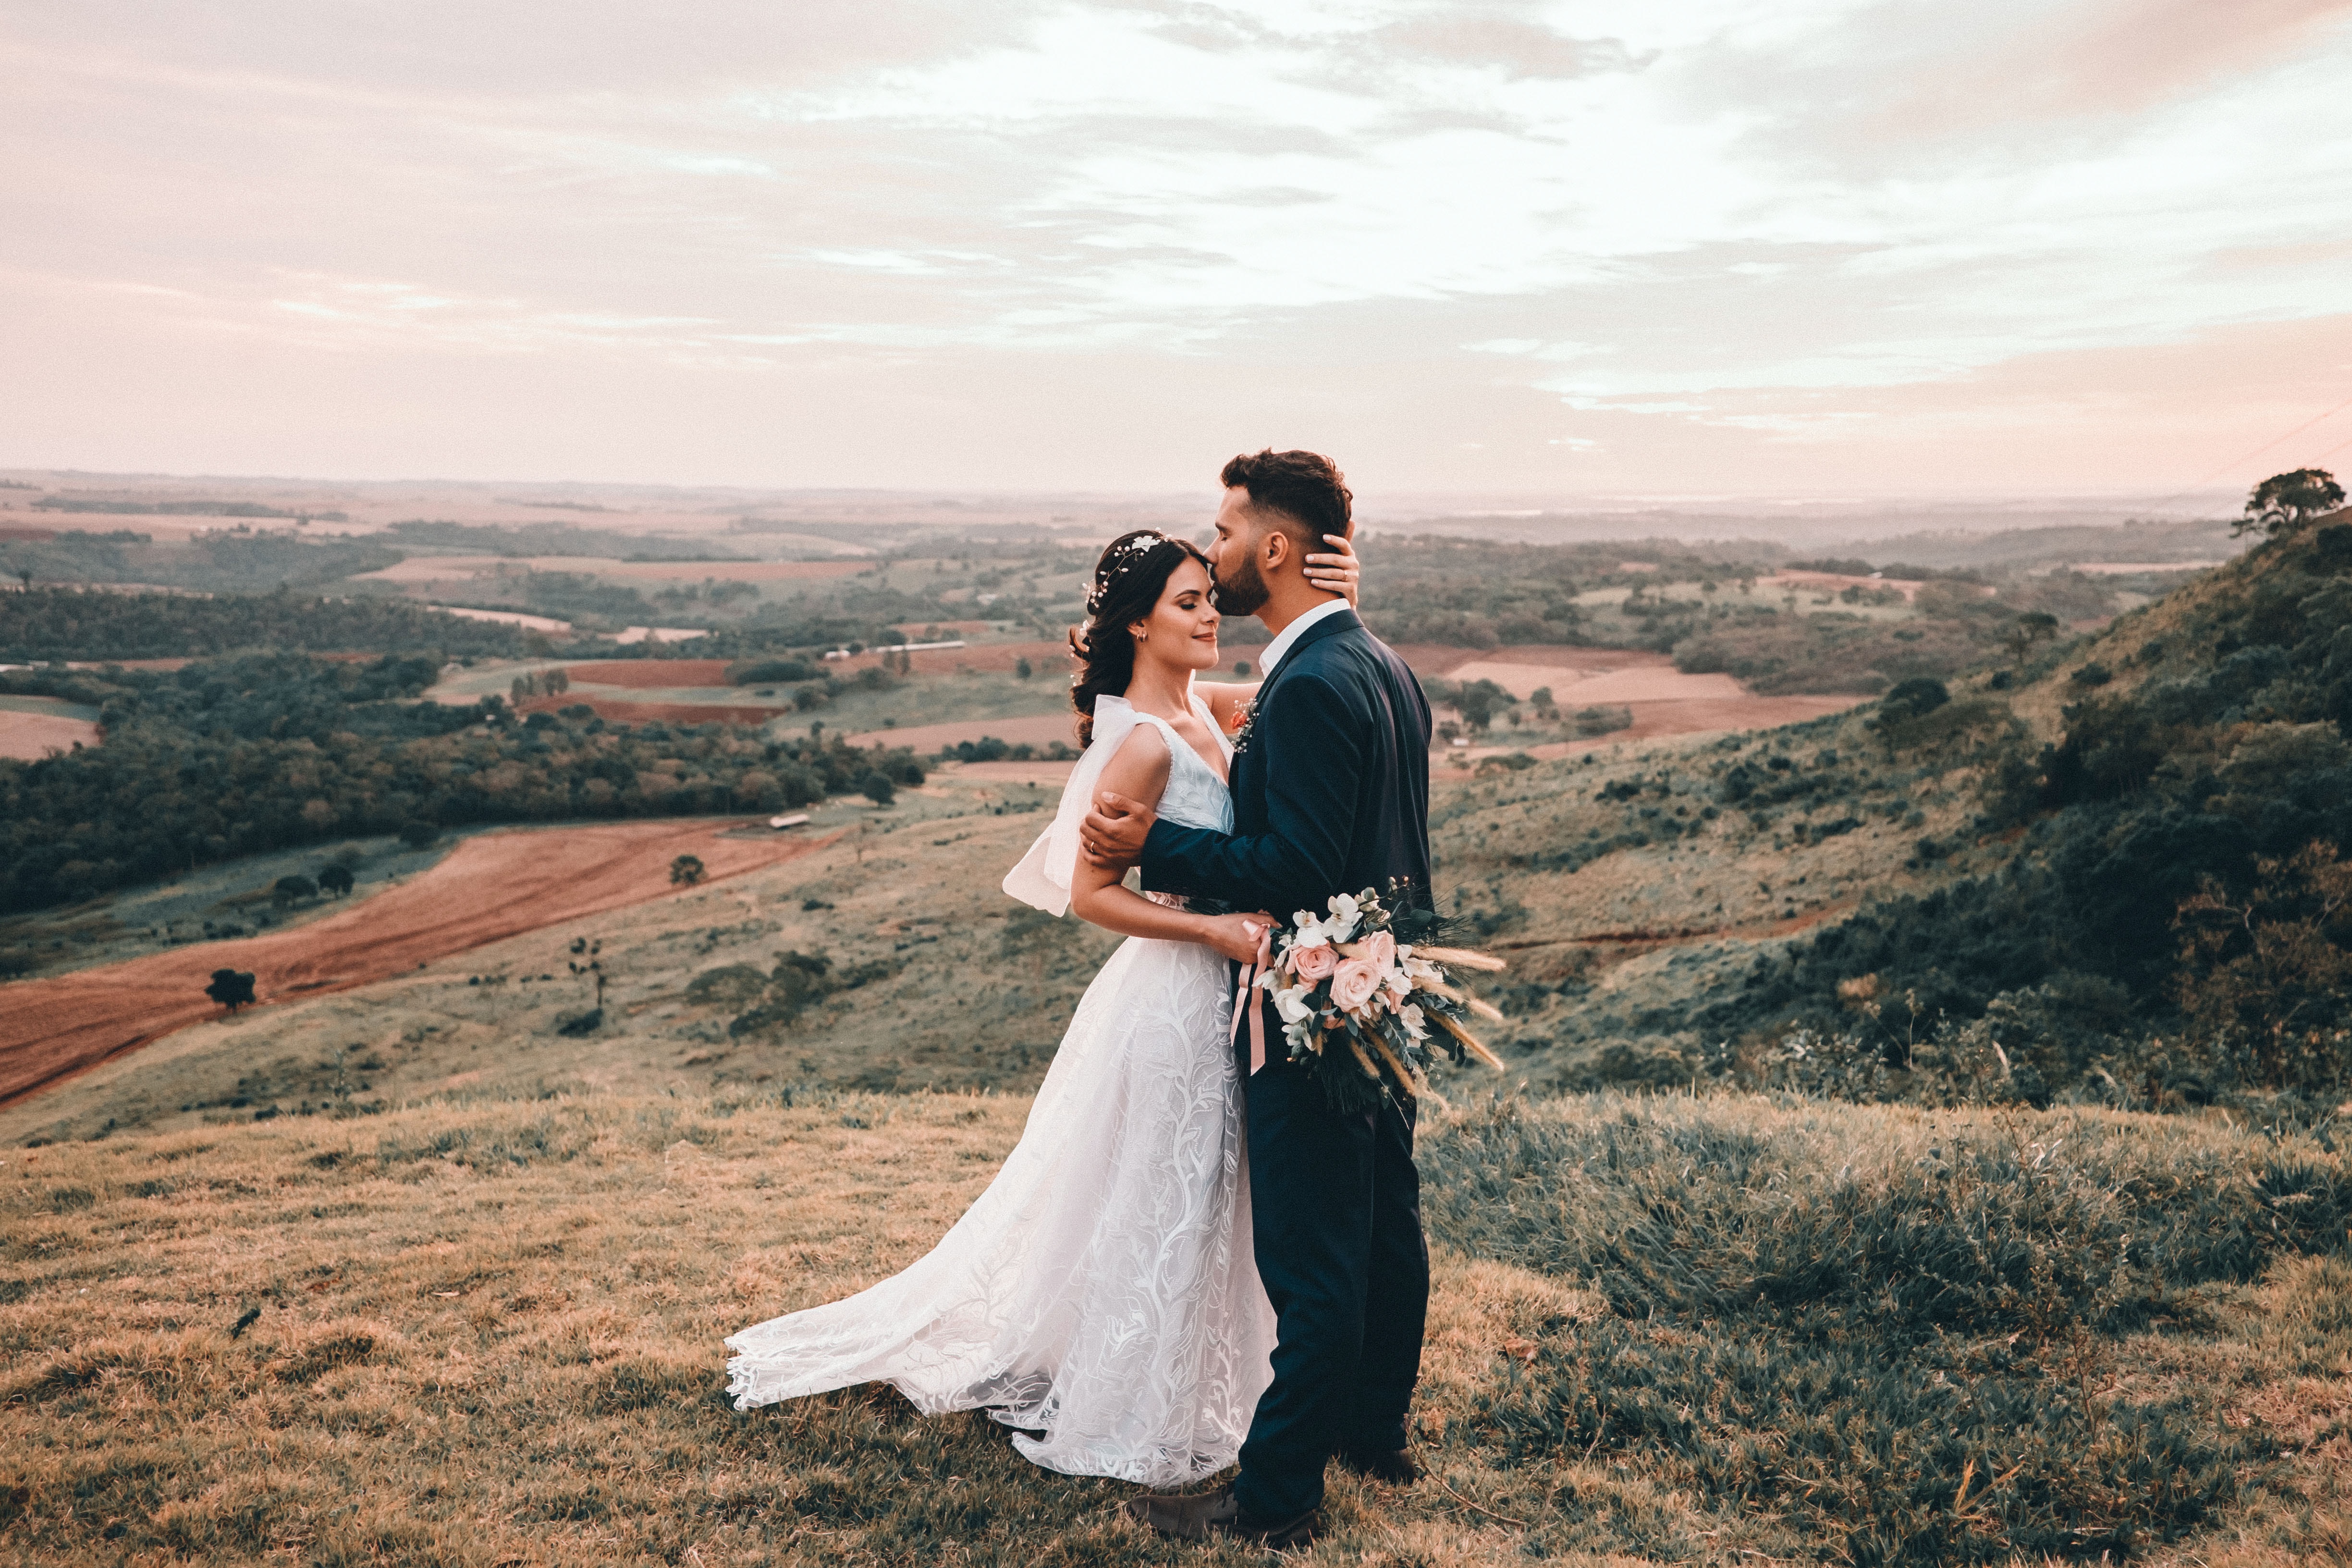
原图
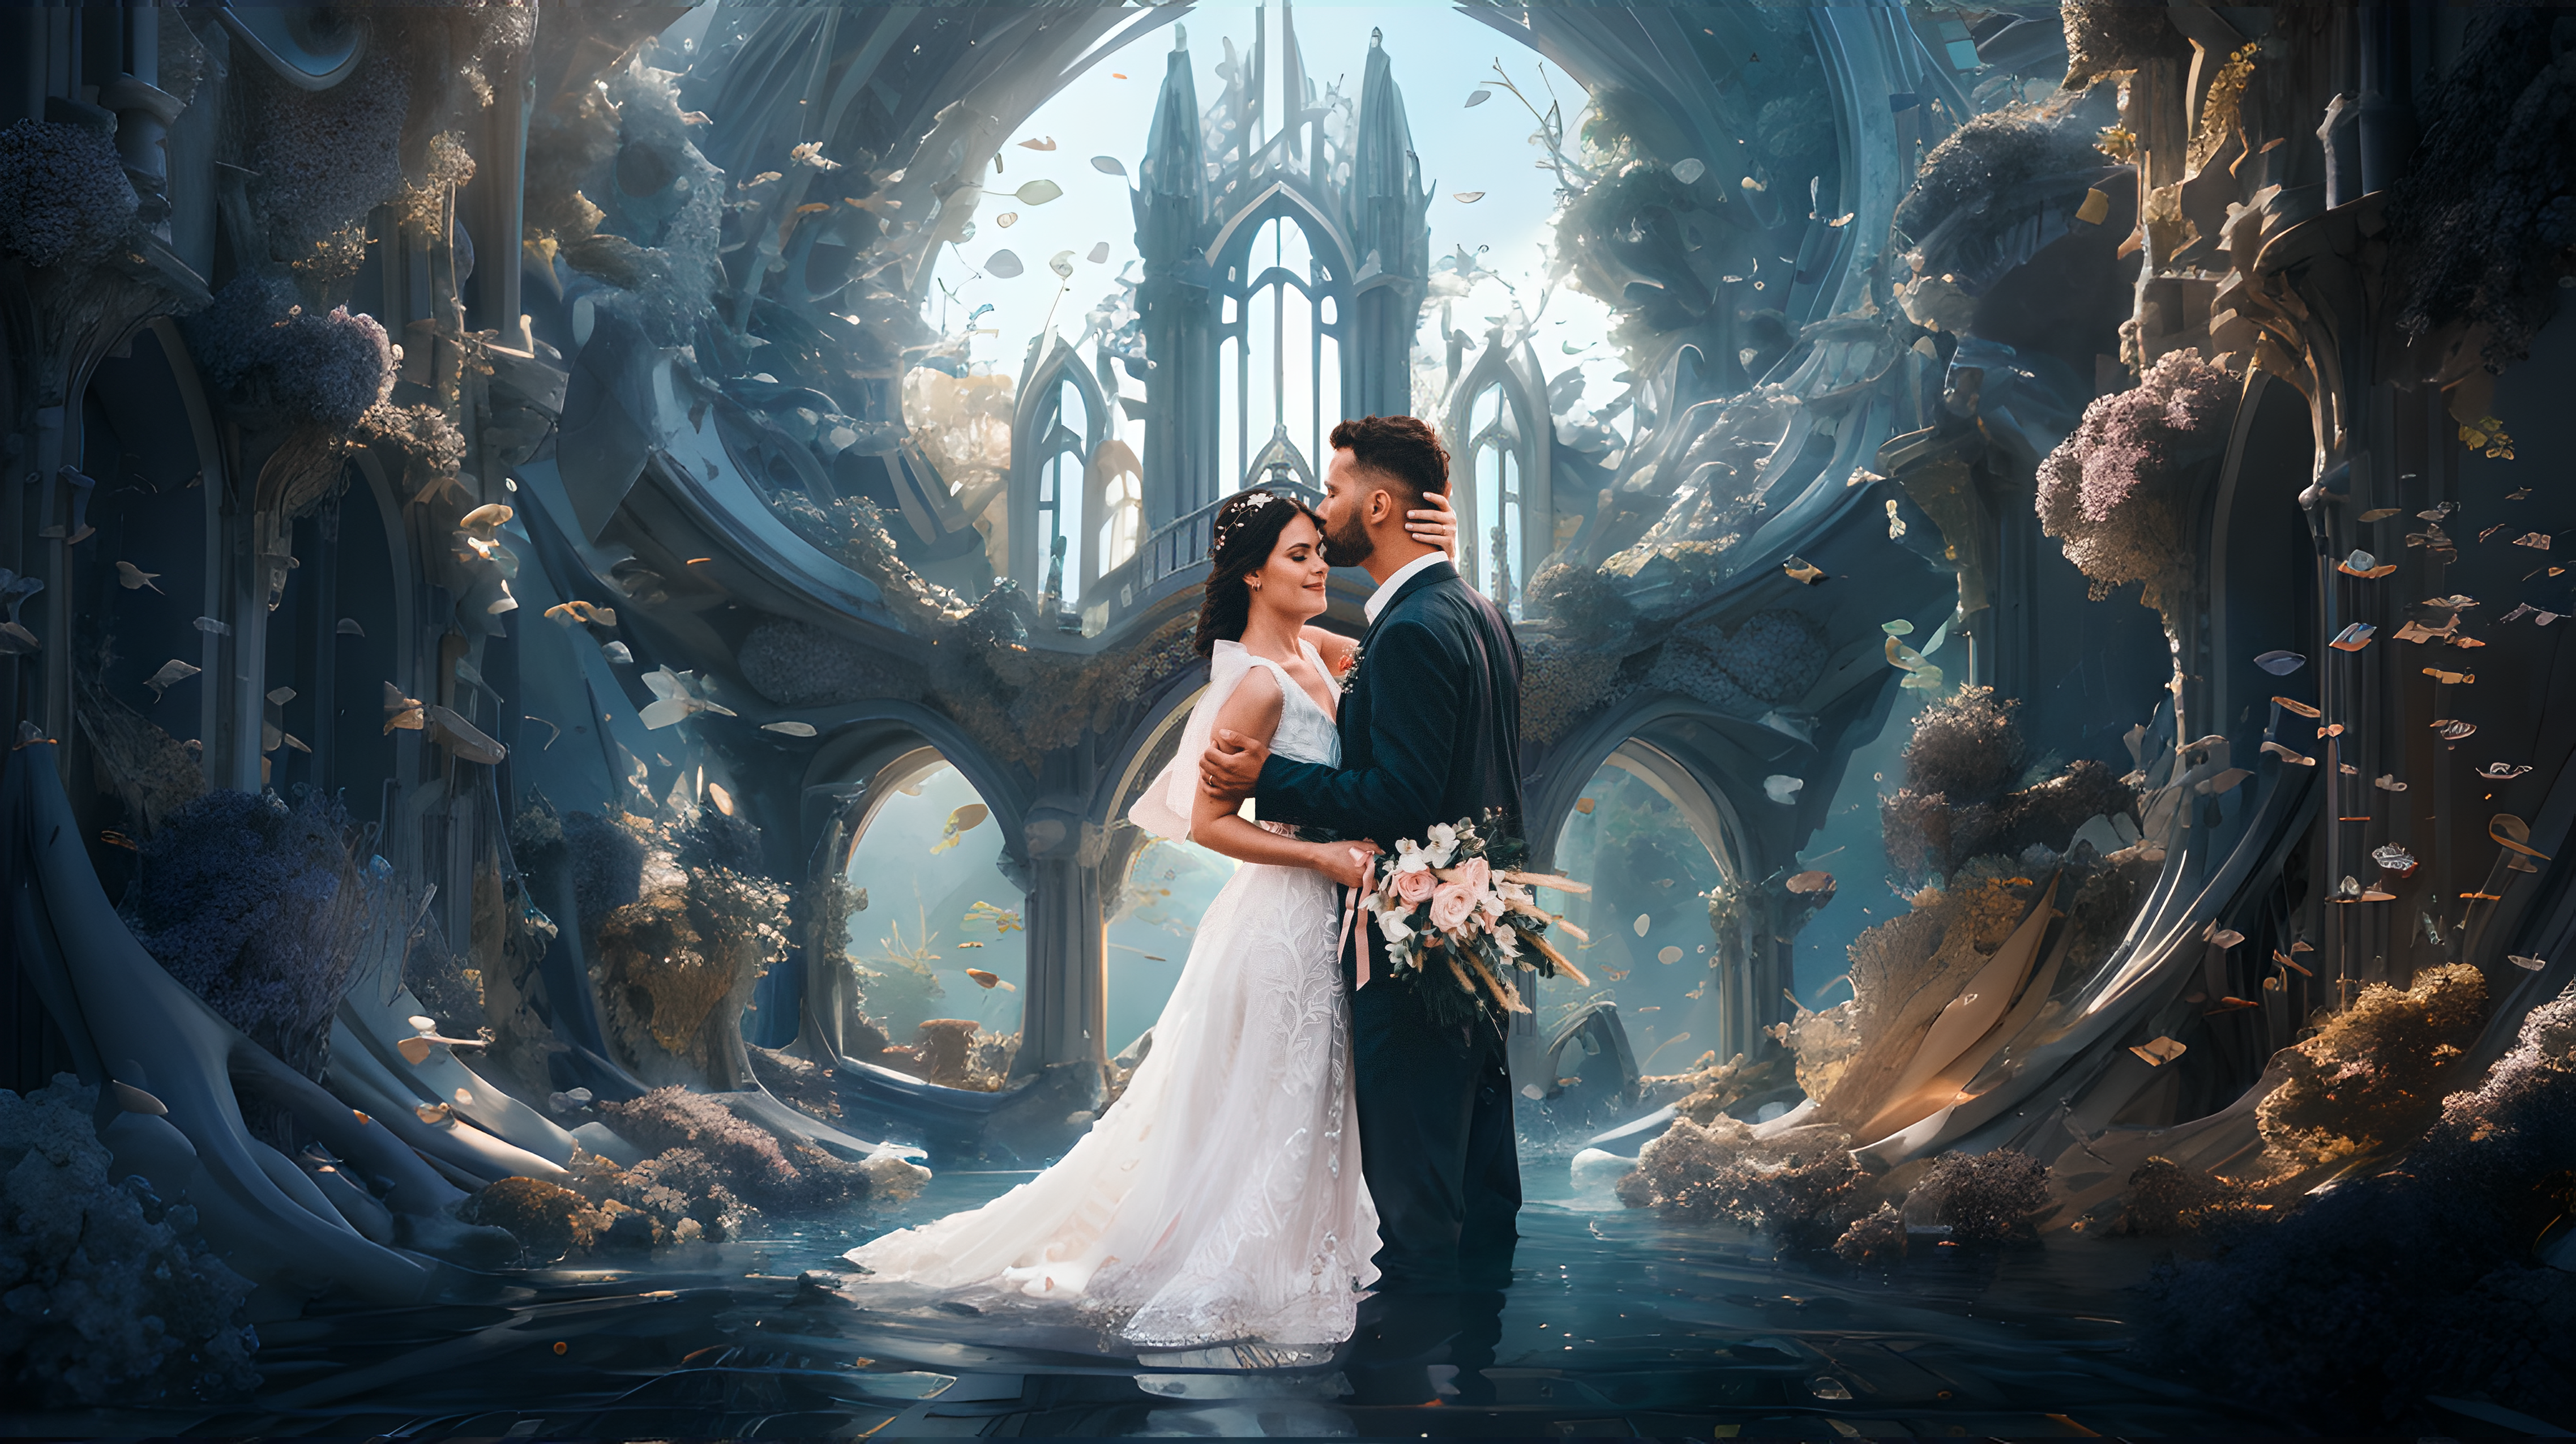
AI 修图
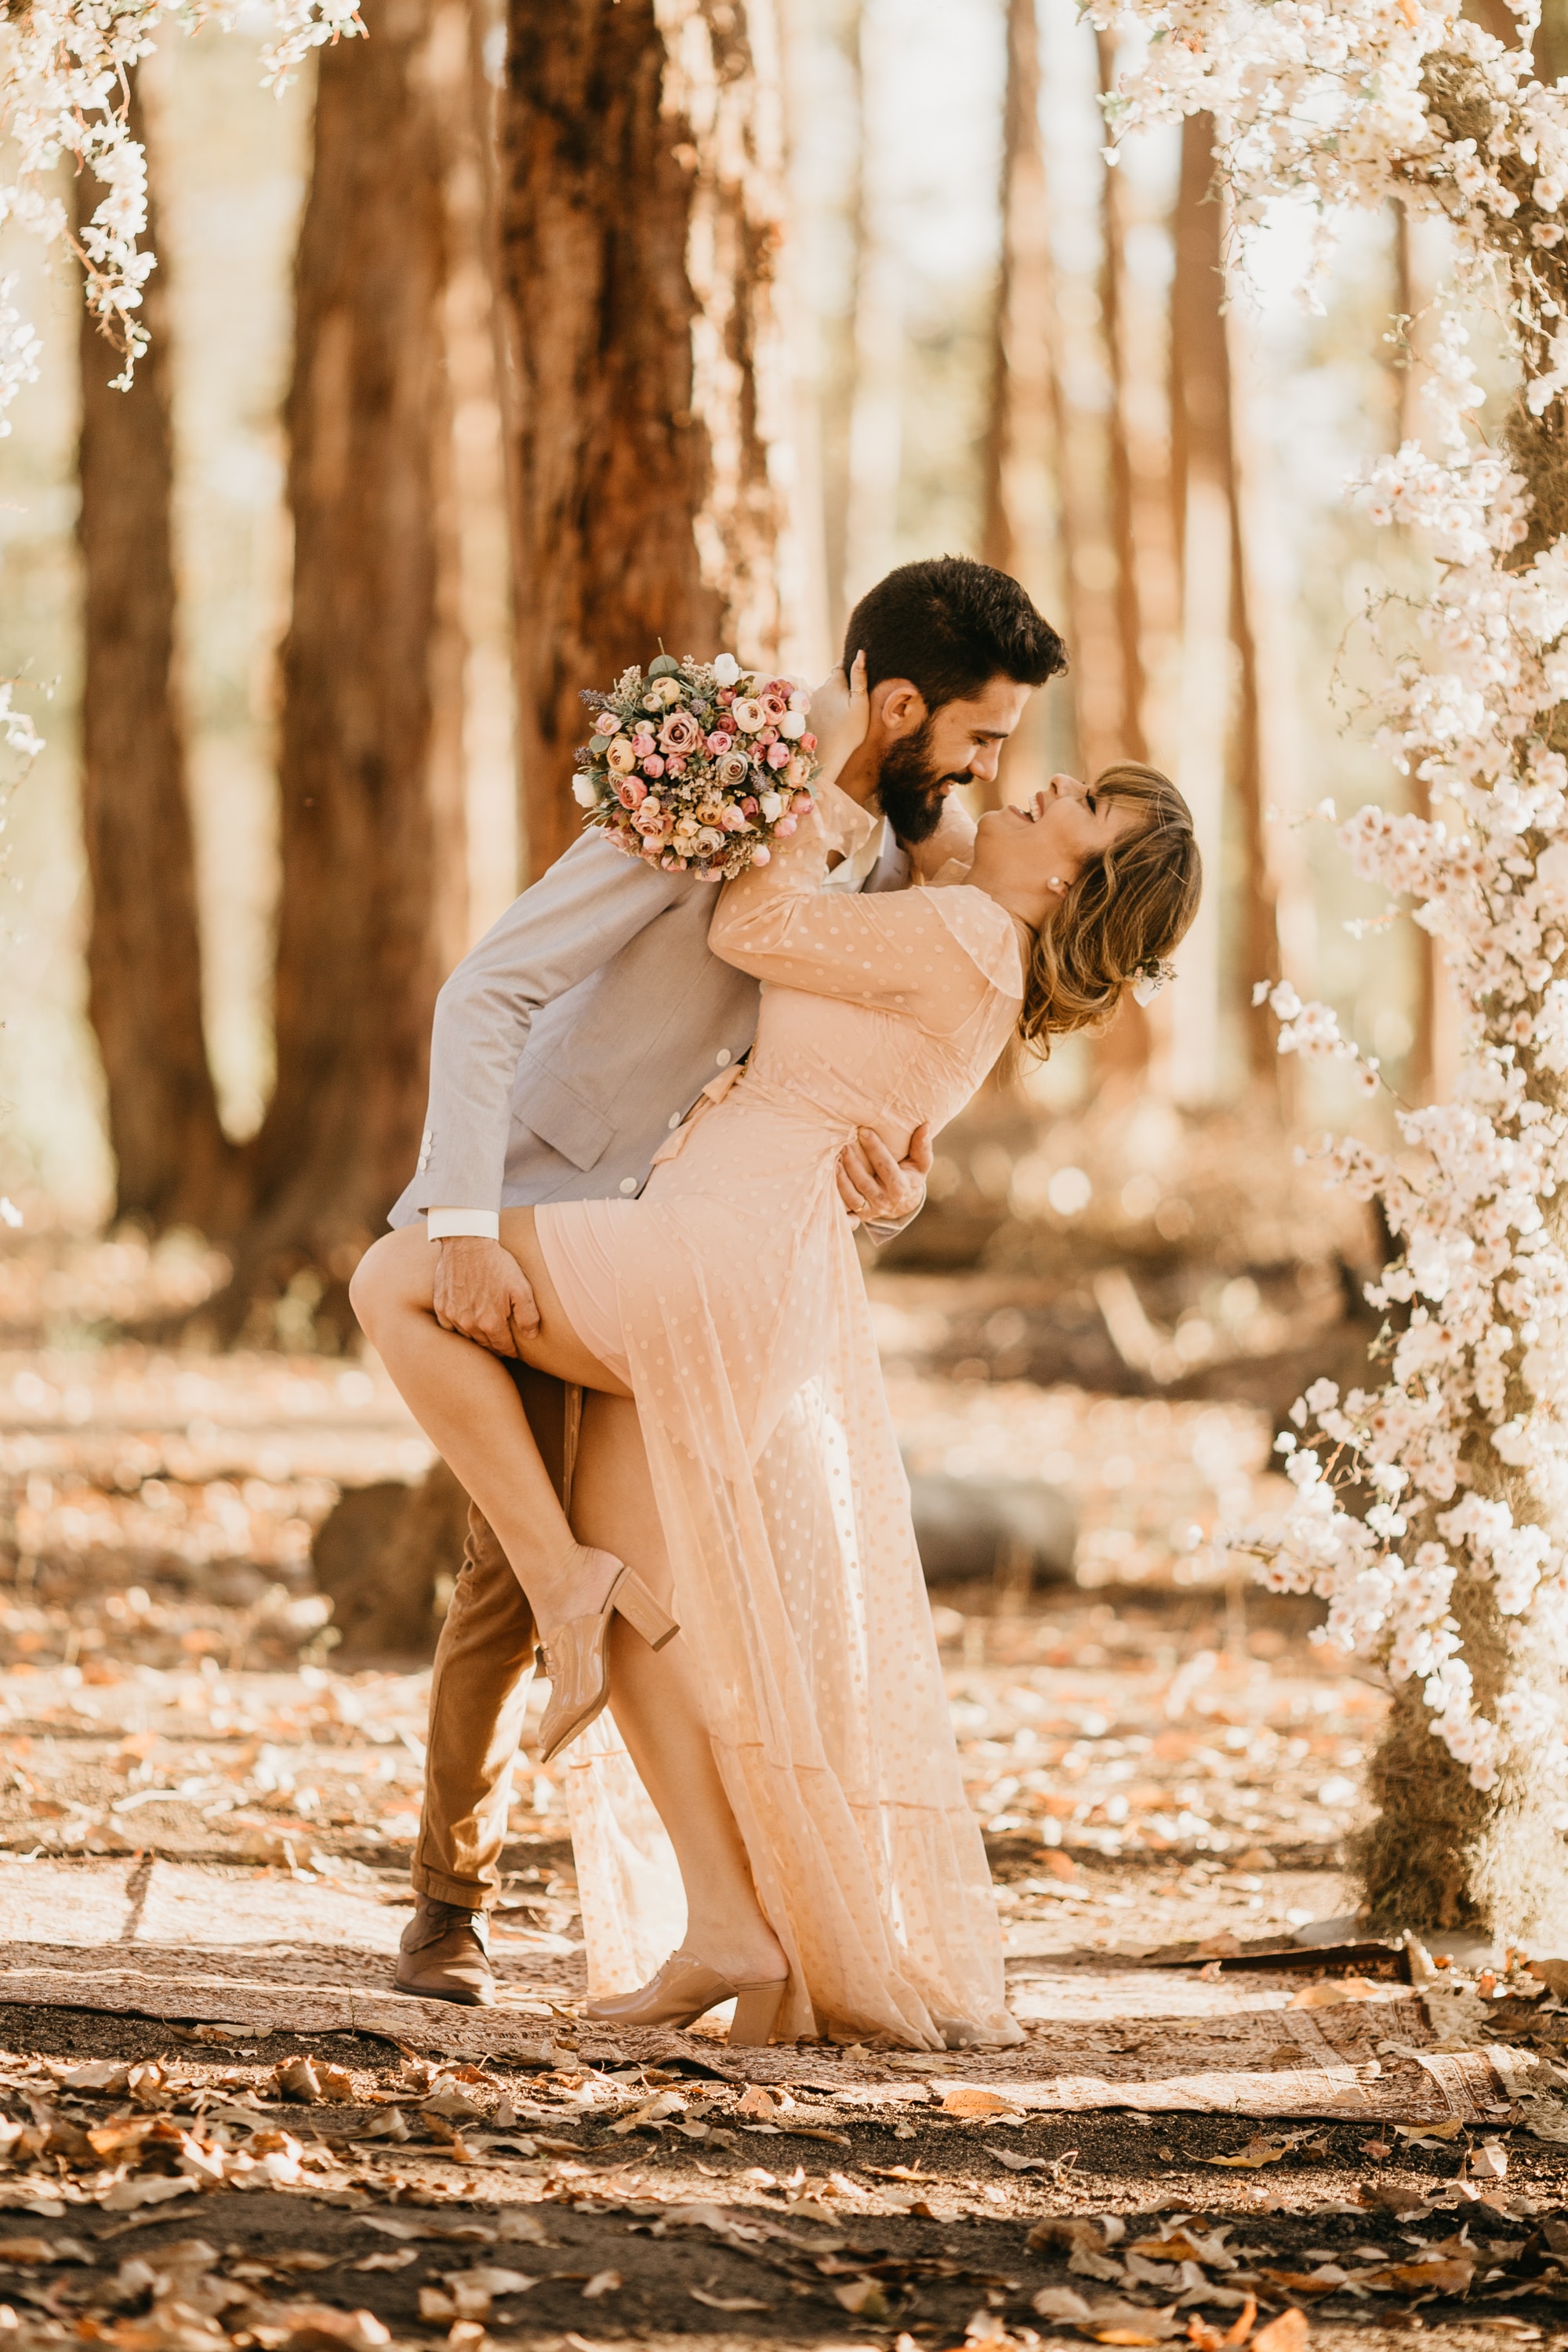
原图
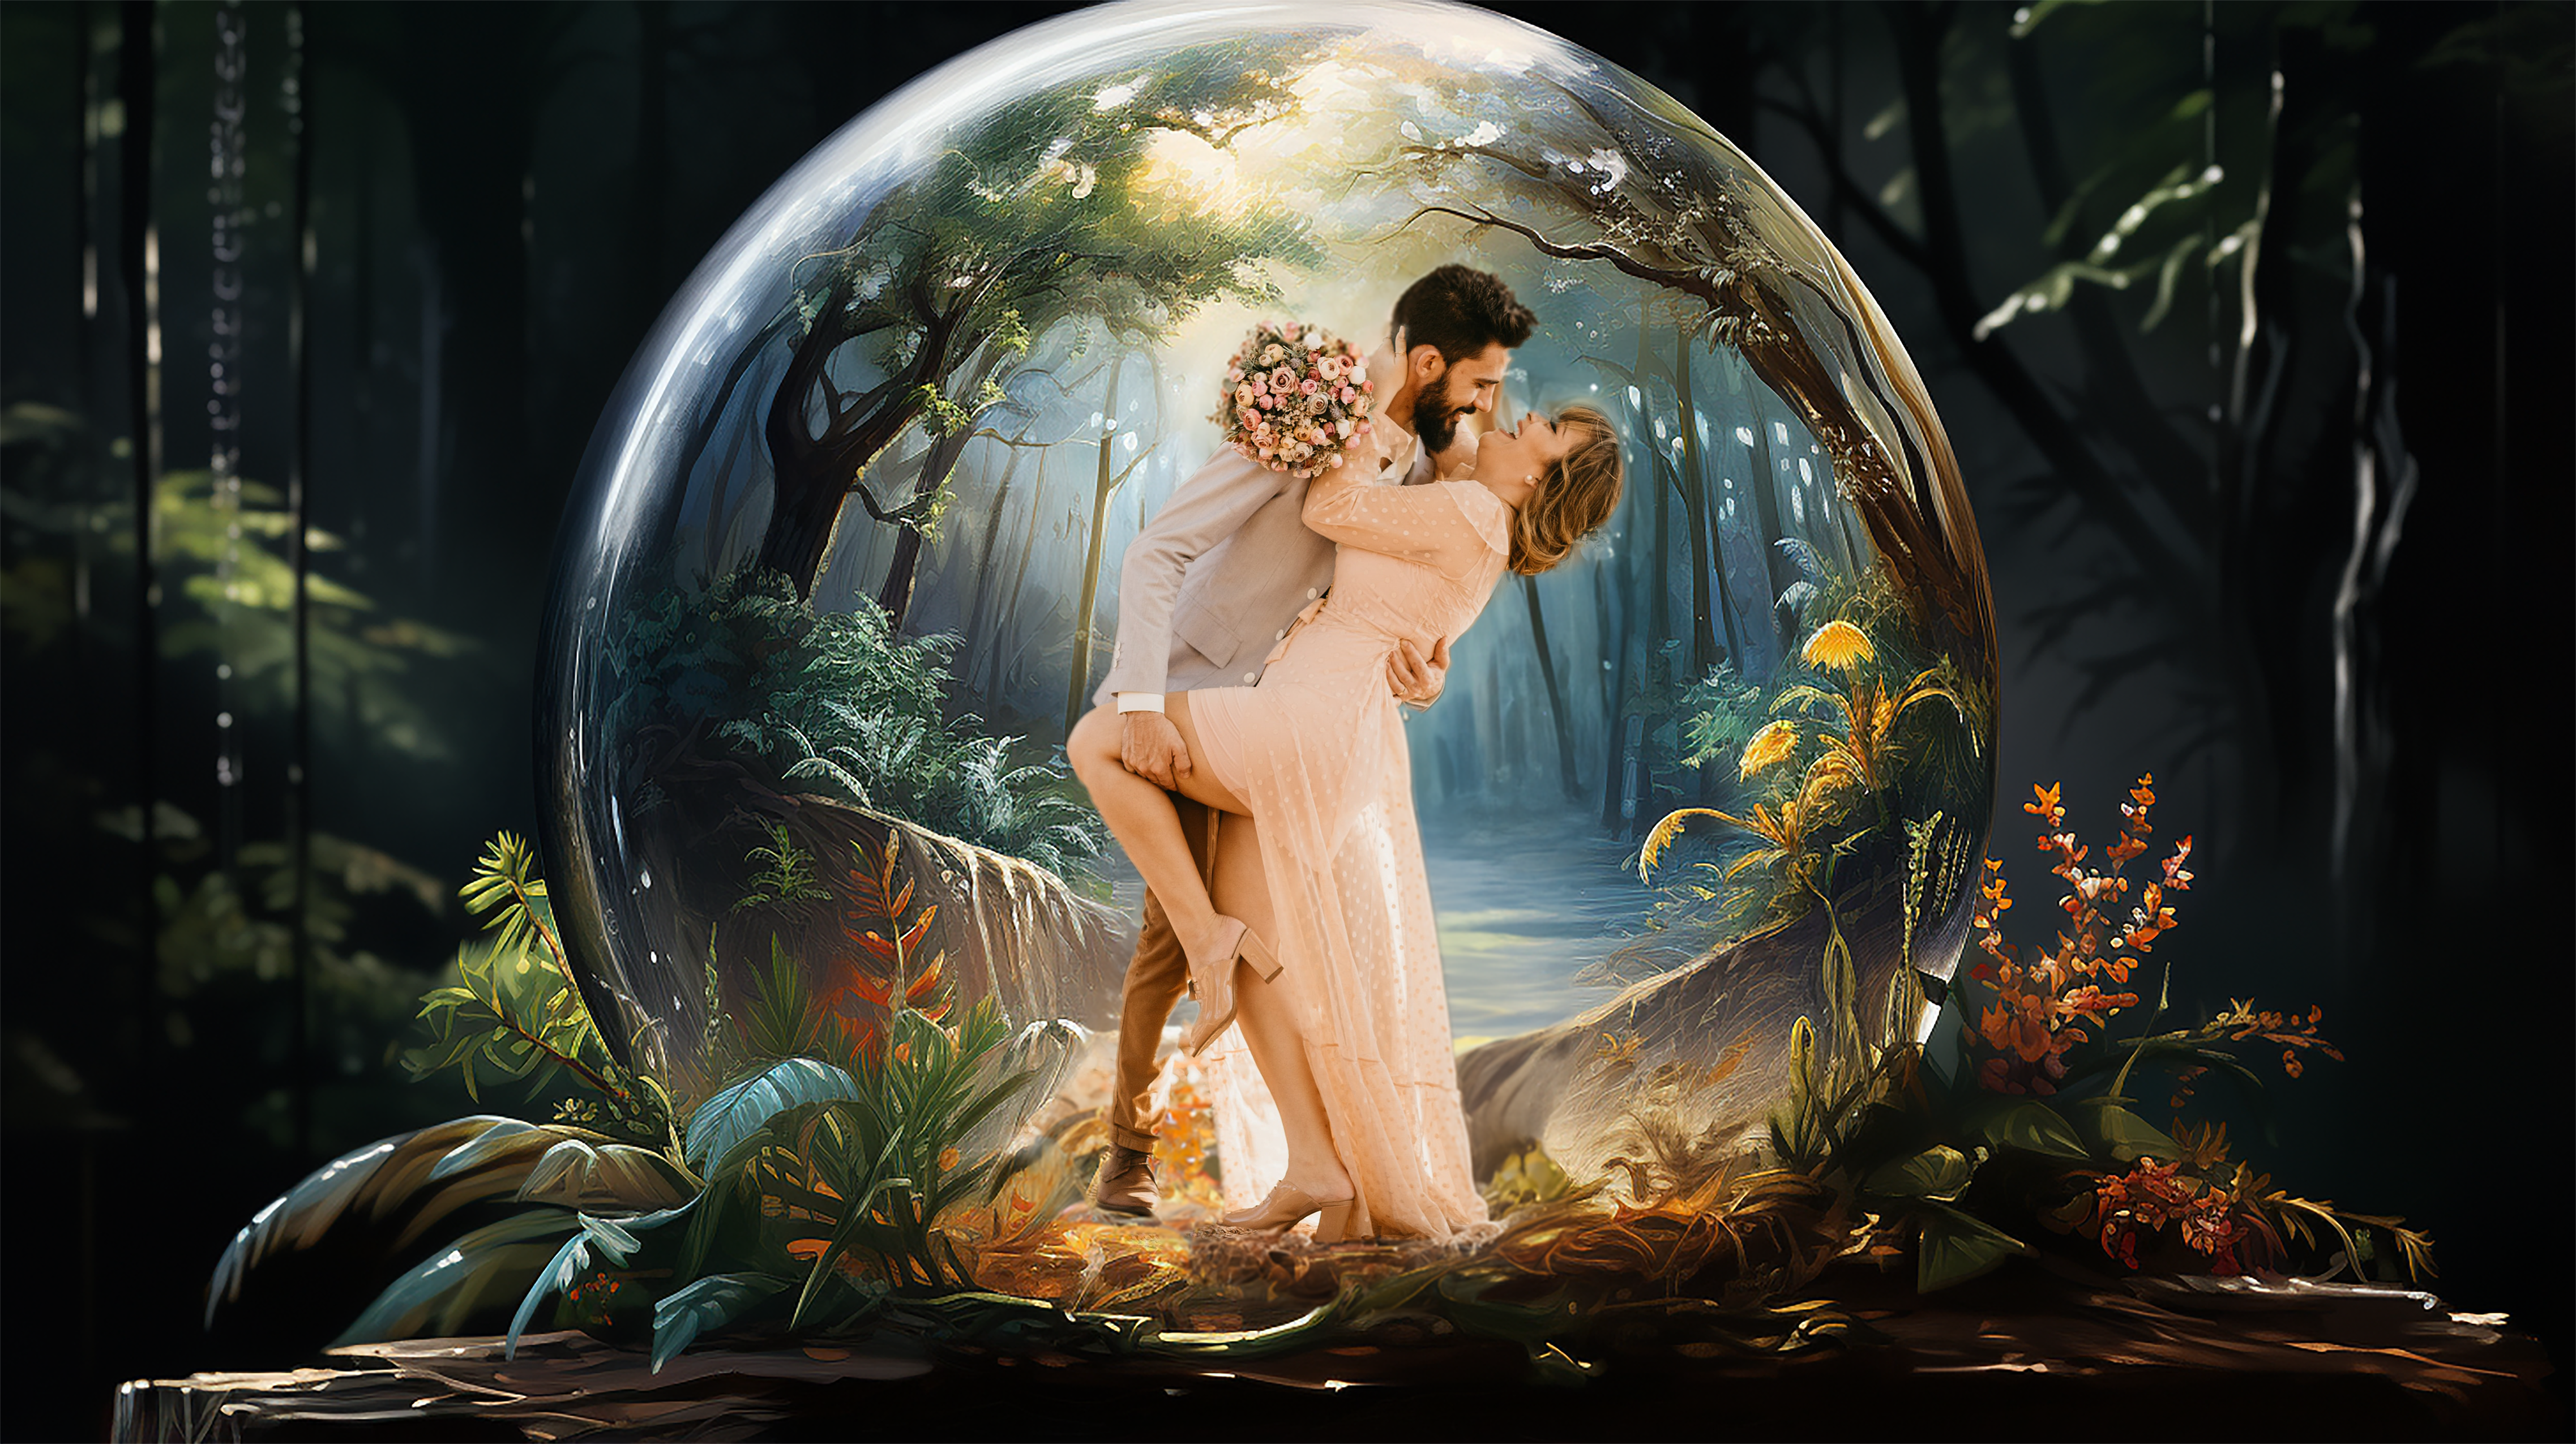
AI修图